How to Tile a Floor

Tiling a floor is about 80 percent layout and substrate and about 20 percent actually setting tile. If the floor underneath flexes, or if it isn't flat, the tile cracks and the grout crumbles no matter how carefully you spread the mortar. So the order of operations is: prove the floor is stiff enough, make it flat, snap your center lines, dry-lay a row, and only then open a bag of thinset.
That's how to tile a floor in one paragraph. The rest of this page is the detail that keeps each of those steps from going wrong, because tile is unforgiving in a specific way: every mistake is buried under something permanent within about four hours.
Get your quantities before you shop. Our free tile calculator turns your room size and tile size into a tile count, a box count, and a thinset estimate with the right waste factor already applied.
Updated August 2026
A note on numbers. This page gives you dimensions, quantities and scope, not dollar figures. Material and contractor pricing varies by region, by season and by the specifics of your job, and we do not set any of it. Work out what you need here, then get quotes that can be compared to each other.
Step 1: your substrate decides whether the tile survives
Tile does not bend. Cement grout bends even less. The floor beneath them does bend, and the whole trade exists to manage that gap.
Deflection: the number nobody checks and everybody should
Floor stiffness is described as a deflection ratio. L/360 means the floor may sag no more than its span divided by 360 under design load. Over a 12-foot span, L/360 works out to about 0.4 inches of movement at the center.
- Ceramic and porcelain tile need a floor built to at least L/360.
- Natural stone (marble, travertine, limestone, slate) needs L/720, twice as stiff, because stone is more brittle in bending than fired porcelain.
You can't fix a deflection problem with thicker mortar. If joists are undersized or spans are long, the answer is sistering joists, adding blocking, or adding a mid-span beam, and that happens before anything else.
The quick homeowner test: walk the floor in stocking feet while someone watches a full glass of water sitting in the middle of the span. If the water visibly moves or the china cabinet rattles when you walk past, you have a stiffness problem, not a tile problem.
Why plywood alone fails
Plywood is a fine structural subfloor and a terrible tile substrate. Three reasons:
- It moves with humidity. Wood expands and contracts across the grain with seasonal moisture change. Tile does not. That differential shear is what cracks grout lines first and tiles second.
- It's not dimensionally stable when wet. A bathroom leak swells plywood, and swollen plywood lifts tile.
- Thinset doesn't bond to it reliably. Modern modified thinsets bond to plywood better than old dry-set mortars did, but bond strength to wood is still the weak link in the assembly.
So the tile industry answer is to put something between the wood and the tile. There are two mainstream options.
Cement backer board vs uncoupling membrane
| Cement backer board | Uncoupling membrane | |
|---|---|---|
| What it is | 1/4 or 1/2 inch cementitious panel, screwed to the subfloor over a bed of thinset | Dimpled polyethylene or fleece-backed sheet, bonded to the subfloor with thinset |
| Thickness added | 1/4 in (floors) or 1/2 in | About 1/8 in |
| Main job | Gives a stable, water-tolerant, cement-based surface to bond to | Lets the subfloor move independently of the tile, and bridges small cracks |
| Crack isolation | None on its own | Yes, this is the whole point |
| Waterproofing | Not waterproof; needs a membrane over it in showers | Many are waterproof when seams are sealed |
| Relative material cost | The cheaper of the two per square foot | Roughly double backer board per square foot |
| Weight and mess | Heavy sheets, dusty to cut | Light rolls, cuts with a utility knife |
| Best for | Budget jobs, floors that need height buildup, wet areas with a separate membrane | Floors over plywood, floors with hairline cracks, slabs, low-clearance jobs, radiant heat |
Both work. The honest split is this: backer board is the cheaper, older, heavier standard, and it does nothing about movement. An uncoupling membrane costs more per square foot but directly solves the movement problem that cracks tile floors over wood framing, and it adds almost no height, which matters when you're trying to keep the new floor flush with the hallway.
Two rules that apply to both:
- Backer board is set in thinset, not just screwed down. Skipping the mortar bed leaves voids under the panel, and voids under a panel are hollow spots under tile. Seams get alkali-resistant mesh tape and thinset, same as any other joint.
- Neither product adds stiffness. Read that again if you skimmed the deflection section. A 1/4 inch backer board on a bouncy floor gives you a bouncy floor with a cement surface.
Flatness, which is a different problem from level
Level means horizontal. Flat means no humps or dips. Tile does not care about level. Tile cares intensely about flat.
The industry tolerance most installers work to is 1/4 inch in 10 feet for tile with any edge under 15 inches, tightening to 1/8 inch in 10 feet for large-format tile. Large tile is a straightedge. Lay a rigid 24-inch tile across a 3/16 inch dip and you get a rocking tile and a lippage edge you can feel with a bare foot.
Check with a long straightedge or a taut string across the room in several directions. Fix dips with self-leveling underlayment, which is sold by the bag and is one of the pricier materials per square foot on a tile job, and grind or sand down high spots. Do this before the membrane or backer board goes down, not after.
How to tile a floor: the full sequence
Here is the order, start to finish. Steps 1 through 4 take longer than most people expect, and they're the ones that determine the result.
- Prep and inspect. Remove old flooring, pull the toilet and baseboards, check deflection, and check flatness with a straightedge.
- Flatten. Self-level dips, grind humps, refasten any squeaky or loose subfloor with screws.
- Install the substrate. Backer board in thinset with taped seams, or uncoupling membrane bonded with thinset, per the manufacturer's trowel spec.
- Lay out and dry-fit. Center lines, square check, dry row, adjust to kill sliver cuts.
- Set the field tile. Mix thinset, comb it out, back-butter where needed, set with spacers or leveling clips, check coverage on the first few tiles.
- Cut and set the perimeter. Leave a movement gap at every wall and every vertical surface.
- Cure. 24 to 48 hours before grouting, longer in cold or humid conditions.
- Grout, clean, and cure again. Then seal if the material calls for it.
- Caulk the changes of plane. Wall-to-floor and inside corners get flexible sealant, never grout.
Step 2: layout from the center out
The single most common regret in a tile floor is a two-inch sliver cut at the most visible wall. It reads as a mistake to people who know nothing about tile, and there is no fixing it after the fact.
The cure is to start in the middle and work outward so the cuts land evenly on both sides.
Find the center. Measure each wall, mark the midpoint, and snap a chalk line between opposite midpoints. Snap the second line perpendicular to the first. Where they cross is your origin.
Check square with the 3-4-5 method. From the intersection, measure 3 feet along one line and mark it. Measure 4 feet along the other line and mark it. The straight-line distance between those two marks must be exactly 5 feet. If it's 4 15/16 or 5 1/16, your lines aren't at 90 degrees, and every row you set will drift. Adjust one line until the diagonal reads 5 feet dead on.
Scale it up in a big room. 6-8-10 or 9-12-15 uses the same ratio and gives you a more accurate reading over distance.
Dry-lay a full row in both directions. Real tile, real spacers, no mortar, running from the center line to each wall. This takes 15 minutes and it's the most valuable quarter hour of the whole project.
Look at what lands at each wall. If the end piece is less than half a tile, shift the entire layout by half a tile. Two slivers become two comfortable cuts.
Bias toward the visible edge. Decide which wall people see when they walk in. Put full tiles there and push the small cuts under the vanity, behind the door swing, or along the wall the appliances sit against.
Let one wall absorb an out-of-square room. Older houses are commonly off by an inch or more across a room. Do not chase the crooked wall with the tile. Keep the field square to your center lines and let the taper die out along the least visible wall.
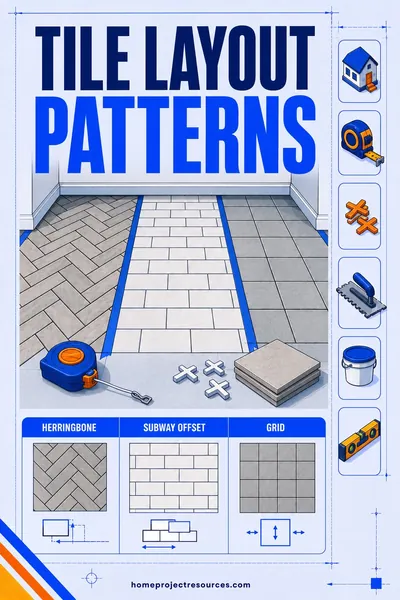
If you're picking between straight-set, diagonal, herringbone, or a Versailles module, our guide to tile layout patterns covers what each one does to waste, difficulty, and labor cost. Straight-set needs about 10 percent waste; diagonal and herringbone need 15 to 20 percent.
Measure the room with the square footage calculator first, then feed that number into the tile calculator with your pattern's waste factor to get a box count.
Step 3: thinset, trowels, and coverage
Mixing and slaking
Thinset is a powder that has to hydrate before it behaves. The sequence:
- Water into the bucket first, then powder. Powder first traps dry pockets at the bottom.
- Mix with a paddle on a drill at low speed, around 300 rpm. High speed whips in air, and air bubbles weaken the bond.
- Let it slake for 5 to 10 minutes. This is the rest period where the polymers and cement fully wet out. Check the bag; most call for it explicitly.
- Remix briefly without adding water. It will feel stiffer and stickier after slaking, and that is correct.
- Do not add water later to loosen it. Once it starts setting, it's done. Mix smaller batches instead.
Correct consistency holds a ridge. Comb a test line on the floor and the notch ridges should stand up without slumping over.
Pot life is roughly 2 to 4 hours in normal conditions and much shorter in hot, dry, or windy rooms. Mix what you can set in an hour when you're learning.
Notch size by tile size
The trowel notch controls how much mortar goes down. Too small and you get voids; too big and you get mortar squeezing up through every joint.
| Tile size | Trowel notch | Approximate coverage per 50 lb bag |
|---|---|---|
| Mosaic sheets, up to 2x2 in | 3/16 in V-notch or 1/4 x 1/4 in square | 75 to 95 sq ft |
| 4x4 to 8x8 in | 1/4 x 1/4 in square | 50 to 65 sq ft |
| 12x12 in | 1/4 x 3/8 in square | 40 to 50 sq ft |
| 12x24 in, 13x13 in | 1/2 x 1/2 in square | 25 to 35 sq ft |
| 18x18 in and larger | 1/2 x 1/2 in or 3/4 x 3/4 in U-notch | 20 to 30 sq ft |
| Backer board bedding | 1/4 x 1/4 in square | 50 to 60 sq ft |
Coverage figures are approximate and vary with how flat the substrate is. A wavy floor eats mortar.
Comb in one direction only. Straight parallel ridges, all running the same way, let air escape when you press the tile down. Swirls and arcs trap air pockets that become hollow spots.
Then flatten the ridges as you set. Press the tile in and slide it perpendicular to the ridges by about half an inch, then back. That collapses the ridges into full contact instead of leaving peaks and valleys.
Back-buttering, and why large format needs it
Back-buttering means skimming a thin, flat layer of thinset onto the back of the tile before setting it, in addition to the combed layer on the floor.
For tile up to about 12x12 it's optional. For anything with an edge of 15 inches or more it is effectively required, for two reasons. Large tiles are usually slightly crowned in the middle from firing, so the center sits higher than the edges and a combed bed alone leaves a hollow under the middle. And large tiles have deep structural ribs or a textured back that the mortar has to fill.
Skim the back, then comb the floor, then set. Yes, it doubles the mortar handling. It's also the difference between a floor that sounds solid and one that rings hollow underfoot.
Coverage: the number to actually verify
Mortar contact behind the tile is the thing that determines whether it survives. The targets are:
- About 80 percent coverage in dry interior areas.
- About 95 percent coverage in wet areas and on exteriors, with no voids at the corners, since the corners are where impact loads land and where water sits.
Verify it. Set your first tile, wait a minute, then lift it straight up and look at the back. If the mortar transferred as a nearly full film, you're right. If you see bare patches or only ridge stripes touching, the notch is too small, the mortar has skinned over, or you didn't press and slide.
Watch for skinning. Thinset develops an open time, typically 15 to 30 minutes, and much less in a hot room with a fan running. Touch the combed ridges. If your finger comes away clean instead of tacky, the surface has skinned and the bond is compromised. Scrape it up and recomb. Only spread as much as you can cover in 10 to 15 minutes.
Step 4: spacers, lippage, and leveling clips
Spacers set the grout joint width. Standard choices are 1/16 inch for rectified large-format porcelain, 1/8 inch as the general default, and 3/16 to 1/4 inch for handmade tile and natural stone where the pieces vary in size. Pull them before the mortar hardens; leaving them buried at the joint bottom leaves you nowhere to pack grout.
Lippage is a height difference between the edges of two adjacent tiles. It's what you stub a toe on and what catches a mop. Some of it comes from an unflat floor, some from tile warp, and some from uneven mortar.
Leveling clips solve most of it. A clip slides under the edge of two neighboring tiles and a wedge or cap pulls their faces flush while the mortar sets. You snap the clips off the next day. Clips are cheap individually and you'll use two to four per tile, so buy them by the bucket rather than the bag and expect them to be a small line on a typical room.
They are close to mandatory for large-format tile and genuinely useful for anything 12x24 and up. They are not a substitute for a flat floor. A clip can pull two tile edges flush with each other, but it can't stop a whole tile from tipping over a hump.
One more layout rule that prevents lippage: large-format tile should never be laid in a half offset. Because big tiles crown slightly in the center, a half offset puts the high point of one tile against the corner of the next. A one-third offset is the standard, and most manufacturers now specify 33 percent as the maximum.
Step 5: movement joints and perimeter gaps
Every tile floor needs somewhere to expand. Leave a gap at the perimeter, typically 1/4 inch, against every wall, column, door jamb, and tub. Baseboard or shoe molding hides it.
Change-of-plane joints, meaning wall-to-floor and inside corners, get flexible silicone or urethane sealant color-matched to the grout, never rigid grout. Grout in those joints cracks in the first season.
Large open floors and any floor over 24 feet in one direction need interior movement joints too, and floors with radiant heat need them more. A floor tight against four walls with no gap anywhere is a floor building compression stress with every warm afternoon, and something eventually gives, usually a row of tiles tenting up in the middle of the room.
Step 6: grout timing, type, and sealing
Wait before you grout
Give the thinset 24 to 48 hours before grouting. Longer in a cold room, longer over an impermeable substrate like an uncoupling membrane where the mortar can only dry upward through the joints, and longer with large tile that seals in moisture.
Grouting too early traps water in the mortar bed and can cause efflorescence, which is the chalky white deposit that shows up in grout lines a week later and is a genuine pain to remove.
Sanded vs unsanded
| Joint width | Grout type | Why |
|---|---|---|
| Under 1/8 in | Unsanded | Sand particles won't pack into a narrow joint, leaving voids |
| 1/8 in and wider | Sanded | Sand resists shrinkage and cracking in a wide joint |
| Any width, high performance | Single-component or epoxy | Stain resistant, no sealing needed, harder to work with |
Unsanded grout in a wide joint shrinks and cracks. Sanded grout in a very narrow joint won't consolidate. Match the grout to the joint, not to the tile.
One caution: sanded grout can scratch soft polished stone and some glass tile. Test on a spare piece, or use unsanded or an epoxy-based product on polished marble.
Grouting technique
Work in sections of about 20 to 30 square feet. Hold the rubber float at 45 degrees and press the grout diagonally across the joints so it packs full, then sweep the excess off with the float held nearly on edge, again diagonally so you don't drag grout back out.
Wait 15 to 30 minutes until the surface haze firms up, then clean with a barely damp sponge in circular passes, rinsing constantly. Too much water washes cement out of the joint and leaves it weak and blotchy. The joint should be smooth and slightly recessed from the tile face, not scooped out.
A final haze buff with a dry microfiber cloth comes a couple of hours later.
Sealing
Cement grout is porous and should be sealed after it cures, typically 48 to 72 hours, and again every one to two years in a bathroom or kitchen. A penetrating sealer is sold by the quart and one quart covers most residential floors.
Epoxy and single-component grouts do not need sealing. They cost more per bag and are less forgiving to install, but in a shower or a mudroom the tradeoff often makes sense.
Porcelain tile itself never needs sealing. It's fired to near-zero water absorption. Only the grout gets sealed.
Natural stone needs sealing before you grout, not just after. Travertine, marble, limestone, and slate are porous enough to absorb grout pigment permanently. Seal the stone, grout, clean, then seal again. Stone sealer is sold by the gallon and covers 200 to 500 square feet per coat, and stone wants resealing every one to three years.
Avoid bright white grout on floors regardless of how good the photo looks. Traffic turns it gray within a year. A mid-tone gray, greige, or sand color looks identical in year ten.
Worked example: a 10x12 kitchen floor in 12x24 porcelain
Real numbers for a 120 square foot kitchen over a plywood subfloor, straight-set with a one-third offset.
Step 1: area and tile.
- 10 ft x 12 ft = 120 sq ft
- Straight-set waste factor: 10 percent, so 120 x 1.10 = 132 sq ft to buy
- Tile sold in boxes covering 15.5 sq ft: 132 / 15.5 = 8.5, so 9 boxes = 139.5 sq ft
Step 2: substrate. Uncoupling membrane over the plywood, because the floor is wood-framed and the tile is large format.
- Membrane: 120 sq ft, buy a 175 sq ft roll
- Bonding thinset for the membrane, 1/4 x 1/4 in notch at about 55 sq ft per bag: 120 / 55 = 2.2, so 3 bags
Step 3: setting mortar. 12x24 tile calls for a 1/2 x 1/2 in notch plus back-buttering, so figure the low end of the coverage range at 25 sq ft per bag.
- 132 / 25 = 5.3, so 6 bags of 50 lb large-format mortar
Step 4: grout. 1/8 inch joints with 12x24 tile is a low joint volume. One 25 lb bag of sanded grout typically covers 100 to 120 sq ft at that joint size and tile size, so 2 bags with margin.
Step 5: everything else. Leveling clips at 3 per tile, roughly 60 tiles in the field, so about 180 clips plus wedges. Spacers, sponges, a bucket, a notched trowel, a grout float, sealer, and silicone for the perimeter.
The shopping list, and what moves each line:
| Item | Quantity | What sets the number |
|---|---|---|
| Porcelain tile | 139.5 sq ft | Tile itself, and it is by far the largest line. Selection ranges from builder-grade porcelain to imported stone, several times apart |
| Uncoupling membrane | 175 sq ft roll | Sold in fixed roll sizes, so a small room often pays for coverage it does not use. The second biggest line here |
| Thinset, membrane bond | 3 bags | Bag count is area divided by coverage. Modified versus unmodified is a small difference in price and a large one in compatibility |
| Large-format mortar | 6 bags | Tile size drives this. Bigger tile needs a bigger notch, and a bigger notch burns bags faster |
| Sanded grout | 2 bags | Joint width and tile size. Epoxy grout costs several times what cement grout does |
| Leveling clips and wedges | ~200 | Cheap per piece, and you use two to four per tile |
| Sealer, silicone, spacers, sponges | The small stuff. Buy spares, they cost less than a return trip |
Price your own list at one supplier before you commit to a tile, because the tile line dominates everything else. Doubling your tile budget roughly doubles the material bill; halving your grout budget changes almost nothing.
Tools, if you don't own them: a wet tile saw rents by the day, and a mixing paddle, trowels, and float are a one time purchase you keep.
Labor, if you hire it out: straight-set installation is quoted per square foot of floor, and substrate work is billed on top of that as a separate line. Four things move the labor rate: tile size (large format is slower and needs a flatter floor), pattern (herringbone and diagonal layouts cut more tile and waste more of it), how many cuts the room shape forces, and whether the existing floor has to come out first. Most tile installers also carry a minimum job charge, so a small bathroom rarely comes in below it no matter what the square footage math says. Ask each bidder for their per square foot labor rate, their minimum, and their substrate scope in writing, then compare those three lines rather than the totals.
Time, doing it yourself: one day for demo and flattening, one day for the membrane, one day for setting, a day of curing, and a half day for grout. Call it a long weekend plus an evening.
Common mistakes that ruin a tile floor
- Tiling over a bouncy floor. No mortar, membrane, or backer board fixes deflection. Fix the framing first.
- Skipping the flatness check. Large-format tile shows every dip. Straightedge the room before you commit.
- Screwing backer board down without a thinset bed. That leaves voids under the panel.
- Swirling the trowel instead of combing straight lines. Trapped air becomes hollow tiles.
- Spreading too much mortar at once. It skins over, and skinned mortar doesn't bond.
- Never lifting a tile to check coverage. Do it on the first tile and again every 20 or so.
- Starting at a wall. That's how you end with a sliver cut on the most visible edge.
- Grouting the next morning on a big-tile floor over membrane. Give it the full 48 hours.
- Grouting the wall-to-floor corner. It will crack. Use flexible sealant.
- No perimeter expansion gap. The floor has nowhere to grow, and eventually a row tents.
Frequently asked questions
Can I tile directly over plywood?
You shouldn't. Plywood expands and contracts with humidity and tile does not, and that difference cracks grout lines and eventually tiles. Install cement backer board bedded in thinset or an uncoupling membrane over the plywood first. Also confirm the floor meets L/360 deflection for porcelain or L/720 for natural stone before anything goes down.
What size notched trowel do I need for 12x24 tile?
A 1/2 x 1/2 inch square-notch trowel, plus back-buttering the tile. That combination gets you the mortar volume needed to fill the slight crown on a large tile and reach the 80 percent coverage target. Comb in straight parallel lines, then press and slide the tile perpendicular to the ridges to collapse them into full contact.
How much thinset coverage do I actually need behind the tile?
About 80 percent contact in dry interior areas and about 95 percent in wet areas and outdoors, with the corners fully supported in both cases. Check it by setting a tile, lifting it straight back up, and looking at the mortar transfer on the back. Bare patches or stripe marks mean a bigger notch, fresher mortar, or a firmer press.
How long should thinset cure before grouting?
Wait 24 to 48 hours. Go to the long end of that range in a cold or humid room, over an uncoupling membrane where moisture can only escape through the joints, or with large tile that seals the mortar in. Grouting too early can trap water and produce efflorescence, a chalky white bloom in the joints that's stubborn to remove.
Should I use sanded or unsanded grout?
Sanded grout for joints 1/8 inch and wider, unsanded for anything narrower. Sand resists shrinkage in a wide joint, but it won't pack into a narrow one. Sanded grout can scratch polished marble and some glass tile, so test on a spare piece or switch to an unsanded or epoxy product on soft polished surfaces.
Do I need to seal a tile floor?
Seal the grout on any cement-grouted floor after it cures, usually at 48 to 72 hours, then every one to two years. Porcelain tile itself never needs sealing. Natural stone does, and it needs a coat before grouting as well as after, or the grout pigment stains it permanently. Epoxy and single-component grouts skip sealing entirely.
How do I keep from ending with a thin sliver of tile at the wall?
Snap center lines, dry-lay one full row toward each wall, and look at what lands at the ends. If the end piece is less than half a tile wide, shift the whole layout by half a tile and both ends become comfortable cuts. Bias the layout so full tiles land at the wall you see first and the small cuts hide under cabinets or behind a door.
Are tile leveling clips worth it?
For anything 12x24 or larger, yes. Clips pull the edges of neighboring tiles flush while the mortar sets, which eliminates most lippage and is far more reliable than eyeballing it. They are cheap per piece and you'll use two to four per tile. They don't replace a flat substrate, though; they can level two edges to each other but not a whole tile riding over a hump.
Related: Tile layout patterns covers waste factors, labor multipliers, and grout color for every common pattern. The square footage calculator gives you the room area, and the tile calculator turns it into a box count with waste applied.