Shower Installation Cost: Prefab vs Tiled Scope Guide

Shower installation cost splits sharply by the type of shower you build, not by the size of your bathroom. A prefabricated acrylic or fiberglass insert goes in over a day or two and arrives waterproof from the factory. A fully custom tiled shower with a site built mud pan takes one to two weeks and has to be made waterproof by hand, layer by layer, on your job site. That difference in method, not in materials, is what separates the two ends of the market.
The second split is the plumbing. A shower that reuses the existing drain and valve location is a finish job. A shower where either one moves is a plumbing job with a permit, an inspection, and a finish job hanging off the back of it.
Pricing the tile? Get your exact square footage and box count with our free Tile Calculator before you call a single contractor. Tile quantity is the number homeowners misjudge most, and a shower has more square feet of wall than people expect.
Updated August 2026
A note on numbers. This page gives you the shower types, the quote line items, the quantity math and the bid questions, not dollar figures. Tile, glass, fixtures and plumbing labor are priced locally and they move constantly, and we do not set any of them. Work out your scope here, then take an identical written scope to three local pros.
Shower installation cost by shower type
This table is the whole article in one screen. Find your row first, then read the sections that apply to it.
| Shower type | Install time | Strengths | Trade offs |
|---|---|---|---|
| One piece fiberglass or acrylic unit | 1 to 2 days | Fastest, factory waterproof, no grout to maintain, no seams | Will not fit through most doorways in a remodel, limited sizes, reads as builder grade, gelcoat can dull |
| Multi piece acrylic kit, 3 to 5 panels | 2 to 3 days | Fits through existing doors, strong remodel option, still low maintenance | Visible seams, quality varies a lot by brand, panel flex if the walls behind are uneven |
| Tiled shower over a preformed pan | 5 to 8 days | Custom look, proven modern waterproofing, pan is factory sloped so drainage is reliable | Grout maintenance, pan sizes are fixed unless you pay for a custom cut |
| Fully custom tiled with a site built mud pan | 7 to 12 days | Any size or shape, any drain location, benches and niches built in | The most labor of any route, and the most dependent on installer skill |
| Walk in or curbless, zero threshold | 8 to 15 days | Aging in place friendly, wheelchair accessible, looks bigger, no curb to step over | Requires recessing or reframing the floor so the drain sits lower, and that structural work is the reason it is the priciest route |
| Tub to shower conversion | 3 to 10 days | Uses the existing alcove and plumbing wall, big usability gain for older homeowners | Removing the only tub in the house can hurt resale with buyers who have young kids |
Two things drive every row. First, whether the waterproofing comes from a factory or gets built by hand. Second, whether the drain and valve stay exactly where they are. Change either one and you have changed the project, not just the quote.
Why a curbless shower is the priciest version
A standard shower pan sits on top of the subfloor. A curbless pan has to sit inside it. That means either cutting and sistering the floor joists to drop the framing an inch and a half to three inches, or building the rest of the bathroom floor up to match the shower. On a second floor with accessible joists that is carpentry with an engineer's review. On a slab on grade house you are cutting and repouring concrete before the shower itself starts.
A licensed contractor should never notch or cut joists without checking the span. If a bid for a curbless walk in shower does not mention the floor structure at all, that bid is incomplete no matter what number is on it.
Waterproofing: where the work and the risk both live
This is the most important section in this article, and it is the part most homeowners never see.
Tile and grout are not waterproof. Cement grout is porous. Water passes through it constantly during every shower, soaks into the mortar bed, and has to be stopped by something behind the tile. That something is the waterproofing system, and it is the only thing between your shower and the framing.
There are three systems in common use:
Sheet membrane. A thin bonded polyethylene sheet, of which Schluter Kerdi is the best known version, goes over cement backer board, with all seams and corners overlapped and sealed in thinset. Reliable, fast for a skilled installer, and easy to inspect before tile goes on.
Liquid applied membrane. A paint on or roll on rubberized coating, such as RedGard, Hydro Ban or Mapelastic, built up in two or three coats over backer board with fabric reinforcement at the corners and seams. Inexpensive in materials and very unforgiving about coat thickness. Too thin in one corner is a leak.
Foam board systems. Waterproof extruded polystyrene panels with a factory coating, such as Wedi, Schluter Kerdi Board or GoBoard, that replace the backer board entirely, with sealed joints and screw washer fasteners. The priciest of the three in materials, the fastest to install, and the hardest to get wrong.
All three work. What matters is that one of them is actually there, installed as a continuous system with the pan, and that the transitions at the curb, the corners, the niche and the drain flange are handled.
What a failed shower pan actually costs you
A leak behind a shower does not announce itself. Water tracks down the studs and into the sill plate, and by the time you see a stain on the ceiling below or feel a soft spot at the base of the tile, the framing has usually been wet for months.
The repair is not a patch. You demo the entire shower back to studs, dry it out, replace rotted framing and subfloor, remediate mold, repair the ceiling and possibly the finishes in the room below, and then rebuild the shower from scratch. That is a second full shower project plus a restoration project, several weeks of a bathroom you cannot use, and it lands on top of whatever you paid the first time.
That is why this is the one line item you never shop on price. A small difference in the waterproofing package between two bids is not a small decision. Ask both bidders which system they use by brand name, and ask whether they will send you a photo of the finished waterproofing before the tile goes on. A good tile setter is proud of that photo. Anyone who gets vague about it has told you something.
For a full bathroom picture of where a shower sits inside a larger project, see our bathroom remodel cost breakdown by scope tier. If you are changing a shower you already have rather than building a new one, shower remodel cost covers the four routes.
Cost to install a shower: the line items on a real quote
Here is what a real quote is made of, and what makes each line bigger or smaller. Hand this list to every bidder so all three proposals cover the same items.
| Line item | Keeps it lean | Pushes it up |
|---|---|---|
| Demolition and disposal | Fiberglass unit, ground floor, short carry to the container | Cast iron tub, mortar bed tile, upstairs bath, long carry, dump fees |
| Plumbing rough in | New valve set in the existing wall, valve stays put | Wall opened and reclosed, new supply runs, old galvanized pipe found |
| Drain work | Drain stays exactly where it is | Relocation over joists, and much more on a slab where concrete is cut and repoured |
| Shower pan or base | Stock acrylic base on a flat, level floor | Site built mud pan, linear drain, custom size, curbless recess |
| Waterproofing membrane | Sheet or liquid system on a simple alcove | Foam board, plus curb, bench, niche and multiple corner details |
| Cement backer board | Standard board over flat framing | Skipped entirely with foam board, or preceded by floating out of plumb walls |
| Tile and setting materials | Large simple field tile in a straight stack | Small format, mosaic, herringbone, diagonal, natural stone, accent bands |
| Glass door or enclosure | Sliding bypass or a stock semi frameless door | Custom frameless, heavy hardware, notched panels, oversize openings |
| Fixtures, valve trim, shower head | One head, one function, standard trim | Body sprays, rain heads, hand shower on a slide bar, thermostatic valves |
| Niche | One prefab foam niche | Multiple framed niches with tiled sills and accent backs |
| Bench | Corner seat | Floating bench, full width bench, stone slab top |
| Ventilation fan | Existing fan reused and adequate | New fan, new ducting to the exterior, new switching, an electrician on site |
| Permit and inspection | No plumbing change, so often none needed | Any plumbing move, plus the schedule gap while you wait on the inspector |
If a bid comes in far under the others, something in this list is missing from its scope. Find the missing item before you assume you found a bargain.
The cost drivers that move your number most
Moving the drain
Everything else on the list is a line item. This one is a category. Relocating a shower drain means opening the floor. Over an accessible joist bay that is carpentry and plumbing. On a slab on grade house it means cutting concrete, rerouting the drain line at the correct slope, patching and repouring, and it is by far the largest swing available in a shower project.
Design your shower around the drain you already have if you possibly can. A drain that sits two feet from where you would ideally put it is worth living with.
Custom glass
Frameless glass is routinely one of the two or three largest single line items in a tiled shower, and homeowners rarely see it coming. Half inch tempered glass, custom measured after the tile is set, with heavy hinges and hardware, is the priciest way to close a shower. A semi frameless door in a standard alcove is well below it, and a sliding bypass unit is cheaper still.
There is a second catch: frameless glass is templated after tile, so it is ordered late and typically takes two to four weeks to fabricate. That is often the reason a finished shower sits unusable for a month.
Frameless is genuinely beautiful in a big open shower. In a standard 60 inch alcove, a semi frameless door looks nearly identical and is one of the largest savings available anywhere in the project.
Tile choice and pattern
Material selection is the obvious half. Basic ceramic subway is the cheapest common option, porcelain sits above it, and natural stone, handmade tile and mosaics climb from there.
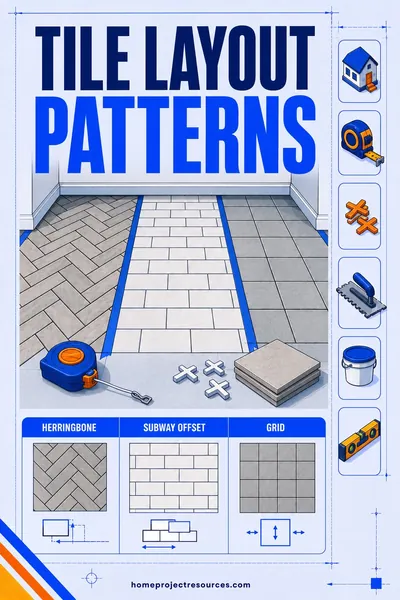
Labor is the half people miss. Setting 12x24 porcelain in a straight stack is fast. Herringbone, small hex mosaic, penny round, or anything laid on a diagonal adds substantially to the tile labor because of cut count and layout time, often by a quarter to a half again. Our guide to tile layout patterns covers which patterns cost more to install and why.
Large format tile has its own trap. Big tiles need a flat wall. If the framing is out, the setter has to float the walls first, and that is an added step that never appears in a bid written from photos.
Benches, niches, and curbs
Every custom feature is a new waterproofing detail, which is where labor hides. A framed bench has to be sloped, waterproofed and tiled on five surfaces. A niche needs a waterproof pan at its sill and sealed corners. None of these are expensive in materials. All of them are hours.
Whether your walls are square
Older homes settle. If the alcove is out of square by more than a quarter inch across its width, a one piece acrylic unit may not seat properly and a tile layout will show a tapering grout line at the ceiling. Shimming, furring or floating the walls to correct this is real labor and is almost never in a bid you got from photos.
Tub to shower conversion scope
Converting a tub alcove into a shower is the most common shower project in American homes, and it is the cheapest route to a walk in because the plumbing wall, the drain and the three walls are already there.
What it involves: remove the tub and surround, cut the tub drain and reset it as a shower drain, usually a small change in position and sometimes none, replace the valve, install a pan or build one, waterproof, board, tile or set the acrylic panels, add a door or glass panel, and trim it out.
The three versions, cheapest first:
- An acrylic or fiberglass kit conversion in the existing footprint.
- A tiled conversion over a preformed sloped pan.
- A tiled conversion with a custom pan, a bench and frameless glass.
Each step up that list adds days, adds a trade, and adds waterproofing detail work.
When it makes sense: you have another tub elsewhere in the house, the tub is used as storage rather than for bathing, someone in the home struggles to step over a 15 inch tub wall, or the tub is a cheap flexing acrylic unit that was never pleasant anyway.
The resale caution: removing the only bathtub in a house is a real problem for buyers with small children, and agents in family neighborhoods will tell you so directly. If your home has exactly one tub, keep a tub somewhere. Convert the primary bath if you have a hall bath with a tub, not the other way around.
Shower replacement versus a brand new shower install
These two get quoted very differently, and knowing which one you are asking for keeps the estimate honest.
Replacing an existing shower in the same footprint is the cheaper job by a clear margin. The drain, the valve location, the vent and the framing all stay. You are paying for demolition, disposal and rebuild, and the range within that job is set almost entirely by prefab versus tiled.
A new shower install where none existed, in a basement bath or a new addition, means running supply lines, running and venting a new drain, framing, electrical and inspection. That is a bigger job than any replacement of the same finish level, and in a basement with a slab you add concrete cutting on top of it. Ask for the plumbing rough in to be quoted as its own section so you can see what the new location is actually costing you.
DIY reality: where the line is
Being direct about this, because getting it wrong is expensive.
A prefab insert swap is realistic for a confident DIYer. Pull the old unit, set the base level in a mortar bed, dry fit the panels, connect the drain, install the valve or have a plumber do that one part, and trim it out. The waterproofing came from the factory. The failure modes are cosmetic or easily fixed. A capable homeowner with a weekend and a helper can do this.
A custom tiled shower is not a beginner project. Not because tile is hard, though it is harder than it looks, but because the waterproofing has zero tolerance for a learning curve. A missed corner in a liquid membrane, an unsealed drain flange, or a pan with the wrong slope will not show up for a year, and then it shows up as rotted framing. There is no way to test your work before you cover it.
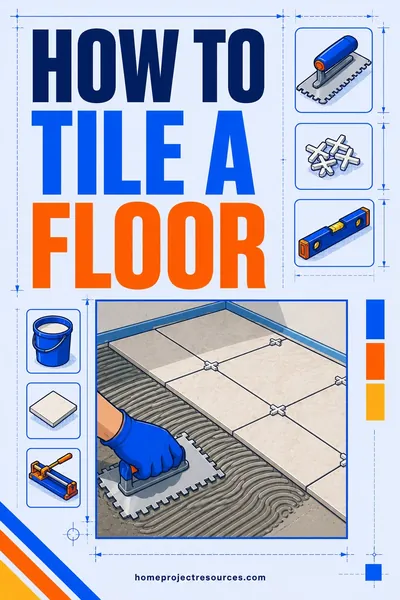
If you want to build a tiled shower yourself, that is a real and rewarding project, but the prep is reading manufacturer installation documents cover to cover, buying one complete system from one manufacturer rather than mixing brands, and following it exactly. Do not learn waterproofing from a twelve minute video. The full sequence is in how to tile a shower.
The middle path a lot of people take: hire out the pan and the waterproofing, then do the tile yourself. Some tile setters will take that arrangement. Many will not, because they do not want their name on a job they did not finish.
Worked example: a 5x8 bathroom, tub to shower conversion
Here is the quantity math for the most common version of this project, which is the part of an estimate you can verify yourself.
The bathroom: a standard 5x8 hall bath, 40 square feet, with a 60 by 32 inch tub alcove on the short wall. Toilet and vanity stay. Drain stays. You are converting to a tiled walk in shower with a low curb, tile to 84 inches, one niche, and a semi frameless glass panel and door.
Step 1: figure the tile area. Three walls: one 60 inch back wall and two 32 inch end walls, all 84 inches tall.
(60 + 32 + 32) x 84 = 124 x 84 = 10,416 square inches 10,416 / 144 = 72.3 square feet of wall
Shower floor: 60 x 32 = 1,920 / 144 = 13.3 square feet
Total tile area = 85.6 square feet. Add 10 percent for waste and cuts and order 95 square feet. Raise that allowance to 20 percent for a diagonal or herringbone layout. Run your own numbers with the Tile Calculator, and if you are measuring the rest of the room too, our square footage calculator handles the whole floor.
Step 2: put the quantities into the scope. Every bidder should be quoting the same 95 square feet, the same 84 inch height, the same one niche and the same door type. When one proposal assumes 70 square feet and another assumes 100, you have found a real difference in what is being built.
Step 3: get the prefab alternative quoted on the same bathroom. Same demolition, same plumbing, a three piece acrylic kit instead of tile, and a sliding or pivot door. Ask one contractor to quote both. That single comparison, on your bathroom, in your market, tells you more than any published range could.
The takeaway: the tiled version costs meaningfully more and takes roughly three times as long. What you buy for that is appearance, resale appeal in a mid to high end home, and a surface that can be repaired in pieces instead of replaced whole. What you give up is grout maintenance and a longer disruption. In a rental, a starter home or a secondary bath, the acrylic kit is the better financial decision and nobody should feel bad about it.
How to read a shower quote
Four checks that catch most bad bids.
Check the waterproofing by name. The bid should say which system, by brand. A line reading waterproof shower pan is not a specification.
Check whether the glass is included or allowanced. Many bids carry a glass allowance, and you discover at templating that the door you want sits well above it. Ask what the allowance is and exactly what it buys.
Check the tile quantity. Compare the square footage on the proposal to the number you calculated. They should match within the waste allowance.
Check who pulls the permit and who calls the inspection. If a bid on a job that moves plumbing has no permit line, you are being quoted an unpermitted job, and that surfaces later when you sell.
Get three bids on the identical scope, and when one is far cheaper, find the missing scope rather than assuming you found a bargain.
Frequently asked questions
How much does it cost to install a shower in an existing bathroom?
The cost to install a shower in an existing bathroom is set by two things: prefab versus tiled, and whether the drain and valve stay put. A prefab unit in the existing footprint is the cheapest version by a wide margin. A tiled shower in the same footprint is well above it, and moving the drain adds a category of work on top of either one, more on a slab than over joists. Get all three priced on your bathroom rather than working from an average.
How long does a shower installation take?
A prefab insert is one to two days. A tiled shower over a preformed pan is five to eight working days, spread across more calendar days because thinset and grout need cure time. A fully custom tiled shower with a mud pan runs seven to twelve working days, and custom frameless glass adds two to four weeks of fabrication after the tile is finished.
Is a walk in shower more expensive than a regular shower?
A true curbless build is the priciest shower type, because the floor structure has to be recessed so the pan sits below the surrounding floor. A walk in with a low curb, which is what most people are actually picturing, costs about the same as any other tiled shower of the same finish level. Ask your contractor to quote both so you can see what the zero threshold is worth to you.
Do I need a permit to replace a shower?
In most US jurisdictions, yes, if plumbing is altered or a wall is opened. A like for like fixture swap sometimes does not require one. The inspection is genuinely useful, since an inspector looks at the waterproofing and the valve before anything gets covered, which is the one stage you cannot check later.
Does removing my bathtub hurt my home's value?
It hurts if it is the only tub in the house. Buyers with young children filter listings for at least one bathtub, and agents will tell you the same thing. If you have two or more bathrooms with a tub in one of them, converting the other to a shower is usually neutral or a small positive.
What is the cheapest way to replace a shower?
A multi piece acrylic kit in the existing footprint, with the drain and valve untouched. Keeping the plumbing exactly where it is saves more than any material choice you can make. Reglazing an existing fiberglass surround is cheaper still, but it is a cosmetic fix with a five to ten year life and it fails at the drain flange first.
How is a tiled shower priced per square foot?
Tile is quoted as material per square foot plus setting labor per square foot, and the labor half moves more than the material half because pattern and tile size change the cut count. That per square foot figure covers the tiled surface only. The pan, the waterproofing, the glass, the plumbing and the demolition are separate, which is why a per square foot number alone never adds up to a shower.
Can I tile over my existing shower walls?
No. Tiling over old tile, over a fiberglass surround, or over drywall in a wet area skips the waterproofing layer entirely and traps whatever moisture is already back there. A shower has to be taken to the studs so a continuous waterproofing system can be installed. Anyone offering to tile over your existing shower to save money is offering you a future demolition.