How to Tile a Shower

Waterproofing is the job. Tile and grout are not waterproof, and they were never meant to be. Water passes through grout joints and through the thinset behind the tile as a matter of normal operation, so what sits behind the tile is the only thing deciding whether the wall survives.
Say that plainly enough and one common mistake disappears: cement board alone is not a waterproof layer. It is a stable, rot proof backer that water passes straight through. Cement board without a membrane over it is the single most common reason a shower built by a careful DIYer fails within five years.
Working out how much tile, thinset, and grout you need? Our tile calculator turns wall dimensions into square footage, tile counts, and waste allowance.
Updated September 2026
A note on numbers. This page gives you quantities, coverage rates, slopes, cure times and the line items that belong on a tile bid, not dollar figures. Tile, membrane and setting labor are priced by your supplier, your region and the format you pick, and we do not set any of it. Work out your quantities here, then price the list at a tile shop and get three quotes on one scope.
How to tile a shower, step by step
- Frame and blocking checked, studs at 16 inches on center, blocking behind the niche and any grab bar.
- Install the backer, cement board, foam board, or the substrate your system calls for.
- Set the pan, with a pre-slope under a traditional mortar bed or a pre-sloped foam tray.
- Waterproof everything, walls, curb, niche, and corners, per the manufacturer's instructions.
- Flood test the pan for 24 hours before a single tile goes on.
- Dry lay and mark the layout, balancing cuts at both ends of every wall.
- Snap layout lines and screw a temporary ledger board at the first full course.
- Set wall tile from the ledger up, back buttering anything over 8 inches.
- Tile the niche last on each wall, sloping the sill toward the shower.
- Remove the ledger and cut the bottom course to fit the pan.
- Grout after the thinset has cured, typically 24 hours.
- Silicone every change of plane and let it cure before using the shower.
Plan on a full weekend for the waterproofing and a second weekend for the tile. Rushing the flood test to save a day is how people end up doing the whole thing twice.
Why waterproofing comes first, and what fails when it does not
Picture what actually happens when someone showers. Water hits the tile, most of it runs down the face, and some of it soaks into the grout joints. Cement grout is porous. Sealer slows that down for a while and then wears off.
Behind the grout, the thinset layer is also porous and also holds water. So within a few minutes of every shower there is liquid water sitting on the back face of the tile assembly. That is normal and it is fine, as long as there is something behind it that water cannot get past, and as long as that something drains what it collects down to the pan.
Without a membrane, that water reaches the backer, passes through it, and hits the framing. Wet framing rots. Wet insulation stops insulating and grows mold. Water tracks along the bottom plate and shows up as a stain on the ceiling below or a soft spot in the hallway floor, often 10 or 15 feet away from the shower, which is why the source takes so long to find.
The tell that a shower is failing is rarely dramatic. Grout that keeps cracking in the corners, a loose tile or two low on the wall, a musty smell, a caulk line that will not stay put. By the time tile is falling off, the framing behind it has usually been wet for years.
Substrate systems compared
There are three mainstream ways to build a waterproof shower wall. All three work when installed correctly. They differ in cost, difficulty, and how much a small mistake costs you.
| System | Relative materials cost | Difficulty | Reliability notes |
|---|---|---|---|
| Cement board plus rolled liquid membrane | Cheapest of the three | Moderate. Heavy boards, messy cutting, and the membrane needs correct film thickness | Very reliable when the mil thickness and corner treatment are right. The most common failure is applying it too thin or missing an inside corner |
| Foam board system, bonded panels | The priciest, roughly double the cement board route | Easiest to install. Light boards, cuts with a utility knife, screws with sealing washers | Very reliable and forgiving. The board itself is the waterproof layer, so only the seams and fasteners need sealing |
| Sheet membrane over cement board or drywall | In between the other two | Hardest to get right. Bonding a large sheet into thinset without voids or wrinkles takes practice | Extremely reliable when done well. A void behind the sheet or a lapped seam in the wrong direction undoes it |
A fourth option exists and it is worth ruling out. The old fashioned method of drywall or greenboard behind tile, with no membrane, was standard for decades and it is why so many showers from the 1970s through the 1990s have rot behind them. Greenboard is moisture resistant paper faced gypsum. It is not for wet areas and it should never go behind shower tile.
A word on cost. The foam board systems look expensive on the receipt and they usually are not, once you count the time saved and the failure risk avoided. A single kit set against tearing the whole assembly out and rebuilding it is not a close call, and the gap is not even close to close.
Overlaps and direction. Whatever system you pick, every layer sheds water downward onto the layer below it, like shingles. Membrane laps over the pan flange, not under it. Corner pieces go on before the flat field, then the field laps over the corners. Get one lap backward and water runs behind the assembly instead of onto it.
Follow the manufacturer's instructions exactly. These systems are tested and warrantied as complete assemblies. Mixing a liquid membrane from one brand with a corner band from another, or thinning the membrane so it spreads further, voids the warranty and usually the waterproofing along with it.
Slope to the drain and the pre-slope
Water has to get to the drain, and it has to get there at both levels of the assembly.
The top level is the tiled floor. It needs a consistent fall toward the drain, typically 1/4 inch per foot, which is the standard for shower floors. On a 30 inch run from the wall to a center drain, that is about 5/8 inch of fall. Too little and water sits in a puddle. Too much and the floor feels like a funnel underfoot.
The bottom level is where people go wrong. On a traditional mortar bed pan with a sheet liner, there are two mortar layers. The pre-slope goes down first, on the subfloor, sloping toward the drain. The waterproof liner goes on top of the pre-slope, following that slope. The final mortar bed goes on top of the liner, and the tile goes on that.
If the pre-slope is missing, the liner sits flat on the subfloor. Water that gets through the tile and mortar, which it always does, reaches the liner and then has nowhere to run. It sits in the mortar bed permanently. That bed stays saturated, it smells, it grows mold, it freezes and delaminates in a cold house, and it eventually starts weeping out the bottom of the wall.
A missing pre-slope is invisible from the outside and it is one of the most common defects in older DIY and low bid showers. If you are tearing out a shower and the mortar under the liner is flat, that is what happened.
Traditional clamping drains have weep holes in the flange for exactly this reason, to let the water sitting on the liner drain out. Those weep holes get packed solid with mortar constantly. Protect them with a ring of coarse gravel before the top bed goes in.
The easier path. Pre-sloped foam shower trays remove this whole problem. They come with the slope molded in, you bond them to the subfloor with thinset, and they pair with a bonding flange drain that seals to the membrane at the top of the assembly rather than under a mortar bed. They cost more up front and they eliminate the most common structural mistake in shower building.
Flood test. Plug the drain, fill the pan to just below the curb, mark the water line, and leave it 24 hours. If the level drops or anything below shows a stain, you found the leak while it was still a tube of sealant and an afternoon. Do this before any tile goes on. Every time.
Niches and benches, the leak prone details
Every niche and every bench is a set of inside corners, outside corners, and horizontal surfaces, which is exactly the list of places waterproofing fails.
Slope the niche sill. The bottom shelf of a niche must slope out toward the shower, roughly 1/8 to 1/4 inch of fall across its depth. A flat niche sill holds a puddle of shampoo water permanently. That water sits against the grout joint at the back of the shelf, works through it, and gets into the wall. Sloped sills are also the difference between a niche that looks clean and one with a permanent ring of soap scum.
Use a one piece sill tile if you can. A single piece of tile or stone across the niche floor with no grout joint in the middle removes a leak path entirely. Set it after the back and sides so it laps over them.
Waterproof the niche before the field. Corner bands in all the inside corners, membrane across every surface, and lapped so water sheds out of the niche, not into the wall. Then the wall membrane laps over the outside edges of the niche.
Benches. Same rules, with more consequence because a bench holds more water and carries weight. Slope the top 1/4 inch per foot toward the drain. Waterproof it completely, including the underside of the front edge. Build it out of foam or masonry, never out of framed lumber with cement board on it unless the whole thing is membraned as one continuous surface.
Blocking. Put solid blocking behind the niche and behind any grab bar location before the backer goes up. Adding a grab bar later means opening a finished tile wall.
Layout: start from a full tile where it shows
Bad tile layout is the thing people notice without knowing why. A wall with a full tile on the left and a 3/4 inch sliver on the right reads as sloppy even to someone with no opinion about tile.
The principle. Center the layout on the wall so the cuts at both ends are equal and as large as possible. If a centered layout leaves you a sliver, shift the whole layout by half a tile so the cuts become half tiles instead. A cut smaller than about a third of a tile looks like a mistake.
Start from a full tile at the most visible point. In a shower that is usually the top of the wall at eye level on the wall you face, or the outside corner nearest the door. Put the awkward cut at the bottom against the pan or in the corner behind the shower head, where nobody looks.
Vertically. Measure the wall height, decide where the tile stops, and lay out from there. Do not start at the pan and work up, because the pan is sloped and the bottom row will be a taper anyway. Screw a level ledger board at the height of the first full course, tile up from it, then come back and cut the bottom row to fit the slope after the field has set.
Do the whole thing on paper or on the wall first. Dry lay a column and a row with spacers on the floor, measure, and mark the wall. Ten minutes here saves a wall.
Running bond and large tile. A 50 percent offset running bond with tile longer than about 15 inches magnifies lippage, because tile is not perfectly flat and the middle of one tile meets the end of the next at the point of maximum bow. Most manufacturers now recommend a maximum offset of one third for large format tile. Use a leveling clip system if you are doing it anyway.
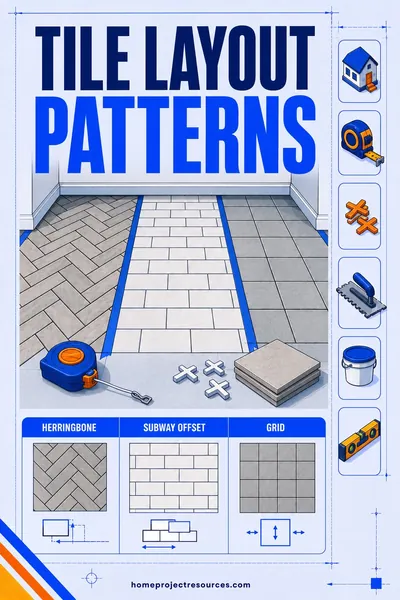
Waste allowance. Order 10 percent extra for a straight layout and 15 to 20 percent for diagonal, herringbone, or anything with a lot of cuts. Our tile calculator handles the waste math. Buy it all at once from the same lot, because dye lots vary and a mid job top up will not match.
Thinset for walls, and back buttering
Wall thinset is not the same product as floor thinset, and the difference matters.
Non sag matters on a wall. Wall tile wants to slide down the wall while the thinset is wet. Mortars sold as non sag or non slump are formulated to hold tile in place. A standard floor mortar under a heavy 12x24 wall tile will let it creep, and you find out an hour later when the whole course has drifted a quarter inch.
Match the mortar to the tile and the substrate. Porcelain has near zero absorption, so it needs a modified thinset or a mortar specifically rated for porcelain. Glass tile needs a mortar rated for glass, usually white and highly polymer modified. Natural stone needs a white mortar so the color does not bleed through, and marble often needs a rapid set to prevent moisture staining.
One exception worth knowing. Some sheet membrane systems specify unmodified thinset over the membrane, because the membrane is impervious and a modified mortar sandwiched between two impervious layers cannot cure properly. This directly contradicts the general advice to use modified mortar with porcelain. The membrane manufacturer's instruction wins. Read the sheet in the box.
Notch size. Use a notch that gives you full coverage under the tile. A 1/4 by 1/4 inch square notch works for small format wall tile. Large format needs a 1/2 by 1/2 inch notch or larger. Comb the ridges in one direction, not in swirls, so air can escape as the tile is pressed in.
Back butter anything over about 8 inches. Skim a thin layer of thinset onto the back of the tile with the flat side of the trowel before setting it. This fills the small depressions in the back of the tile and dramatically improves coverage. Wet areas require high coverage under the tile, commonly cited as 95 percent, because a void behind a tile in a shower fills with water and stays full.
Check your coverage. Pull one tile off the wall every so often early in the job and look at the back. If you see bare patches, you need a bigger notch, more back buttering, or a wetter mix.
Movement joints and why silicone belongs in the corners
Everything in a building moves. Framing shrinks and swells with the seasons, tile expands slightly with heat from hot water, and the substrate behind it moves at a different rate than the tile in front.
Grout is a rigid cement product. It has essentially no ability to stretch. Where two planes meet at a corner, the two surfaces move relative to each other, and rigid grout in that joint has only one way to accommodate the movement, which is to crack.
That is why grout in shower corners always cracks eventually, no matter how carefully it was packed, and why regrouting the same corner every year never fixes it.
The rule. Use a flexible sealant, not grout, at every change of plane. That means:
- Every inside vertical corner where two walls meet
- The horizontal joint where the walls meet the pan or the tub
- The joint where the walls meet the curb
- Inside corners of niches and around benches
- Where tile meets a different material, such as a window jamb
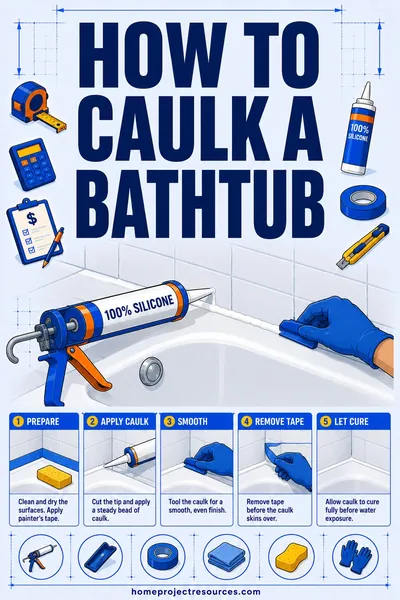
Use 100 percent silicone, and buy the color matched silicone sold alongside your grout so the corners match the field. Acrylic and latex caulks shrink, mildew, and fail in wet areas. Silicone stays flexible for years.
Do it properly. Let the grout cure first, clean the joint out so silicone is bonding to tile edges and not sitting on top of grout, run a continuous bead, tool it once with a wet finger or a tool, and let it cure the full time on the label before running water, usually 24 hours.
On a large wall, tile assemblies also want a movement joint every 20 to 25 feet in interior areas, and over any control joint in the substrate. Most shower walls are far smaller than that, so the plane changes are the joints that matter.
Grout choice and sealing
| Grout type | Joint width | Cost | Notes |
|---|---|---|---|
| Unsanded cement | Under 1/8 inch | $ | For narrow joints and soft or polished tile that sanded grout would scratch |
| Sanded cement | 1/8 inch and up | $ | Standard, stronger, resists shrinkage in wider joints |
| High performance cement, polymer modified | Varies by product | $$ | Denser and more stain resistant than plain cement, often sold as no sealing required |
| Epoxy | Any | $$$ | Waterproof, stain proof, no sealing ever, and hard to work with |
Cement grout needs sealing unless the label specifically says otherwise. Penetrating sealers soak in and repel water from inside the joint. Plan to reseal every 1 to 2 years in a shower. Sealer is not waterproofing, it is stain resistance and a bit of water repellency, and it is not a substitute for a membrane.
Epoxy grout deserves an honest description. It is genuinely far more durable. It never needs sealing, it does not stain, it does not grow mildew the way cement grout does, and in a shower it will look the same in ten years. It is also considerably harder to work with. It is sticky and stiff rather than creamy, it has a short pot life once mixed, usually 45 to 60 minutes, and if you let it set on the tile face you are scrubbing haze off with a chemical remover rather than a sponge.
The practical advice: epoxy is worth it in a shower if you are willing to work in small sections, keep two buckets of clean water going, and accept that the grouting will take twice as long. If that sounds miserable, a high performance polymer modified cement grout is a good middle ground.
Do not grout until the thinset has cured, typically 24 hours, and do not run water in the shower until the grout has cured, typically 72 hours before the first use and longer before sealing.
Worked example: a 60 by 32 inch alcove shower
Say a standard alcove, 60 inches wide by 32 inches deep, tiled to 84 inches on the walls with 3x6 ceramic subway tile and a 2 inch mosaic floor.
Wall square footage. - Back wall: 60 x 84 equals 5,040 square inches, which is 35 square feet - Each side wall: 32 x 84 equals 2,688 square inches, which is 18.7 square feet - Total: 35 plus 18.7 plus 18.7, which is 72.4 square feet
Tile to order. 72.4 plus 15 percent for a running bond layout with lots of cuts gives 83.3 square feet. Order 85 square feet, all from the same lot. Add about 4 square feet for the niche interior.
Floor. 60 x 32 equals 1,920 square inches, which is 13.3 square feet. Mosaic sheets cut with more waste, so add 15 percent to get 15.3. Order 16 square feet.
Backer. 72.4 square feet of wall. Half inch cement board in 3 by 5 foot sheets is 15 square feet each, so 5 sheets by area. Order 6 for cuts. Our drywall calculator covers the rest of the bathroom if the non wet walls need board too.
Waterproofing. A rolled liquid membrane at the required film thickness typically covers 45 to 60 square feet per gallon over two coats. Walls plus floor plus curb is roughly 95 square feet, so a 3.5 gallon pail. Add a roll of reinforcing fabric and preformed inside and outside corners.
Thinset. A 50 pound bag with a 1/4 inch square notch covers roughly 85 to 95 square feet, but back buttering cuts that significantly. Plan on 3 bags for the walls and 1 for the floor mosaic.
Grout. For 3x6 tile at a 1/16 inch joint, a 10 pound bag covers roughly 45 to 60 square feet. Two bags for the walls. Mosaic uses far more grout per square foot, so one more bag for the floor. Plus 2 tubes of color matched 100 percent silicone.
The full materials list, and what moves each line.
| Item | Quantity | What moves the price |
|---|---|---|
| Ceramic subway tile | 89 sq ft | Format and finish. Stock ceramic is the cheapest thing in the shower, handmade and natural stone the priciest by a wide margin |
| Mosaic floor tile | 16 sq ft | Material. Sheet mounted porcelain is cheap, glass and stone mosaics climb fast |
| 1/2 inch cement board | 6 sheets | Barely moves. Buy the real thing, not a gypsum lookalike |
| Liquid membrane, 3.5 gal pail | 1 | Brand, and whether corners and fabric come bundled in the pail |
| Corners, fabric, seam tape | 1 set | Small line, but match the membrane brand or you void the warranty |
| Pre-sloped foam tray and bonding drain | 1 | Tray size, drain position, and linear versus center drain. Linear costs more |
| Thinset mortar | 4 bags | Standard versus large format or lightweight mortar |
| Grout | 3 bags | Cement grout is cheapest, urethane sits above it, epoxy is several times either |
| Color matched silicone | 2 tubes | Barely moves, and never substitute regular bath caulk |
| Niche, preformed | 1 | Size, shelf count, and whether the face comes finished |
| Trowels, spacers, sponges, mixing paddle | 1 set | A one time buy you keep for the next job |
Two lines dominate that list: the tile itself and the pre-sloped tray. Everything else is small change by comparison, which is why swapping stock ceramic for stone changes the materials bill more than every other decision on the page combined. Price the tile first, then the tray, then stop worrying about the rest.
Labor, separately. Tile setters usually quote by the square foot of tile, so the size of the shower and the tile format drive the number more than anything else. Small format tile in a plain running bond is the cheapest to set. Large format, herringbone, natural stone, a curbless entry, or a custom mud pan all push it up, sometimes dramatically, because they are slower and less forgiving. Ask for the waterproofing to be a separate line from the tile setting, get the same scope in front of three setters, and ask each one which membrane system the price assumes, since a bid built on cement board and no membrane will always look cheaper and is the one to throw out. Our shower installation cost guide covers how to scope that bid, and the bathroom remodel cost guide puts it in the context of a whole room.
Regional labor rates vary widely, so a written quote from a local tile setter, itemized the way the list above is itemized, is the only number worth budgeting against.
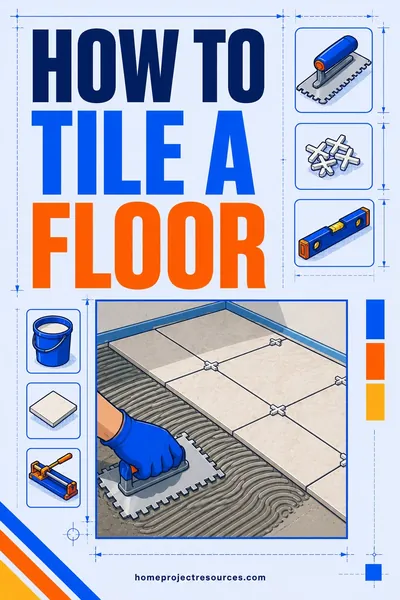
If you are tiling the bathroom floor as part of the same project, our how to tile a floor guide covers the different substrate, mortar, and layout rules that apply there.
Frequently asked questions
Is cement board waterproof for a shower?
No. Cement board is water resistant and rot proof, which means water passing through it will not destroy the board itself, but water passes straight through. It needs a waterproof membrane over it, either a rolled liquid coating or a bonded sheet, before any tile goes on. Cement board with tile directly over it is the most common cause of shower failures in otherwise careful DIY work.
Do you tile the shower walls or floor first?
Walls first in most cases. Tiling walls first means the wall tile laps down over the top of the floor tile edge, so water running down the wall lands on the floor rather than at the joint, and it also means you are not kneeling on fresh floor tile. Set a ledger board at the first full course, tile up, then do the floor, then come back and cut the bottom wall course to fit.
What is a shower pre-slope and why does it matter?
It is a sloped mortar bed installed under the waterproof liner in a traditional mortar pan, sloping toward the drain. Without it, the liner sits flat and water that reaches it, which always happens, has nowhere to go and sits in the mortar bed permanently. That saturated bed smells, grows mold, and eventually seeps out of the bottom of the wall. Pre-sloped foam trays avoid the issue entirely.
Should I use grout or caulk in shower corners?
Silicone caulk, never grout. Corners are changes of plane where the two surfaces move relative to each other, and rigid cement grout has no ability to stretch, so it cracks. Use 100 percent silicone in color matched to your grout at every inside corner, at the wall to pan joint, and where tile meets any different material.
What thinset should I use for shower walls?
A non sag or non slump mortar rated for your tile type, so the tile does not creep down the wall while it cures. Porcelain generally needs a modified thinset, glass needs a mortar rated for glass, and stone needs white mortar. The exception is over some sheet membranes, which specify unmodified thinset because a modified mortar between two impervious layers cannot cure. Follow the membrane instructions.
Is epoxy grout worth it in a shower?
For durability, yes. It is waterproof, stain proof, never needs sealing, and resists mildew far better than cement grout. The tradeoff is real: it is sticky and stiff to work with, the pot life is short at 45 to 60 minutes, and haze left on the tile face needs a chemical remover rather than a sponge. Work in small sections and it is manageable.
How much tile do I need for a shower?
For a standard 60 by 32 inch alcove tiled to 84 inches, the walls are about 72 square feet plus roughly 13 square feet for the floor. Add 10 percent waste for a straight layout, or 15 to 20 percent for running bond, diagonal, or herringbone. Our tile calculator does the math from your own dimensions, and buy the whole order from the same dye lot.
How long before I can use a newly tiled shower?
Let the thinset cure about 24 hours before grouting, then let the grout cure per the label, typically 72 hours, before running water. Silicone needs its own cure time, usually 24 hours. If you are sealing cement grout, most sealers want the grout fully cured first, which can mean waiting a week or more. Rushing any of these steps weakens exactly the parts you spent the most effort on.
The short version
The waterproof layer is the project. Tile and grout let water through by design, so pick a system, cement board plus liquid membrane, foam board, or bonded sheet membrane, and install it exactly to the manufacturer's instructions with every lap shedding downward.
Get slope in the pan at both levels. Under a traditional mortar bed, that means a real pre-slope under the liner. A pre-sloped foam tray with a bonding flange drain sidesteps the whole problem. Flood test for 24 hours before any tile.
Treat niches and benches as leak details, with corner bands, complete membrane coverage, and a sloped sill. Lay out from a full tile where it shows and balance the cuts at both ends. Use a non sag mortar, back butter anything over 8 inches, and aim for full coverage behind every tile.
Silicone every change of plane rather than grouting it, because grout cannot flex and corners always move. Then let everything cure before the first shower.
Our tile calculator sizes the order, how to tile a floor covers the floor work, and shower installation cost has the pricing if you are deciding between doing it and hiring it out.