Cost to Lay Pavers Per Square Foot

The cost to lay pavers per square foot is not one number, it is eight decisions stacked on top of each other. How deep the crew digs, how many inches of compacted gravel go back in, how thick the paver is, how many cuts the pattern demands, how many linear feet of edge need restraint, how the material gets into the yard, how much slope has to be built, and where the spoil goes. Change any one of those and the per square foot figure on your quote moves, sometimes by half.
That is the useful way to read a paver bid. Two contractors quoting the same patio can be far apart because one is building 6 inches of base in three compacted lifts and the other is building 2 inches in one pass. You cannot see the difference after the last paver goes down, but you will see it in year three.
Updated September 2026
Get your exact quantities first. Run your dimensions through our free paver calculator and you will have paver count, pallets, base gravel in yards and tons, bedding sand, polymeric sand bags, and linear feet of edge restraint before a single contractor walks your yard. Numbers in hand changes the conversation.
What the cost to lay pavers per square foot actually includes
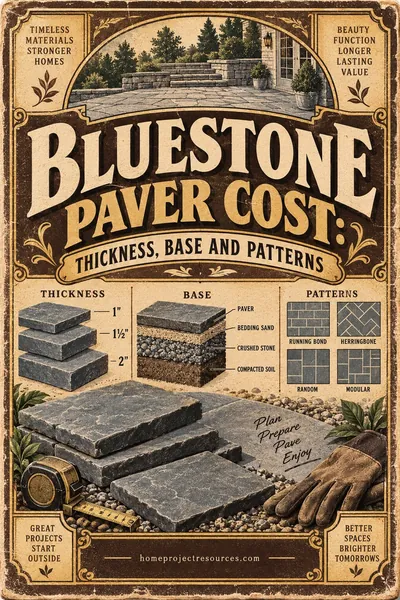
A paver surface is a layered system. Only the top 2 to 3 inches of it are visible, and the invisible part is where nearly all the labor hours and most of the material weight live.
| Layer or task | Typical spec, patio | Typical spec, driveway | Why it exists |
|---|---|---|---|
| Excavation | 7 to 9 in total depth | 12 to 16 in total depth | Makes room for the whole system below finished grade |
| Subgrade compaction | 2 to 4 passes with a plate | Proof-rolled, often a roller | Keeps the base from settling into soft soil |
| Geotextile fabric | Used in clay and silt | Almost always used | Stops gravel and soil from mixing over time |
| Compacted base | 4 to 6 in crushed stone | 8 to 12 in crushed stone | Carries and spreads the load, drains water away |
| Bedding layer | 1 in coarse sand or chip | 1 in coarse sand or chip | Seats each unit at exact height |
| Pavers | 2.375 in thick, typical | 2.75 to 3.125 in thick | The wear surface |
| Cutting | 5 to 10 percent of units | 8 to 15 percent of units | Perimeter, curves, and pattern closure |
| Edge restraint | Every open edge | Every open edge, spiked heavy | Stops the field from spreading outward |
| Joint sand | Polymeric, swept and set | Polymeric, swept and set | Locks units together, blocks weeds |
| Final compaction | 2 to 3 passes over pavers | 3 or more passes | Seats pavers into the bedding layer |
Notice that the paver itself is one line out of ten. The rest is dirt, stone, machine time, and crew hours. That is why "I found a better deal on pavers" rarely changes a quote much, and why "the yard has a 34 inch gate" changes it a lot.
The paver calculator on this site follows the same build. It assumes the base extends 6 inches past the paver edge on every side, because a base that stops exactly at the paver line has nothing supporting the outer course, and that outer course is the first thing to sink.
The eight variables that move your per square foot number
1. Application: patio, walkway, or driveway
This is the biggest single split. A patio carries people and furniture. A driveway carries a loaded vehicle, sometimes a delivery truck. Our calculator's own guidance is blunt about it: a driveway needs two to three times the base of a patio. Thicker pavers too, usually 2.75 inches or more instead of the standard 2.375 inch patio unit.
So the same 400 square feet costs meaningfully more per square foot as a driveway than as a patio, and none of that difference is profit. It is stone, digging, and hauling.
2. Total area
Bigger jobs cost less per square foot. Mobilization is fixed: the crew loads out, the machine gets trailered in, the dumpster gets dropped, the string lines get set. Spread across 120 square feet that setup is punishing. Spread across 600 square feet it nearly disappears. If you are on the fence about extending a patio by a few feet, price both sizes. The larger one often has a lower per square foot figure.
3. Site access
The hidden multiplier nobody warns homeowners about. With a driveway approach and a gate wide enough for a skid steer, spoil goes out by the bucket and gravel comes in by the ton. With a 34 inch gate and a fence you cannot open, every scoop moves in a wheelbarrow, and a 280 square foot patio means roughly 15 tons of material through that gate in both directions.
If a fence panel can be removed for a week, say so when you request quotes. It is one of the few things a homeowner can do that genuinely lowers a bid.
4. Base depth and compaction method
Base is where an underbid hides. Compaction energy from a plate compactor only reaches about 2 to 3 inches down, so 6 inches of base has to go in as three lifts, not one dump. Each lift is another pass with the machine and another round of grade checking. A crew that runs lifts is spending hours a crew that does not is skipping.
Ask every bidder, in writing: how many inches of compacted base, and in how many lifts?
5. Pattern and cut count
Every cut is saw time plus a wasted piece. A running bond rectangle with square corners has cuts only at two ends. A 45 degree herringbone has a cut at every perimeter unit on all four sides. A curved edge is continuous saw work.
| Layout | Cutting load | Waste allowance to order | Labor effect |
|---|---|---|---|
| Running bond, square edges | Lowest | 5 percent | Baseline |
| Basketweave, square edges | Low | 5 percent | Slightly slower to lay |
| 90 degree herringbone | Moderate | 8 percent | More perimeter cuts |
| 45 degree herringbone | High | 10 to 15 percent | Cuts on all four edges |
| Curved or free-form edge | Highest | 12 to 15 percent | Continuous saw work, slow |
| Soldier course border | Adds cuts on both sides | Add 3 percent | Adds a full extra edge line |
6. Edge length relative to area
A long skinny walkway has far more perimeter per square foot than a square patio. Edge restraint is priced by the linear foot, cuts happen at the edge, and the border course is the slowest part of any layout. A 3 foot by 40 foot walkway is 120 square feet with 86 linear feet of open edge. A 11 by 11 patio is 121 square feet with 44 linear feet. Same area, twice the edge work.
7. Slope, drainage, and elevation change
Flat lots are quick. A sloped yard means either cutting into the hill and holding it with a wall, or building up and holding fill in place. Steps and seat walls are separate scopes with their own per unit pricing, and a segmental retaining wall is its own project. If your plan involves one, our retaining wall calculator will size the block and backfill.
Every paver surface needs fall. Build in 1/4 inch of drop per foot away from the house, which is 1 inch every 4 feet, or about 2 percent. That slope is built into the compacted base, not created by tilting pavers at the end.
8. Removal and disposal
Tearing out an old slab first adds machine time, breaking, and hauling, and wire mesh in the old concrete slows it further. Removing an old deck is its own line. Old pavers are the easy case since they lift by hand and often get reused as fill.
Square foot math: measure the way an installer measures
Contractors quote from a takeoff, and the takeoff starts with area. Most patios are not simple rectangles, so break the shape into rectangles, triangles, and circle segments, then add them.
For an L-shaped patio 20 feet by 14 feet with a 6 by 8 foot bite taken out of one corner:
- Full rectangle: 20 x 14 = 280 square feet
- Missing corner: 6 x 8 = 48 square feet
- Net paver area: 280 minus 48 = 232 square feet
For the perimeter, walk the outline: 20 + 14 + 6 + 8 + 14 + 6 = 68 linear feet total, and if the 14 foot leg sits against the house, the open edge needing restraint is 54 linear feet.
Odd shapes with curves are where hand math falls apart. Our square footage calculator handles L-shapes, triangles, and circles and adds them into one total you can carry straight into the paver calculator.
Worked example: a 14 by 20 foot paver patio takeoff
Here is a full quantity takeoff, no money in it, just the material list a bidder is pricing from. The patio is 14 by 20 feet against the back of a house, standard 4x8 inch concrete pavers 2.375 inches thick, running bond, 4 inch compacted base.
Area: 14 x 20 = 280 square feet
Excavation depth: 4 in base + 1 in bedding + 2.375 in paver = 7.375 in, so dig 8 inches and fine-tune at grade.
Spoil volume: 280 sq ft x (8 / 12) ft = 186.7 cubic feet = 6.9 cubic yards in place. Excavated soil fluffs up roughly 20 to 25 percent, so plan disposal for 8 to 8.6 cubic yards loose.
Base gravel: 280 sq ft x (4 / 12) ft = 93.3 cubic feet = 3.46 cubic yards compacted. Order about 15 percent extra for compaction loss, so 4 cubic yards. At the calculator's default density of 1.4 tons per compacted cubic yard, that is about 5.6 tons of 3/4 inch minus crushed stone. Remember the base runs 6 inches past the paver edge on the three open sides, which is why the ordered figure is not the bare math.
Bedding sand, 1 inch: 280 x (1 / 12) = 23.3 cubic feet = 0.86 cubic yards, roughly 1.2 tons of coarse concrete sand. Never mason sand or play sand.
Pavers: a 4x8 inch paver covers 32 square inches, which is 0.222 square feet, so 4.5 pavers per square foot. With a 5 percent waste allowance for running bond, order for 294 square feet: 294 x 4.5 = 1,323 pavers. At the calculator's default of 480 pavers per pallet, that is 3 pallets with roughly 117 units left over, which is a good spare stock to keep behind the shed.
Edge restraint: perimeter is 2 x (14 + 20) = 68 linear feet, minus the 20 foot house side, so 48 linear feet of restraint. Spikes at 12 inches on center means 48 to 55 spikes.
Polymeric sand: at the calculator's default coverage of 35 square feet per 50 pound bag, 280 / 35 = 8 bags. Coverage genuinely ranges from 20 to 100 square feet per bag depending on joint width and paver thickness, so read the bag before you buy. Wide joints and thick driveway pavers eat sand fast.
Slope: 14 feet of run away from the house at 1/4 inch per foot = 3.5 inches of total fall from the house edge to the far edge. Set that in the base with a string line, then carry it through the screeded bedding.
Compaction plan: compact the bare subgrade first, then the base in two 2 inch lifts, then 2 to 3 passes over the laid pavers with a protective mat before sweeping joint sand.
That takeoff is the same list any bidder is working from. If you hand it to three contractors, their quotes become genuinely comparable, because the only remaining variable is their hours and their overhead.
DIY versus hiring: what actually changes
Laying pavers is one of the more forgiving DIY projects, because nothing cures wrong and nothing is permanent. A paver you set badly comes up in thirty seconds. Compare that to a concrete pour, where the clock runs whether you are ready or not.
What you take on instead is weight and time.
- Weight. The 280 square foot example above moves roughly 8.5 cubic yards of soil out and about 5.6 tons of gravel, 1.2 tons of sand, and 3 pallets of pavers in. Most of it by wheelbarrow.
- Time. For two people who have not done it before, a patio that size is realistically 40 to 60 hours. Three weekends plus a delivery day.
- Equipment. A plate compactor rated around 3,000 to 5,000 pounds of centrifugal force, for at least two rental days. A masonry cut-off saw or a grinder with a diamond blade. Two 1 inch screed pipes, a long level, string line, and a wheelbarrow with a real tire.
- Skill floor. Low, but the two failure points are unforgiving: compaction in lifts, and building slope into the base.
The labor share of an installed paver bid is the largest single line, larger than every material combined on most patios. That is the part DIY removes. It is also the part that decides whether the patio is flat in a decade, so do not remove it unless you are going to do the base work properly.
For a broader look at which projects reward DIY and which need a trade, see our guide to DIY home improvement.
How to compare paver bids line by line
A bid that says "install patio" with one total is not comparable to anything. Ask every contractor to itemize these, and the vague ones will identify themselves.
- Excavation depth in inches, and where the spoil goes.
- Base material type and compacted depth, plus number of lifts.
- Geotextile fabric: included or excluded, and why.
- Bedding material: coarse concrete sand or 1/4 inch chip, and the screeded depth.
- Paver make, model, thickness, and color, plus the waste percentage they are ordering.
- Edge restraint type and spike spacing.
- Joint sand type: polymeric or plain.
- Slope and drainage direction, stated as a number and a direction.
- Cut allowance and pattern, especially for herringbone or curves.
- Cleanup, restoration, and any lawn repair at the staging area.
- Warranty terms and length, and what voids them.
- License and insurance: verify hardscape licensing rules with your local building department, and ask for a current certificate of insurance.
Our guide on how to get contractor bids walks through the request process and what a complete scope of work looks like.
Permits, utilities, and when to call a pro
Most ground level patios do not need a building permit, but plenty of jurisdictions regulate them anyway, usually through impervious surface limits, setback rules, drainage review, or an HOA architectural committee. Driveways and driveway aprons that touch the public right of way almost always require a permit, and the apron portion is often held to a municipal standard spec.
Two rules that are not optional anywhere:
- Call 811 before you dig, in the US, at least a few business days ahead. It is free, it is the law in every state, and paver excavation at 8 to 16 inches deep is exactly the depth where shallow utility runs live.
- Retaining walls above a certain height require engineering and a permit in most jurisdictions, commonly at 4 feet, sometimes lower with a surcharge above the wall. If your paver plan includes a wall to hold a grade change, ask the building department where that line sits before you design around it.
Grade work that redirects water toward a neighbor's property is also a common source of trouble, and in some places a code violation. If your yard already has a drainage problem, solve that first.
FAQ
What is included in the cost to lay pavers per square foot?
Excavation and disposal, subgrade compaction, geotextile fabric where used, compacted crushed stone base, a screeded bedding layer, the pavers themselves, all cutting, edge restraint, polymeric joint sand, and final compaction. Labor covers all of it, not just the paver laying, which is why the base spec matters so much when comparing bids.
Is labor or material the bigger part of a paver installation?
Labor, on nearly every residential job. Digging, hauling, grading, compacting in lifts, cutting, and setting each unit is hour-intensive work. Materials are close to fixed at the supplier, so a bid that comes in far under the others is usually saving hours in the base, not finding cheaper stone.
How deep should the base be under pavers?
Plan on 4 to 6 inches of compacted crushed stone for a patio or walkway and 8 to 12 inches for a driveway, with the deeper end in clay soil and freeze-thaw climates. Add 1 inch of bedding sand and the paver thickness to get total excavation depth, usually 7 to 9 inches for a patio.
How much waste should I order for pavers?
Five percent for a running bond rectangle, 8 percent for 90 degree herringbone, and 10 to 15 percent for 45 degree herringbone, curves, or a heavily bordered design. Order it all at once. A second delivery risks a different dye lot, and mismatched color is permanent.
Does a bigger patio cost less per square foot?
Yes. Setup costs are fixed regardless of size: crew mobilization, equipment transport, dumpster drop, and layout all happen once. Spread over 600 square feet those hours barely register, while over 120 square feet they dominate. Price two sizes if you are undecided.
Are pavers a better choice than poured concrete?
They solve different problems. Concrete is faster to install and cracks eventually, and a crack in a slab is permanent. Pavers flex with ground movement and any single unit lifts out for repair or replacement. Our concrete vs pavers comparison covers lifespan, repair, and maintenance side by side.
Do I need edge restraint on every side?
On every open edge, yes. Without it, perimeter units creep outward under foot traffic and freeze-thaw cycling, joints open, sand washes out, and the field spreads. Edges against a house foundation, a wall, or an existing curb do not need it. Spike restraint into the compacted base, not into the bedding sand.
How long does a paver installation take?
A professional crew does a straightforward 300 square foot patio in 3 to 5 working days: one for excavation and base, one to two for laying and cutting, and one for edging, sanding, and cleanup. Add days for bad access, heavy cuts, curves, steps, or wet weather that stops compaction work.
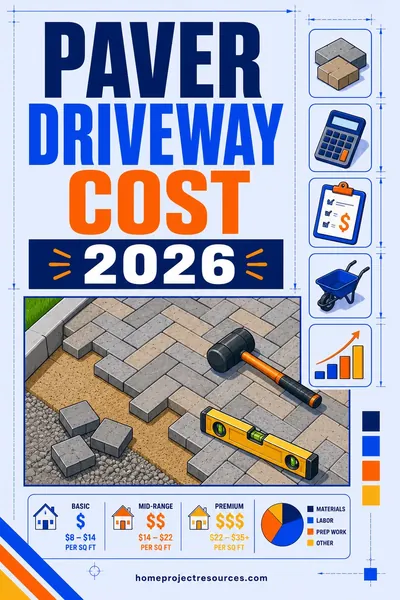
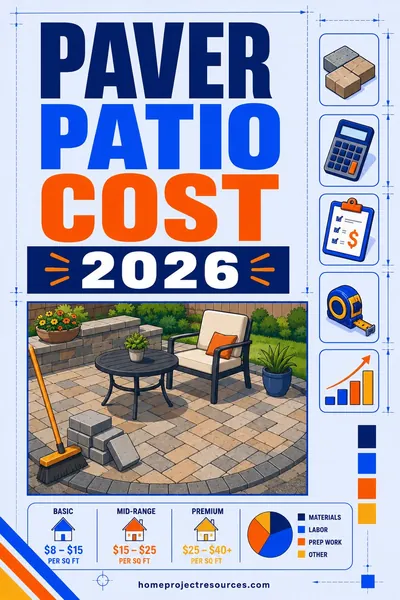
Related: For application-specific detail, see paver patio cost and paver driveway cost, and weigh the alternative in concrete vs pavers. To size the materials, use the paver calculator, the gravel calculator for base stone, and the square footage calculator for odd shapes.