Concrete vs Pavers

Here is the tradeoff in one line: poured concrete costs less up front and will crack, while pavers cost more and can be lifted and reset individually. On the same patio, a plain broom finished slab typically lands at around half the installed price of a standard concrete paver field, and stamped or stained concrete sits between the two. Everything else in this comparison hangs off those facts. If you want the cheapest surface that works, pour concrete. If you want a surface that can be repaired invisibly for the next forty years, lay pavers.
Updated August 2026
A note on numbers. This page compares the two systems on quantities, base depths, lifespans, failure modes and repair work rather than dollar figures. Hardscape pricing is mostly labor and haul distance, both of which are local, so published per square foot ranges go stale and travel badly. Use the comparisons here, run your own quantities, then get three bids on one identical scope.
Price both before you decide. Run your dimensions through our free concrete calculator for slab yardage, then the paver calculator for unit counts, and compare real quantities instead of rules of thumb.
Concrete vs pavers: the full comparison table
| Factor | Poured concrete | Pavers |
|---|---|---|
| Relative installed cost | The cheaper of the two, and cheapest of all as a plain broom finish | Roughly double a plain slab for a patio, more again for a driveway |
| Material share of the bill | 20 to 30 percent | 20 to 30 percent |
| Lifespan | 25 to 40 years | 30 to 50 years or more, clay brick longer |
| Repairability | Poor. Patches never color match, cracks are permanent | Excellent. Lift the units, fix the base, reset the same pavers |
| Freeze thaw behavior | Rigid. Heave cracks it and the crack stays | Flexible. Joints let it move and settle back |
| Drainage | Impervious. Needs slope and somewhere for runoff to go | Joints shed some water, permeable systems drain through entirely |
| DIY difficulty | Hard. One shot, a curing clock and no undo | Moderate. Slow and heavy, but every step is reversible |
| Resale impression | Clean and expected. Rarely a selling point | Reads as a custom feature. The stronger impression |
| Maintenance | Seal every 2 to 5 years, maintain joints, repair spalls | Refresh joint sand every 5 to 10 years, pull occasional weeds, reset a settled unit |
| Time to usable | 24 hours to walk, 7 days for furniture, 28 days for vehicles | Walk on it the hour it is finished |
| Failure mode | Cracks and spalls, visible forever | Settles in spots, fixable in an afternoon |
The row that decides most projects is repairability. Both surfaces move when the ground under them moves. The difference is what that movement looks like five years later. A slab telegraphs it as a crack you see every day. A paver field telegraphs it as a low spot you can pull up and rebuild with a bag of sand and a Saturday.
Cracking is not a defect in concrete, it is expected
This is the part that surprises homeowners, and it is worth understanding before you sign anything: concrete cracks. All of it. Every slab. Nobody is going to pour you a patio that stays uncracked forever, and a contractor who promises one is either new or not being straight with you.
Concrete shrinks as it cures. A typical slab loses about 1/16 inch of length for every 10 feet as the mix water leaves it. Something has to give. On top of that shrinkage you get thermal expansion in summer, contraction in winter, frost heave from below, tree roots and settling subgrade. Concrete is strong in compression and weak in tension, so when it is pulled in any direction it separates.
The industry's answer is not to prevent cracks. It is to decide where they go.
How control joints actually work
A control joint, also called a contraction joint, is a deliberate groove that weakens the slab along a straight line. When the slab shrinks and cracks, it cracks at the bottom of that groove, below the surface, where you never see it. The joint does not stop the crack. It aims it.
Two rules make joints work, and cheap jobs get both wrong.
Spacing: roughly 2 to 3 times the slab thickness in feet. Take the slab thickness in inches, multiply by 2 to 3, and read the answer in feet. A 4 inch slab wants joints every 8 to 12 feet. A 5 inch slab wants 10 to 15 feet. A 6 inch driveway wants 12 to 18 feet. Keep panels close to square, and never let a panel get longer than about 1.5 times its width. A 4 foot by 20 foot sidewalk panel will crack across the middle no matter how good the concrete was.
Timing: cut within 6 to 18 hours of the pour. Most residential slabs land in the 6 to 12 hour window. Cut too early and the saw ravels the edges and tears aggregate loose. Cut too late and the slab has already cracked on its own somewhere you did not choose. If you are tooling joints by hand with a groover instead of sawing, that happens while the concrete is still plastic, right after the bull float pass.
Depth: one quarter of the slab thickness. A 4 inch slab needs a 1 inch joint. Any shallower and the joint does not weaken the section enough to control anything, so the crack wanders off on its own.
Also plan for isolation joints wherever the slab meets something rigid: the house foundation, a garage stem wall, a porch pier, a light post footing. A half inch strip of compressible material there lets the two structures move independently. Slabs poured hard against a foundation crack at the contact point almost every time.
Pavers skip this entire problem. A paver surface is a flexible pavement made of thousands of small units with sand filled joints between them. When the ground moves, the joints absorb it. There is no monolithic panel to crack, because there is no panel.
Base preparation matters more than the surface for both
Whichever you choose, the work that decides whether it lasts happens before the surface goes down. This is also exactly where cheap bids cut, because it is the one part nobody can inspect after the job is finished.
For pavers, you want 4 to 6 inches of compacted crushed gravel under a patio and 8 to 12 inches under a driveway, over geotextile fabric in clay or silty soil, compacted in 2 to 3 inch lifts. Then 1 inch of coarse bedding sand, screeded flat and never pre compacted.
For concrete, you want the subgrade compacted, then 4 inches of compacted crushed stone rather than pea gravel, which will not lock together, a vapor barrier under interior slabs, and reinforcement held in the middle third of the slab depth on chairs. Steel lying on the dirt does nothing at all.
Compaction has to happen in lifts, because a plate compactor's energy only reaches down 2 to 3 inches. Dumping 6 inches of gravel and running the plate over the top gives you a hard crust over loose stone. It feels solid on day one and shows up as a dip in year two.
Here is how to tell a real bid from a cheap one. Ask three questions and get the answers in writing:
- How deep are you excavating?
- How many inches of compacted base, and in how many lifts?
- What is the slope, and which direction does it drain?
A contractor who answers instantly does it properly. One who gets vague is telling you where the savings came from. When one bid comes in far under the others, it is almost never cheaper materials, because paver prices are close to fixed at the distributor and ready mix is a commodity. The gap is 4 inches of base instead of 8, no fabric, and one compaction pass at the end. Our gravel calculator converts your footprint and base depth into tons so that you can check what a bid claims to be installing against what the job actually needs.
One more shared rule: slope 1/4 inch per foot away from the house. That is 1 inch every 4 feet, or about 2 percent, and it applies to both surfaces. Flat patios hold puddles, grow algae in shade, and heave first in freeze thaw climates, because the water has nowhere to go.
Stamped and stained concrete: the honest middle option
Stamped concrete is poured concrete pressed with textured mats while it is plastic, then colored, so it reads as stone or brick at a distance. Stained concrete is a slab treated with acid or water based stain for a mottled, variegated color. Both sit between a plain slab and a paver field on price, which is exactly why people consider them.
What you get: a paver like appearance with no joints to weed, no sand to refresh, and a single continuous surface that is easy to sweep and easy to shovel.
What you need to hear before you buy it: stamped concrete still cracks, and the crack crosses the pattern. It is a slab. It shrinks and cracks like any other slab, but now the crack runs diagonally across your imitation flagstone, ignoring the imitation joint lines entirely. That reads as damage in a way that a crack in a plain gray slab does not. Control joints have to be cut into decorative work too, and a good installer hides them in the pattern lines. A mediocre one saws a straight line across the stone pattern, and it looks exactly as bad as it sounds.
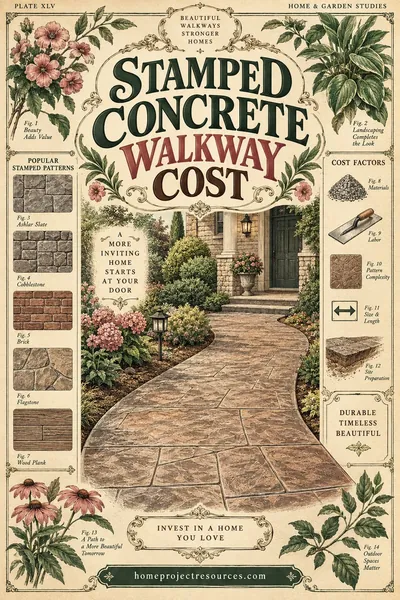
Two more honest notes. Stamped color is surface applied in most systems, so chips and spalls expose gray concrete underneath and repairs are effectively impossible to blend. And the sealer that makes stamped work look wet and rich has to be reapplied every 2 to 3 years outdoors, which is an ongoing cost most quotes never mention. Our stamped concrete walkway cost page covers what that maintenance cycle looks like in practice.
Stamped concrete is a good choice when you want the look, you are staying in the house 10 to 15 years rather than 30, and you have stable, well drained soil. It is a poor choice on expansive clay, over tree roots, or anywhere frost heave is aggressive.
Permeable pavers and stormwater rules
Permeable interlocking pavers have wider joints filled with small clean stone instead of sand, sitting on an open graded stone base that acts as a reservoir. Water goes through the surface, into the base, and either soaks into the subgrade or leaves through an underdrain.
They cost more than a standard paver system, mostly because the base is deeper and uses washed open graded stone rather than crushed base with fines. Expect a meaningful premium per square foot over a conventional patio, and expect the excavation to be deeper as well.
They become worth it, or unavoidable, in three situations:
Impervious surface limits. Many towns cap the percentage of a lot that can be covered by surfaces water cannot pass through. If adding a patio or driveway would push you over that cap, a permeable system may not count against it, which can be the difference between getting a permit and not. Check with your building or zoning department before you design anything, since the credit and the definitions vary by jurisdiction.
Stormwater detention requirements. Some municipalities require new impervious area to be offset with on site retention. A permeable driveway can satisfy that requirement without a separate dry well or rain garden.
A drainage problem you already have. If your yard puddles, a poured slab makes it worse by adding runoff. A permeable surface takes the water out of the equation at the source. Our french drain installation cost page covers the alternative approach when the water is coming from somewhere else.
The catch is maintenance. The joint stone clogs with fine sediment over the years and needs vacuuming or joint stone replacement every few years to keep infiltrating. Do not install permeable pavers downhill of bare soil or a mulch bed that washes.
Poured concrete has a pervious version too, but pervious concrete is a specialty pour with a narrow placement window and a short list of contractors who do it well. On residential jobs, permeable pavers are usually the more practical route to the same result.
Worked example: a 12x16 patio, both ways
A 12 by 16 foot patio is 192 square feet, big enough for a table for six with room to walk around it. Flat yard, decent machine access, standard concrete pavers on the paver side, 4 inch broom finish on the concrete side.
Option A: poured concrete
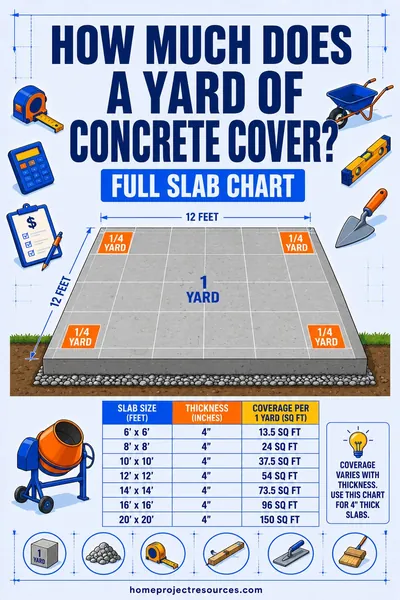
Yardage first. 192 sq ft at 4 inches = 192 x 4 / 324 = 2.37 cubic yards. Add 10 percent for uneven subgrade and chute loss and you are at 2.6, so you would order 3 yards.
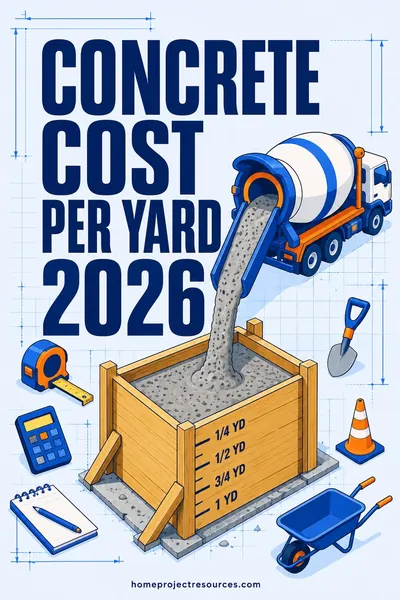
Here is the wrinkle that hits small pours. Most ready mix plants set a 4 or 5 yard minimum, and a 3 yard order sits below it, so you pay a short load charge on the missing yards. On a patio this size that charge can be a large fraction of the concrete itself, which is why small slabs price so much worse per square foot than large ones. The full explanation of plant minimums and delivery line items is in our concrete cost per yard guide.
| Quantity | This patio |
|---|---|
| Concrete | 3 yd of 3,000 PSI mix, ordered against a plant minimum |
| Base stone | 4 in compacted crushed stone, about 2.5 yd |
| Forms | 56 linear ft of 2x4 with stakes every 3 to 4 ft |
| Reinforcement | 192 sq ft of 6x6 mesh on chairs, or fiber in the mix |
| Joints | Cut at 8 to 12 ft spacing, 1 in deep |
| Crew | Two people minimum, three is comfortable |
| Working window | One continuous pour, finishing on the concrete's schedule |
Option B: pavers
| Quantity | This patio |
|---|---|
| Pavers | 192 sq ft plus 5 to 10 percent for cuts and breakage |
| Base stone | 4 to 6 in compacted, about 3 to 4 yd, placed in 2 to 3 in lifts |
| Bedding sand | 1 in screeded coarse sand, not pre compacted |
| Edge restraint | About 40 linear ft along the open sides, with spikes |
| Joint sand | Polymeric sand for the full field |
| Equipment | Plate compactor, screed rails, saw for cuts |
| Working window | Any number of sessions, nothing sets while you are away |
What the comparison actually says
Installed by a contractor, the plain slab lands at around half the paver number on a patio this size. That gap is real and it is the reason concrete wins on budget driven jobs.
Doing it yourself, the gap narrows sharply, because the paver route is mostly your own labor while the concrete route still requires a truck, a minimum load and a crew on the day. Add risk to that comparison and it narrows further. The paver job is heavy and slow, but every mistake is reversible. The concrete job is one continuous operation on a clock, with a truck waiting and a finishing window that closes whether you are ready or not. A first time slab that goes wrong is a demolition job.
So the honest read on a small patio: hire out concrete, lay pavers yourself. That is the opposite of what a per square foot comparison suggests, and it is exactly why the raw price comparison misleads people.
At 400 or 600 square feet the math shifts again. Concrete's advantage grows, short load charges disappear because you clear the plant minimum easily, and paver labor scales up in a straight line. If the paver patio cost drivers put your number out of reach, a poured slab at the same size will usually land near half of it.
Which one should you actually pick?
Pick poured concrete if: budget is the constraint, the area is large, the shape is simple, you want an easy surface to shovel snow off, or you are selling within a few years and simply need a clean finished surface.
Pick pavers if: you are staying long enough that a slab would be cracking by the time you leave, you are in an aggressive freeze thaw climate, the soil moves, you want to fix a settled spot without a demolition crew, or the look is a large part of the point.
Pick stamped or stained concrete if: you want the decorative look nearer concrete pricing and you accept that a crack will eventually cross the pattern.
Pick permeable pavers if: your town regulates impervious area, or you are solving a real drainage problem at the source.
Two situations override all of the above. On expansive clay or a site with known settlement, pavers are the safer bet, because a flexible pavement tolerates movement that would crack a slab. And on a long driveway, where paver cost per square foot compounds over a large area, concrete or asphalt is the reasonable answer. The paver driveway cost drivers show where that line usually falls, and concrete driveway cost covers the alternative.
If you are weighing a patio against raised outdoor space entirely, our deck cost guide covers the third option, which often competes on sloped lots where both hardscape choices would need expensive retaining work first.
Frequently asked questions
Are pavers better than concrete?
Pavers are better on repairability, freeze thaw performance, lifespan and appearance. Concrete is better on up front cost, snow removal and simplicity. If the budget is tight, concrete wins. If you are staying twenty years, pavers usually cost less over the life of the surface, because you never demolish and replace them, you just reset the section that moved.
Is a paver patio cheaper than a concrete patio?
No. A plain broom finished slab typically installs for around half of what a standard paver field costs on the same patio. Pavers earn the difference back in repairability over time. A single settled paver is a two hour fix, while a cracked slab stays cracked or gets replaced entirely.
Do pavers crack like concrete?
Individual pavers rarely crack, because each unit is small and the sand joints between them absorb ground movement instead of transferring it. What pavers do instead is settle, meaning a section drops or goes wavy when the base underneath washes or compresses. That is a base repair, and the same pavers go back down when it is fixed.
Does stamped concrete crack?
Yes. Stamped concrete is a slab, so it shrinks and cracks like every other slab, and the crack runs across the stamped pattern rather than following the imitation joint lines. Control joints still have to be cut into it, and a good installer hides them within the pattern. Plan on sealer reapplication every 2 to 3 years as well.
How far apart should control joints be in a concrete slab?
Space them at roughly 2 to 3 times the slab thickness in feet, so a 4 inch slab gets joints every 8 to 12 feet and a 6 inch slab every 12 to 18 feet. Cut them one quarter of the slab depth, within 6 to 18 hours of the pour. Keep panels close to square and never longer than about 1.5 times their width.
Which lasts longer, concrete or pavers?
A well built paver surface lasts 30 to 50 years or more, and clay brick can outlast that. Concrete lasts 25 to 40 years before spalling and cracking make replacement the sensible option. Both numbers depend far more on the base underneath than on the surface material itself, which is why the base questions matter more than the material debate.
Are pavers worth it for a driveway?
They are worth it if you are staying long term or the driveway is a visible part of the home's front elevation. A paver driveway costs substantially more per square foot than plain concrete, and a driveway is a large area, so the difference compounds. What you get back is that ruts and settled sections are rebuilt in place rather than becoming a full tear out.
Can I lay pavers over an existing concrete slab?
Sometimes, using thin overlay pavers set in a bond layer, but only if the slab is structurally sound, drains properly, and you have the height to spare at doors and thresholds. If the slab is cracked, heaved or holding water, an overlay hides the problem and inherits it. In that case, breaking it out and building a proper base is the honest fix.
Related tools: Concrete Calculator | Paver Calculator | Gravel Calculator | Square Footage Calculator
Related reading: Paver patio cost | Concrete cost per yard | Paver driveway cost | Deck cost