Stamped Concrete Walkway Cost: What Drives Your Quote

Stamped concrete walkway cost is set by six measurable things: the square footage of the path, how many linear feet of edge that shape produces, the depth of compacted base under the slab, how many colors and patterns the finish calls for, what has to be torn out first, and whether the truck can reach the pour. A quote is those six items priced together. When two bids are far apart, they are almost never bidding the same walkway.
A walkway is the awkward case in decorative concrete. It is a small pour with an enormous amount of edge, so contractors price it by forming and finishing difficulty rather than by volume. A curving three foot path has more forming per cubic yard than almost anything else on a residential lot, which is why per square foot thinking breaks down on small paths and why you should compare scopes instead.
Updated September 2026
A note on numbers. This page gives you the quantities, specifications, scope items and bid questions, not dollar figures. Ready mix is a local product, decorative labor is a local trade, and both move with your distance from the plant and the season. Work out your yardage here, write one scope, and take it to three local installers.
Know your yardage before you call anyone. Run your walkway dimensions through our free Concrete Calculator so you can check whether the material line on a proposal matches the slab you were promised.
What Drives Stamped Concrete Walkway Cost the Most
Rank a proposal in this order. The first three explain most of the gap between quotes on the same walk.
1. Area and edge length. Everything scales off square footage, but edge is the hidden multiplier. A straight four foot by thirty foot run and a serpentine three foot by forty foot path can contain similar area while the curved one needs flexible forms, twice the stakes, and a slower pour. Measure the real shape, including any landing or flare at the porch, with our square footage calculator.
2. What is there now. Pouring on bare, stable soil that already drains is the leanest starting point. Breaking out an existing walk, hauling the rubble, cutting tree roots, or excavating soft clay all add machine time and disposal loads. Brick and dry laid pavers come out far more easily than a reinforced slab, and that difference shows up as a line item.
3. Base depth and subgrade condition. The base is what keeps a walk flat. Four to six inches of compacted stone is the common residential specification, deeper in hard frost regions, deeper again over clay that holds water. A stamped slab on a thin base still cracks, and a crack across a fake flagstone pattern is far more visible than a crack in plain gray concrete.
4. Finish level. Every additional color, border band, hand tooled edge and accent treatment is a separate labor operation performed inside a closing time window. Pattern choice barely moves the number. Color count and border work move it a lot.
5. Access. If the mixer can chute directly into the forms, the pour is fast. If it cannot, the crew wheelbarrows the load or the contractor brings a pump. On a narrow side yard walk, a pump can be one of the largest single lines on the proposal, and it is the item most often missing from a low bid.
6. Job size. Mobilization, forming, finishing tools and cleanup are nearly identical for a short walk and a long one, so small jobs carry a higher effective rate and most decorative crews hold a job minimum. That minimum, not the square footage, is what sets the number on a very short path.
| Driver | What keeps the estimate lean | What pushes it up |
|---|---|---|
| Shape | Straight run, consistent width | Curves, tapers, radiused corners, landings with steps |
| Demolition | Bare, stable soil | Reinforced slab removal, roots, wet clay excavation and haul off |
| Base | Existing compacted stone in good shape | Deep frost base, geotextile fabric, undercut and replace |
| Finish | One pattern, one color, machine cut joints | Multiple colors, border band, accent stain, saw cuts hidden in the pattern |
| Access | Truck chutes straight into the forms | Wheelbarrow runs, pump rental, hand carry through a gate |
| Scale | Long run or a walk plus landing | Short isolated path that trips the crew minimum |
The Three Finish Levels, and What Each One Actually Includes
Decorative concrete is sold in tiers. Contractors use roughly the same three everywhere even when they name them differently, and knowing which tier a bid is quoting is the fastest way to see why one number is lower.
| Finish level | What you get | Relative position |
|---|---|---|
| Basic stamped | One pattern, one integral or cast on color, standard release agent, machine cut control joints, one coat of sealer | Cheapest stamped option |
| Mid range stamped | Field pattern plus a contrasting border band, two colors, antiquing release, hand tooled edges, two coats of sealer | The tier most homeowners land in |
| High end stamped | Multiple patterns, three or more colors, hand applied accent staining, saw cut joints hidden in the pattern lines, custom border and inlay | The priciest of the three by a wide margin |
| Stampable overlay | Resurfacing a sound existing slab, no demolition, no new base | Cheaper than tear out and repour |
| Plain broom finish | Gray concrete, broom texture, no color, no stamping | The baseline every stamped tier is measured against |
The jump from basic to mid range buys the most visible difference, because a border band is what makes stamped work read as intentional rather than as concrete imitating stone. The jump from mid range to high end buys detail that mostly reads up close.
Watch the overlay row. If your existing walk is structurally sound and just tired, a stampable overlay skips demolition, hauling and base work entirely. It is not an option over a slab that is cracked, heaved or spalling, because the overlay telegraphs every flaw underneath within about two winters and you will have paid for a finish that failed on someone else's slab.
Where the Work Goes: Labor Against Materials
This is the split that surprises people. On a stamped walkway the material is the minority of the number and skilled labor is the majority. Stamping is a race against the concrete setting, so it takes a bigger crew than a plain pour and every crew member is on the clock during the same short window.
Here is what actually appears on a properly itemized proposal for a small front walk.
| Line item | What it covers | Where it varies |
|---|---|---|
| Ready mix delivered | Yardage at the specified strength, plus the short load fee any small order carries | Distance from the plant, strength specified, admixtures for hot or cold weather |
| Aggregate base delivered | Crushed stone or road base, placed and compacted in lifts | Frost depth, subgrade condition, haul distance |
| Color | Integral pigment batched at the plant, or cast on color hardener applied at the surface | Pigment loading, number of colors, hardener adds labor but a denser surface |
| Forming | Lumber, stakes, fasteners, and the labor to set and strip | Curves need flexible forms and far more stakes per foot |
| Reinforcement | Fiber in the mix, welded wire, or rebar on a grid | Fiber is the cheapest, rebar the priciest, and traffic load decides which |
| Placement and stamping | Screed, float, color, stamp, detail, tool the edges | Crew size, pattern complexity, weather on the day |
| Joint cutting | Machine cut or saw cut control joints | Saw cuts hidden inside pattern lines cost more than obvious straight cuts |
| Sealer | First application, one or two coats | Coat count and sealer chemistry |
| Cleanup and restoration | Wash off, haul away, regrade and seed the edges | Site size and how much lawn the crew crossed |
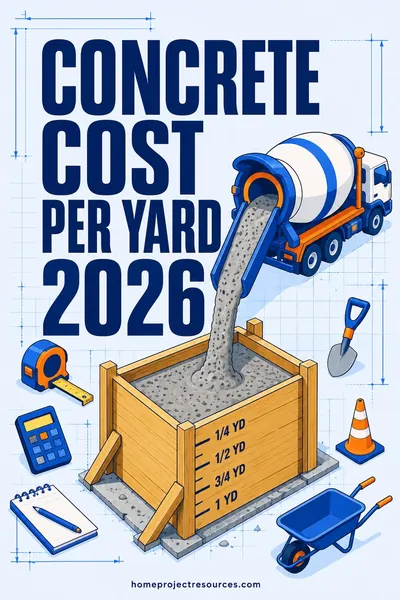
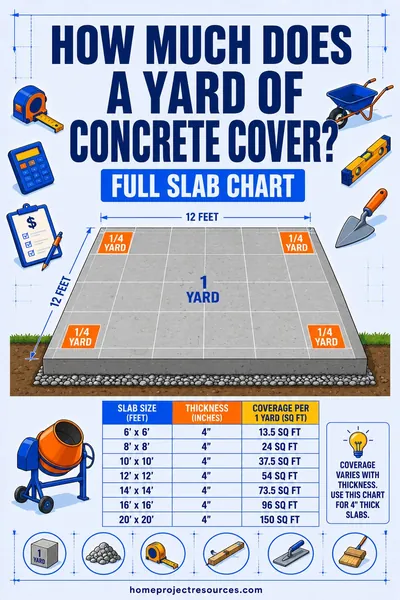
If a proposal shows material as more than half the total, ask what is in it. Either the contractor has bundled labor into a combined line, or something you did not ask for got specified. For a closer look at the ready mix line itself, including how short loads are handled, see our concrete cost per yard breakdown and how much a yard of concrete covers.
The Yardage Math, Done for You
Two quantities matter, and both come from the same area figure. Get them yourself and you can sanity check any proposal in about two minutes.
- Concrete is ordered in cubic yards. Area in square feet times thickness in feet, divided by 27.
- Aggregate base uses the same formula at the base depth, and crushed stone runs about 1.50 tons per cubic yard if the supplier sells by weight.
Worked example: a 4 ft by 30 ft front walk
A homeowner is replacing a cracked three foot broom finish walk from the driveway to the porch. The new walk is four feet wide and thirty feet long, four inches thick, over four inches of compacted stone, with an ashlar slate pattern and a contrasting border band.
Step 1: area. 4 x 30 = 120 square feet.
Step 2: slab volume. 4 inches is 4 / 12 = 0.333 feet. 120 x 0.333 = 40 cubic feet. 40 / 27 = 1.48 cubic yards.
Step 3: what to order. Round up to 2 yards. You never order the exact figure, and running short on a stamped pour is not a delay, it is a ruined job. The slab is setting while you wait for a second truck and the cold joint will show through the pattern forever.
Step 4: base volume. Same math at 4 inches of stone gives another 1.5 cubic yards, which is roughly 2.2 tons if it is sold by weight. Add about ten percent for compaction and the uneven bottom of an excavation.
Step 5: check the proposal. If a bid on this walk specifies two inches of base and a three inch slab, that is roughly half the stone and three quarters of the concrete. That is not a better price on the same walkway. It is a thinner walkway.
If your path curves or tapers, our square footage calculator will handle the geometry so you are not estimating area by eye.
Base, Drainage and Reinforcement
Almost every stamped walkway that fails, fails from below.
- Base depth. Four to six inches of compacted stone is standard for foot traffic. Deep frost regions go deeper so the walk moves as one piece through the freeze and thaw cycle. Soft or clay subgrade means more stone, geotextile fabric, or both.
- Compaction in lifts. Dumping the full base depth and rolling the top does not compact the bottom. Ask about lift thickness, not just total depth.
- Slab thickness. Four inches is standard for a walk that carries people. Go to five or six inches where the walk crosses a driveway apron or where a trailer wheel will ever touch it. A thicker slab needs no extra stamping labor, so the upgrade costs only the added concrete.
- Reinforcement. Fiber in the mix plus correct joint spacing is usually enough for a pedestrian walk. Welded wire sits in the middle. Rebar on a grid is what you want where vehicles cross.
- Control joints. Every slab shrinks and eventually cracks. Joints spaced at roughly 24 to 30 times the slab thickness give the crack a place to go, which is 8 to 10 feet on a four inch slab. On stamped work a good installer hides those joints inside the pattern lines. Ask to see photographs of joint placement on their previous stamped jobs.
- Drainage and pitch. Around a quarter inch of fall per foot sheds water. Pitch away from the foundation, never toward it. A walk that has to move water away from the house may need a small drain line, and that is real scope that belongs on the proposal in writing.
Regional and Seasonal Differences
Concrete is heavy, it cannot travel far, and its price tracks the local ready mix plant and the local labor market more than any national figure. Two things drive the regional spread.
Frost depth is the biggest technical driver. A walkway in a hard freeze climate gets a thicker compacted base and often a higher strength mix with air entrainment, so the same drawing is a different build in Minnesota than in Florida.
Labor market and access friction drive the rest. Dense urban work means tight access, parking restrictions, permit friction and higher trade rates. Rural work means the truck travels farther, short load charges bite harder, and fewer crews compete for the job.
Season matters too. Concrete placed in extreme heat sets faster, which shortens the stamping window and often means a larger crew or admixtures. Cold weather placement brings blankets, heated water or accelerators. Most decorative crews book their calendars solid in the shoulder seasons, so the flexible homeowner has more leverage than the one who needs it done next week.
DIY Against Hiring a Pro
Stamped concrete is the one decorative concrete finish we steer most homeowners away from doing themselves, and the reason is not skill in the abstract. It is the clock.
Once the truck discharges you have a window of roughly forty five to ninety minutes to place, screed, float, color and stamp before the surface is too stiff to take an impression. Heat and wind shrink that window fast. A three person crew that has done it hundreds of times moves through it calmly. Two people doing it for the first time run out of time on the last stretch, and the last stretch is the part visible from the street. There is no second attempt.
| Approach | What you take on | Risk |
|---|---|---|
| Full DIY stamped | Base, forms, pour, color, stamping, joints, sealer, plus stamp mat rental | High. One pour, one shot at the timing, no do overs |
| DIY base, pro pour and stamp | Excavation, stone, compaction, then the crew does the concrete day | Moderate. Get the base specification from the contractor in writing first |
| Full pro install | Nothing but selection and site access | Low. Workmanship warranty, usually one to two years |
| DIY stampable overlay | Surface prep and overlay on a sound existing slab | Moderate. Forgiving on timing, but only over a slab that is not moving |
Where DIY genuinely pays is everything before and after the pour: demolition, hauling old concrete to a recycler, excavation, spreading and compacting base, and resealing later. None of it is time critical, all of it is heavy, and taking it on removes real labor hours and disposal loads from the proposal. Tell the contractor up front so the scope is written that way from the start rather than credited back later.
If you want a decorative surface you can genuinely install yourself, pavers are the better route because they forgive. You can set one, step back, look at it, and pick it up again.
Permits, Codes and the Rules That Catch People
Most residential walkways on private property need no building permit. The exceptions are worth checking before you sign.
- Work in the public right of way. The strip between the sidewalk and the curb usually belongs to the city. A walk or apron crossing it typically needs a right of way or encroachment permit, and some cities require a licensed, bonded contractor to do the work at all.
- Replacing a public sidewalk section. Many cities require the replacement to match the standard municipal specification, which can mean you are not allowed to stamp it.
- Impervious surface limits. Some jurisdictions cap how much of a lot can be hard surface for stormwater reasons. A wide new walk on a lot already near the cap can trigger a review or a requirement for permeable material.
- Accessibility. If the walk is a required accessible route, slope and cross slope limits apply and a heavily textured pattern may not be permitted.
- HOA architectural review. Not a code issue, but the one that most often forces a redo. Get the pattern and the color approved in writing before the forms go in.
Ask your contractor to confirm which permits apply and to name who is pulling them. A contractor who will not pull a permit that clearly applies is telling you how the rest of the job will go.
What Belongs in the Scope of Work
Do not accept a one line proposal. Ask for these written out, and give every bidder the identical list so the comparison means something.
- Measured area in square feet, with a sketch and dimensions.
- Demolition and disposal. What comes out, how thick, how many loads, and where it goes.
- Subgrade preparation. Compaction method, any undercut, any geotextile fabric.
- Base material. Type of stone, compacted depth, number of lifts.
- Concrete. Strength, slab thickness, air entrainment if the climate needs it, and the yardage they expect to place.
- Reinforcement. Fiber, wire or rebar, and the spacing.
- Finish. Pattern name, color count, how color is applied, release agent, border detail, edge tooling.
- Joints. Machine cut or saw cut, spacing, and how they are concealed in the pattern.
- Grading. Finished pitch and the direction water leaves.
- Sealer. Product type, number of coats, and when it goes on.
- Access plan. Chute, wheelbarrow or pump, and lawn protection.
- Schedule and warranty. Start window, weather policy, and specifically whether cracking and settling are covered or excluded.
Items 4, 5 and 6 are the ones you can verify with the math above. If the yardage on the proposal does not match the thickness on the proposal, ask which one is wrong.
Questions to Ask Each Bidder
- What slab thickness and what base depth, and is that base compacted in lifts?
- How many yards of concrete, at what strength?
- Is the color integral, cast on, or both?
- How many colors am I paying for, and where does each one appear?
- Where do the control joints fall, and how are they hidden in the pattern?
- How does the concrete reach the forms on this site?
- What is your plan if the day turns hot or windy?
- When does the sealer go on, and how many coats?
- What exactly is excluded from this proposal?
- Can I see a walk you stamped at least five years ago, not just last month?
That last question is the one that separates installers. Fresh stamped work all looks good. Five year old stamped work shows you how their joints, their color and their sealer schedule actually held up.
Our contractor red flags page has the verification steps, and how to get contractor bids has wording that produces genuinely matched quotes.
What Makes a Number Move After Work Starts
- Soft subgrade found during excavation, which means undercut, haul off and extra stone.
- A second slab or an old brick walk discovered underneath.
- Tree roots that have to be cut back, plus the voids they leave.
- A drainage problem that only shows itself once the site is stripped and it rains.
- A utility line sitting shallow in the excavation path.
- A municipal specification at the sidewalk that is stricter than the bidder assumed.
Raising each of these before the contract is signed turns most of them from a surprise into a written line item.
Living With a Stamped Walk
Sealer is what gives stamped work its depth of color and its wet look, and it is also what protects the surface color from foot wear. Plan on resealing every two to three years in most climates, and closer to every two in full sun or heavy freeze and thaw. It is a straightforward homeowner job, similar in method to sealing a driveway, and doing it yourself is the single biggest ongoing saving available on a stamped surface.
Beyond that: keep de icing salt off it, especially in the first winter, since salt attacks the surface paste that carries your color. Shovel with a plastic edge rather than steel. Keep the soil at the edges built up so the slab is supported. And accept the trade you made. A slab cracks eventually, and repairs on stamped work are effectively impossible to color match, which is the honest argument for pavers over concrete on ground that moves.
Frequently Asked Questions
What determines stamped concrete walkway cost per square foot?
Area, edge length, base depth, slab thickness, color count and site access, in roughly that order. Small paths price higher per square foot than long ones because forming, mobilization and cleanup barely shrink with the job, and most decorative crews hold a minimum that a very short walk will trip. That is why comparing per square foot figures between two different walkways tells you almost nothing.
Is stamped concrete cheaper than pavers?
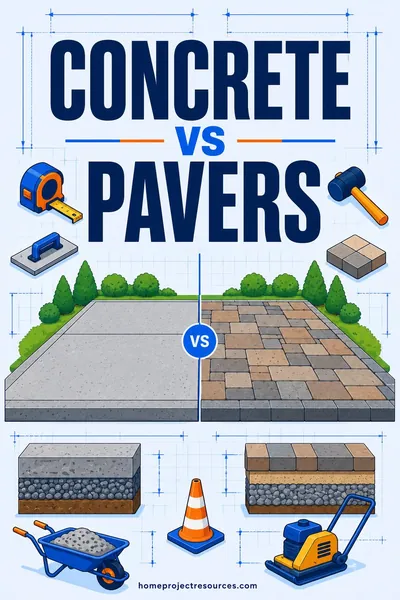
Usually a little, though on a small walkway the two land close enough that the decision should come down to soil and maintenance rather than price. Pavers pull ahead on ground that moves, because each unit moves independently and any one of them can be lifted and reset. Stamped concrete pulls ahead on snow removal and on having no joints to weed.
How thick should a stamped concrete walkway be?
Four inches over four to six inches of compacted stone is standard for a walk that only carries foot traffic. Go to five or six inches where a vehicle or trailer crosses, such as where the walk meets a driveway. Thicker slabs take no more stamping labor, so the upgrade costs only the extra concrete, which makes it one of the better value decisions on the whole job.
Does a stamped concrete walkway crack?
Yes. Every concrete slab shrinks as it cures and cracks somewhere eventually. Control joints spaced at about 24 to 30 times the slab thickness, so 8 to 10 feet on a four inch slab, give the crack a place to go where you will not notice it. Ask a bidder to show you how they conceal joints inside pattern lines before you hire them.
How often does stamped concrete need to be resealed?
Every two to three years in most climates, and closer to every two years in full sun or heavy freeze and thaw. Watch the surface rather than the calendar. When the wet look flattens and the color starts looking dusty, it is time. Sealing is a reasonable DIY job and the savings compound over the life of the walk.
Can you stamp over an existing concrete walkway?
Yes, using a stampable overlay, but only if the slab underneath is structurally sound. It must be free of heaving, active cracking and spalling, and it has to drain. Any movement in the old slab will crack the overlay, usually within a year or two, so get an honest read on the existing slab first. When it works, skipping demolition, hauling and base makes it the cheapest route to a decorative surface.
How long before you can walk on a new stamped concrete walkway?
Typically after 24 to 48 hours, but the sealer usually goes on 7 to 28 days after the pour once the slab has dried enough to accept it, so plan on the walk being partly off limits for a couple of weeks. Concrete reaches most of its design strength at 28 days. Keep vehicles off for at least a week, longer in cold weather.
What is the cheapest way to get a decorative walkway?
A stampable overlay on a sound existing slab, or hiring out only the pour and the stamping while you handle demolition, excavation and base yourself. Both remove whole categories of labor without touching the finish you actually see. The cheapest decorative option overall is a dry laid paver walk you install yourself, which spreads the work over as many weekends as you need.
Related Reading
- Concrete Calculator - yardage for your exact walkway dimensions
- Concrete vs Pavers - the full comparison, including where stamped work is a poor fit
- Concrete Cost Per Yard - what the ready mix line on your proposal should look like
- Paver Driveway Cost - the DIY friendly decorative alternative
- Square Footage Calculator - area for curved and tapering paths