How to Build a Deck

A deck is structural, life-safety construction, not a woodworking project. It holds a crowd of people several feet in the air, and when one fails it usually fails all at once with everybody standing on it. So the honest first answer to "how to build a deck" is: pull the permit, follow the footing and framing inspections, and get the ledger connection right, because improper ledger attachment is the leading cause of deck collapse in the United States.
The build sequence itself is straightforward: permit, layout, footings below the frost line, posts, beams, ledger, joists, decking, then stairs and guardrails. The parts that hurt people are all connections, and every one of them is inspectable before it gets covered up. That's the entire reason the inspection process exists.
Size the structure before you buy anything. Our free deck calculator gives you joist counts, board counts, footing counts, and fastener quantities from your dimensions.
Updated August 2026
A note on numbers. This page gives you spans, footing depths, fastener specs, code requirements and the line items that belong on a written deck bid, not dollar figures. Framing lumber moves with the commodity market, and footings, access and permits are priced locally. Build the scope here, then get three matched bids against it.
Permits and inspections come first
Most US jurisdictions require a permit for any deck attached to a house, and for freestanding decks above a set height, commonly 30 inches. The permit is not a formality and it is not a tax.
Expect two inspections at minimum:
- The footing inspection, with the holes dug and open, before any concrete goes in. The inspector is checking depth, diameter, and that you're bearing on undisturbed soil.
- The framing inspection, after the frame is complete but before the decking covers it. The inspector is checking the ledger bolts, the flashing, the joist hangers, the post-to-beam connections, and the hardware.
Both of those stops exist because once the deck boards go down, nobody can see the parts that carry the load. The inspection is the only outside check on the connections that keep the deck attached to the house.
Skipping the permit costs you later. Unpermitted structures show up in disclosure at resale, buyers' agents ask about them, some lenders and insurers care, and in the worst case a municipality can require you to open finished work or remove the deck outright. Permit fees vary widely by jurisdiction and often scale with project value, but they are a small fraction of the deck and trivial next to the cost of opening finished work later.
If a contractor offers to build without pulling a permit to save you the fee, that tells you something about the contractor, not about the fee.
Bring a drawn plan when you apply: dimensions, height above grade, footing size and depth, joist size and spacing, beam size, post size, and guardrail and stair details. Many building departments publish a prescriptive deck guide based on the IRC that you can build straight from, and using it makes approval much faster.
The ledger board: the one detail that kills people
The ledger is the board that bolts the deck frame to the house. On an attached deck it carries roughly half the entire deck load into the house framing.
Decks almost never fail by snapping a joist. They fail by peeling off the house, and it usually happens when a crowd gathers on them at once. There are two failure modes and both are preventable in an afternoon.
Failure mode 1: the wrong fasteners
Never nail a ledger. Nails have almost no withdrawal resistance, and withdrawal is exactly the load a ledger sees when the deck tries to pull away from the house. Deck screws are equally wrong; they are not structural fasteners and they snap in shear.
A ledger gets structural lag screws or through-bolts, in a staggered two-row pattern, with washers.
- Through-bolts (a bolt all the way through the rim joist with a washer and nut on the inside) are the stronger and more reliable option when you can access the inside of the rim.
- Structural lag screws or approved structural wood screws are the alternative when you can't get behind the rim.
Spacing depends on the joist span the ledger is carrying. The IRC publishes a table (R507.9.1.3 in recent editions) that ties fastener spacing to joist span, and the numbers commonly land somewhere between about 16 and 30 inches on center, tightening as spans get longer. Do not guess at this. Look up the row for your joist span in the table your jurisdiction has adopted, or take the spacing your building department's deck guide gives you.
The pattern rules that go with it:
- Stagger the rows. Upper and lower row fasteners offset from each other, not stacked in a vertical line, so you're not splitting the rim joist along a single grain line.
- Respect edge and end distances. Typically about 2 inches from the ends of the ledger, and specified distances from the top and bottom edges of both the ledger and the rim joist.
- Bolt into solid framing. The ledger must land on the house's rim joist or a properly blocked wall, not into sheathing, not into brick veneer, and not into a cantilevered floor overhang.
Lateral load connection. Recent codes also require a lateral load device, typically a pair of hold-down tension devices tying deck joists back to the house floor framing. Ask your building department what they enforce.
Failure mode 2: water behind the ledger
This is the quieter killer. The bolts stay fine; the wood they're bolted into turns to compost.
Water runs down the house wall, gets behind the ledger, and sits there because there's nowhere for it to go. Over a few years the rim joist rots out, and one day the fasteners pull through wood that no longer has any strength.
The fix is flashing, and it's a layered assembly, not a single piece:
- Remove the siding where the ledger will sit so you're on the sheathing and the house's water-resistive barrier.
- Run a self-adhering flexible flashing membrane over the sheathing behind the ledger location.
- Install the ledger.
- Install a metal Z-flashing or cap flashing over the top edge of the ledger, tucked up behind the house's weather barrier and siding, lapping down over the face of the ledger.
- Use stainless or heavy hot-dip galvanized flashing. Aluminum flashing corrodes in contact with modern treated lumber.
Many builders also set the ledger on stacked washers or a proprietary spacer to leave a small drainage gap behind it, so any water that gets in can drain out and the back of the ledger can dry.
When you read a contractor's bid, look for the words "ledger flashing" and a fastener spec. A good builder answers how the ledger attaches in one sentence. A vague answer is your signal. A ledger done right is a rounding error against the deck as a whole, and there is no version of this project where economizing on that connection is a good trade.
The freestanding alternative
If any of that makes you uneasy, build the deck freestanding. Add a second beam line along the house side sitting on its own footings, and skip the ledger entirely. You pay for two or three more footings and you eliminate the single most dangerous detail on the whole structure. For a ground-level DIY deck this is often the smarter call.
Footings, posts, and beams
Footings below the frost line
Deck footings follow the same logic as fence posts, only the consequences of getting it wrong are far more expensive. Water in soil expands when it freezes, and a footing sitting inside the freezing layer gets gripped and lifted. It doesn't settle all the way back, so it ratchets upward a little every winter until the deck is visibly out of level and the ledger connection is being pried.
The bottom of the footing goes below the local frost line. That figure is a code number your building department publishes, not a weather fact, and it varies over short distances. Typical enforced depths run from effectively zero along the Gulf Coast to 42 to 60 inches in the upper Midwest and northern New England. Call and ask. Our guide to fence post depth has a region-by-region table and explains the frost heave mechanism in more detail.
Footing diameter is set by the load each post carries and by your soil bearing capacity. Prescriptive deck guides give you a footing size table based on the tributary area each post supports. Common residential deck footings run 12 to 24 inches in diameter.
Two more rules:
- Bear on undisturbed soil. Digging past your depth and backfilling is worse than not digging deep enough.
- Get the post off the concrete. Set a galvanized post base anchor in the wet concrete so the post sits above grade on metal, not buried in the footing. A post embedded in concrete sits in a sealed cup and rots at the bottom. Post base anchors also give you an inspectable, rated connection.
Footings are priced each, and what moves the number is diameter, depth to frost, soil type, whether they are hand dug or augered, and site access. If you're doing it yourself, the concrete calculator handles the cylinder math for any hole size and post count.
Posts and beams
- Post size. 4x4 is common at low heights, but 6x6 is the better default and is required by many jurisdictions above a certain height. 6x6 also gives you room for proper beam connection hardware.
- Post-to-beam. The beam should bear on top of the post through a rated post cap connector, not be bolted to the side of the post through fasteners in shear. Notching a 6x6 to receive a beam is acceptable where the code and the connector detail allow, but "just bolt the beam to the side" is the connection that shows up in failure reports.
- Beam splices land over posts, never mid-span, and built-up beams get fastened together per the connector schedule.
- Bracing. Taller posts need knee bracing or a rated lateral system. Anything more than a few feet up should not rely on the decking alone to keep the frame from racking.
Joists: spans, spacing, and hangers
Span and spacing
Joist span is set by lumber species, joist size, and spacing. The approximate numbers below are for No. 2 southern pine at a 40 psf live load plus 10 psf dead load, which is the standard residential deck loading.
| Joist size | 12 in on center | 16 in on center | 24 in on center |
|---|---|---|---|
| 2x6 | about 10 ft | about 9 ft 11 in | about 7 ft 7 in |
| 2x8 | about 14 ft | about 13 ft | about 10 ft |
| 2x10 | about 18 ft | about 16 ft | about 12 ft 4 in |
| 2x12 | about 18 ft | about 18 ft | about 14 ft |
Treat these as planning numbers only. Hem-fir, spruce-pine-fir, and western species span noticeably less than southern pine at the same size, and your jurisdiction's adopted table is the one that governs. The controlling reference in most of the US is IRC Table R507.6 or the equivalent in your local deck guide. Look up your species.
Spacing rules of thumb:
- 16 inches on center is the general default for wood decking.
- 12 inches on center is required by many composite manufacturers, and by nearly all of them for a 45 degree diagonal board layout, because the diagonal increases the effective span between bearing points. Tightening to 12 inches adds roughly a third more joists, which is real lumber cost.
- Check the decking manufacturer's instructions before you frame. Discovering that your composite requires 12 inch spacing after the joists are up is an expensive discovery.
Cantilevers. A joist may overhang past its supporting beam, but the overhang is limited relative to the span behind it, commonly no more than one quarter of the backspan under the IRC. A 12-foot joist span allows about a 3-foot cantilever; an 8-foot span allows about 2 feet.
Joist hangers, done correctly
Joist hangers are where DIY decks fail inspection most often, and the mistakes are small and easy to avoid.
- Fill every hole. A hanger's rated capacity assumes every nail hole is filled. Half-filled hangers carry roughly half their rating.
- Use the specified fastener. Manufacturer structural connector nails, or the structural screws that manufacturer lists for that hanger. Deck screws and drywall screws are not acceptable in joist hangers. They're brittle in shear and they are not tested for it.
- Size the hanger to the joist. A 2x8 hanger on a 2x10 joist doesn't work, and neither does the reverse.
- The joist must bear fully in the seat. No gap at the bottom.
- Match the hardware finish to the lumber. More on this next.
Fasteners rated for treated lumber
Modern pressure-treated lumber uses copper-based preservatives (ACQ, copper azole, and similar). Copper is aggressive toward ordinary steel and toward aluminum, and standard electroplated zinc fasteners corrode fast in contact with it. This is not a slow, cosmetic process; connectors have failed in a few years.
What to use:
- Hot-dip galvanized fasteners meeting ASTM A153, and connectors with a G185 (or heavier) hot-dip galvanized coating for general use.
- Stainless steel near saltwater, in high-humidity areas, and with some hardwood and cedar species that stain from galvanized runoff.
- Never electroplated or bright zinc fasteners, and never aluminum flashing or aluminum connectors in contact with treated lumber.
- Don't mix metals. Stainless screws in a galvanized hanger, or vice versa, sets up a galvanic couple.
Across a whole deck, the difference between the right hardware and the wrong hardware is a small fraction of one day's labor. It's the cheapest insurance on the job.
Decking, gaps, and hidden fasteners
Board direction and spacing. Boards run perpendicular to the joists. Straight boards need 16 inch joist spacing (or whatever the manufacturer specifies), diagonal boards need 12 inch.
Gaps for expansion and drainage:
- Wet, freshly treated lumber shrinks as it dries. Install those boards nearly tight, because they'll open up to a comfortable gap on their own within a few months.
- Kiln-dried or air-dried wood gets an installed gap, commonly around 1/8 inch, because it's already at or near its dry width.
- Composite and PVC expand and contract with temperature rather than moisture. Follow the manufacturer's gap spec exactly, which typically means a side gap of about 3/16 inch and an end gap that changes with the temperature on installation day. Installing PVC tight on a cold morning is how you get buckled boards in July.
Fastening options:
- Face screws are cheapest, fastest, and easiest to service. Two per joist per board. Predrill near board ends to prevent splitting. Priced by the square foot, and this is the cheapest option on the list.
- Hidden fastener clips ride in a groove in the board edge and leave a clean top surface. They cost roughly two to four times as much per square foot as face screws and add roughly 20 to 40 percent to the decking install time.
- Tropical hardwood requires predrilling every single hole, which is why ipe labor runs high.
Picture-frame borders look great and add cuts, waste, and blocking under every border seam. Budget the extra framing.
Guardrails and stairs
This is where a deck stops being carpentry and becomes life safety.
Guardrails
- Required when the walking surface is more than 30 inches above grade in most jurisdictions.
- Minimum height 36 inches for residential decks in most of the US. Some jurisdictions require 42.
- Baluster spacing must not allow a 4-inch sphere to pass anywhere in the guard. On stairs, the triangular opening formed by the tread, riser, and bottom rail uses a 6-inch sphere, while the rest of the stair guard uses 4 3/8 inches.
- Guards are commonly required to resist a 200 pound concentrated load applied in any direction at the top rail. This is the requirement that most homeowner-built railings fail. A 4x4 post notched down and lag-bolted to the outside of a rim joist is one of the classic non-compliant details, because the notch removes most of the post's section right where the bending moment is highest.
The compliant approach is a full-section post bolted through the rim with a rated hold-down tension device, blocking behind the rim to prevent it from rolling, and through-bolts rather than lag screws. Manufacturers publish tested post-attachment details, and using one of those details is far easier than engineering your own.
Railing is also a large share of the budget, and it is priced by the linear foot installed. Pressure-treated is the cheapest by a wide margin. Composite is roughly double it, cable roughly triple, and glass panel is several times the cost of pressure-treated and the most expensive option in common use. On an elevated deck, railing commonly lands at 15 to 25 percent of the entire project cost, so the material you pick here moves the total more than the decking does. See deck cost for the full material and line item breakdown.
Stairs
Stairs are the other place inspectors find problems, and the rules are about consistency more than absolute dimensions.
- Maximum riser height about 7 3/4 inches, minimum tread depth about 10 inches, under the IRC. Local amendments vary.
- Riser heights must be consistent within a flight. The difference between the tallest and shortest riser typically cannot exceed 3/8 inch. Same for tread depth. This matters because people climb stairs by feel, and a single odd riser at the bottom is a genuine trip hazard.
- The bottom step lands on a solid pad, not on dirt that settles. A concrete pad or a compacted gravel landing keeps the bottom riser height from changing over time.
- Stringers need adequate remaining material after the notches are cut, and long runs need a center stringer or tighter stringer spacing.
- Handrails are required on stairs with four or more risers, mounted about 34 to 38 inches above the tread nosings, and they need a graspable profile. A 2x4 laid flat is not graspable.
- Stairs are expensive. They are priced per step, and each step is a tread, its riser framing, and its share of stringer, landing and rail, which is why a short flight costs far more than its square footage suggests.
How to build a deck yourself: the honest DIY verdict
A ground-level floating deck is a realistic, ambitious DIY project. If the walking surface stays under 30 inches:
- No guardrail is required, which removes the hardest engineering problem on the deck.
- Two or three steps instead of a full stair run.
- The load path is short and the posts are stubby.
- Building it freestanding removes the ledger entirely.
- The consequences of a framing mistake are a wobbly deck, not a fall.
Two motivated people with a circular saw, a drill, and a rented auger can build a 12x16 ground-level deck over three or four weekends. Doing the labor yourself typically saves 40 to 50 percent of the installed cost.
Anything elevated is different work. An 8-foot deck with stairs and guardrails is structural, life-safety construction. The ledger connection, the post-to-beam and post-to-footing connections, the guardrail post attachment, and the stair stringer layout all have code requirements and all have failure modes that hurt people. If you build it yourself anyway, pull the permit and take the inspections. The inspector is a free second set of eyes on exactly the connections that matter, and the permit is what protects you at resale.
There is no shame in framing it yourself and hiring out the ledger and the guardrails, or in hiring the whole thing and doing your own demolition. Tear-out is unskilled work billed at skilled rates.
Worked example: a 12x16 freestanding ground-level deck
192 square feet, 18 inches off grade, freestanding so there is no ledger, in a region with a 36-inch frost depth.
Structure plan. Two beams running the 16-foot direction, set 8 feet apart, with joists running the 12-foot direction: 8 feet spanning between the beams and a 2-foot cantilever past each beam. Two feet is exactly one quarter of the 8-foot backspan, so the cantilever is at its limit and legal.
Step 1: footings.
- 3 posts per beam at 8-foot spacing, 2 beams = 6 footings
- 12-inch diameter, 36 inches deep to get below frost
- Concrete per footing: a 12-inch cylinder 36 inches deep is about 2.36 cubic feet. At 0.60 cubic feet per 80 lb bag, that's 3.9 bags, so 4 bags each
- 6 x 4 = 24 bags of 80 lb mix
- Set a galvanized post base anchor in each while the concrete is wet
Step 2: posts and beams.
- 6 short 6x6 posts, cut to length after the concrete cures
- 2 beams, each a built-up double 2x10, 16 feet long, sitting in rated post caps
- Check your local beam span table for the 8-foot post spacing and the 12-foot tributary width before you commit to 2x10
Step 3: joists.
- 2x8 at 16 inches on center handles the 8-foot span with a lot of margin
- 16 feet at 16 inches on center = 12 spaces, so 13 joists, each 12 feet long
- Plus rim joists on all four sides
- Joist hangers where joists meet the rim, filled with structural connector nails
- Blocking at the beam lines to keep joists from rolling
Step 4: decking.
- 5/4 x 6 pressure-treated boards, actual width 5.5 inches, plus a 1/8 inch gap = 5.625 inches of coverage per board
- Deck depth is 12 feet = 144 inches. 144 / 5.625 = 25.6, so 26 boards, each 16 feet long
- Face screws, 2 per joist per board: 26 boards x 13 joists x 2 = 676 screws, so buy 800
Step 5: steps. 18 inches off grade at roughly 7 inch risers means 3 risers, on a compacted gravel or concrete landing pad. No guardrail required at 18 inches, and no handrail required at 3 risers in most jurisdictions.
Materials list. Take this to the yard and have them price it:
| Item | Quantity | What moves the number |
|---|---|---|
| 80 lb concrete mix | 24 bags | Bag count rises fast with footing diameter and frost depth |
| Post base anchors | 6 | Galvanized versus stainless, and post size |
| 6x6 posts | 6 short | Species and treatment grade, ground contact rating required |
| Beam lumber, 2x10 x 16 ft | 4 | Grade, treatment, and current lumber market |
| Joists, 2x8 x 12 ft | 13 | Grade and treatment, plus waste on odd lengths |
| Rim joists and blocking | How much blocking your span table calls for | |
| Joist hangers, post caps, connector nails | Coating grade, which is not optional near treated lumber | |
| 5/4 x 6 PT decking, 16 ft | 26 boards | The single biggest line. Composite multiplies it |
| Deck screws, hot-dip galvanized | 800 | Coating grade, and hidden clips cost several times more |
| Stair stringers, treads, landing pad | 3 risers | Riser count, landing type, whether a rail is required |
| Permit | 1 | Jurisdiction, and whether fees scale with project value |
The decking itself is the largest line by a wide margin, so the material you choose there decides the total more than anything else on the list. Concrete, hardware and fasteners together are usually the second biggest chunk, and every one of them is worth buying at the correct coating grade.
Add tool rental if you don't own the gear: a powered auger rents by the day, and digging 6 footings by hand in clay is a genuinely bad Saturday.
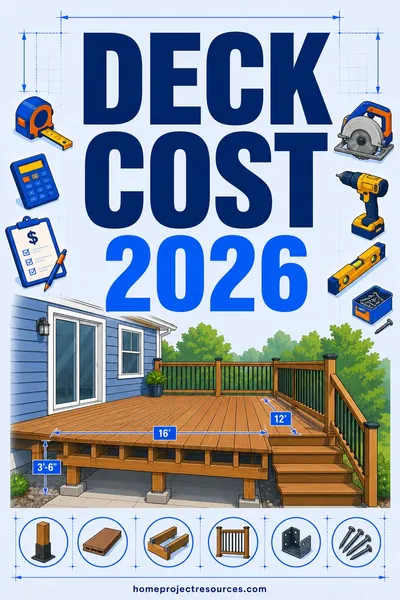
How that compares to hiring it out. A ground-level pressure-treated deck is priced by the square foot installed, and the labor half of that is where the 40 to 50 percent DIY saving comes from. Six things move an installed quote: height off the ground, footing depth and soil, whether stairs and railings are involved, decking material, site access for materials, and how much of the ledger area has to be opened up. To get a comparable set of bids, write one scope naming the dimensions, the decking product, the railing type, the number of steps and who pulls the permit, send that same page to three contractors, and ask each what the bid excludes. Full material and labor line items for every deck type are in deck cost.
Time: a weekend for layout and footings, a curing week, a weekend for framing and the framing inspection, and a weekend for decking and steps.
Frequently asked questions
Do I need a permit to build a deck?
In most US jurisdictions, yes, for any deck attached to the house and usually for freestanding decks above about 30 inches. Expect a footing inspection with the holes open before concrete, and a framing inspection before the decking covers the frame. Unpermitted decks create disclosure and financing problems at resale, so pull the permit even on a DIY build.
How is a deck ledger board supposed to be attached?
With structural lag screws or through-bolts in a staggered two-row pattern, never with nails or deck screws, and always over layered flashing so water can't sit behind it. Fastener spacing depends on the joist span the ledger carries, and the governing table is IRC R507.9.1.3 or your local equivalent. Improper ledger attachment is the leading cause of catastrophic deck collapse.
How far apart should deck joists be?
Sixteen inches on center is the general default for wood decking. Many composite decking products require 12 inches on center, and nearly all of them require 12 inches for a 45 degree diagonal board layout because the diagonal increases the effective span. Check your decking manufacturer's instructions before you frame, not after.
How deep do deck footings need to be?
Below your local frost line, which is a code number your building department publishes and which ranges from effectively nothing on the Gulf Coast to 42 to 60 inches in the upper Midwest and northern New England. Bear on undisturbed soil, and set a galvanized post base in the wet concrete so the post sits above grade instead of being buried.
When is a deck railing required?
Most jurisdictions require a guardrail once the walking surface is more than 30 inches above grade, at a minimum height of 36 inches, with openings that will not pass a 4-inch sphere. Guards commonly must resist a 200 pound concentrated load in any direction at the top rail, which is why railing post attachment needs a tested hold-down detail rather than a notched post and two lag screws.
What screws should I use with pressure-treated lumber?
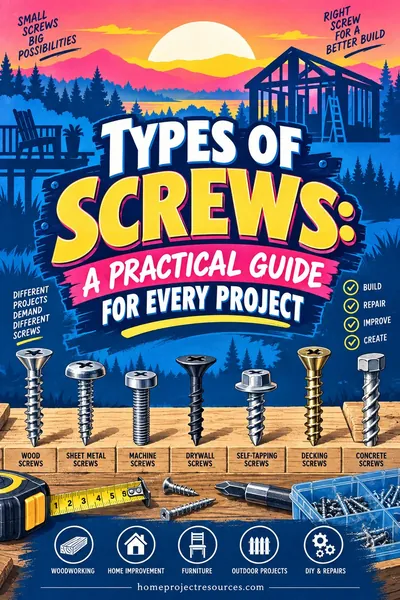
Hot-dip galvanized fasteners meeting ASTM A153, with G185 or heavier hot-dip galvanized connectors, or stainless steel near saltwater. The copper in modern treated lumber corrodes electroplated and bright zinc fasteners quickly, and it eats aluminum flashing and aluminum connectors. Don't mix metals either; stainless screws in galvanized hardware sets up a galvanic couple.
Can I build a deck by myself as a first-time project?
A ground-level freestanding deck under 30 inches is a realistic ambitious DIY project, because there's no ledger, no guardrail engineering, and only two or three steps. An elevated deck with stairs and guards is not a good first project. If you build elevated anyway, pull the permit so an inspector checks the ledger, the hangers, and the guard posts before they're covered.
How long does it take to build a 12x16 deck?
Two motivated people typically need three or four weekends for a ground-level 12x16, spread out to allow a week for the footings to cure and time for the footing and framing inspections. An elevated deck with a full stair run and guardrails takes considerably longer, since the railing and stairs alone can equal the framing in hours.
Related: Deck cost breaks down every line item, material, and the four-way price spread by height and decking type. Fence post depth explains frost heave and gives frost depths by region. The deck calculator sizes your frame, and the concrete calculator tells you how many bags your footings need.