DIY Halloween Yard Silhouettes: Plywood, Paint and Stakes

DIY Halloween yard silhouettes are the easiest big-impact decoration you can build: a flat shape cut from exterior plywood or corrugated plastic, painted flat black, braced against the wind, and lit from behind so it shows up as a crisp dark figure against a glowing wall. A witch crossing a moon, a black cat arching its back, or a hooded figure standing at the edge of the lawn reads clearly from the street, takes an afternoon with a jigsaw, and stores flat for years. The steps that decide whether a silhouette looks great or ends up face down in the grass are choosing the right sheet, sealing every edge before the first rain, and bracing a tall figure like the sail it is.
This guide covers picking a design that reads at a distance, plywood versus corrugated plastic, transferring a pattern by projector or grid, cutting and sanding, priming and painting for weather, bracing and staking, backlighting, and storage.
Updated September 2026
Building the braces and stakes? Our free board feet calculator turns your cut list of furring strips and 2x2 stakes into the board feet you need, so one trip to the lumber aisle covers every figure.
DIY Halloween yard silhouettes: picking a design that reads at night
A silhouette only has one job: be recognizable as a solid dark shape. Before you cut anything, test your design.
Choose profiles, not front views. A witch seen from the side has a hooked nose, a pointed hat brim, and a broom sticking out behind her. The same witch from the front is a triangle with a blob on top. Cats, crows, wolves howling, bats, hunched figures with lanterns, and a hand reaching out of the ground all read best in profile.
Do the black fill test. Print or sketch the design, color it in solid black, tape it to a wall, and look at it from across the room. If you cannot tell what it is in two seconds, it will not read from the sidewalk either. Exaggerate the features that make it recognizable: a longer nose, a taller hat, a fluffier tail, pointier ears.
Keep narrow parts wide enough to survive. Thin necks, wrists, broom handles, cat tails, and crow legs are where cutouts snap. On 1/2 inch plywood, keep any narrow section at least 2 inches wide. On corrugated plastic, keep it at least 3 inches wide, since the sheet is floppier. If a design needs a delicate part, connect it to something solid with a hidden bridge, such as a tail that touches the fence behind the cat.
Add a ground strip. Joining the feet of a figure, or a group of figures, with a strip of grass or ground along the bottom makes the whole cutout far stronger and gives you a solid place to attach stakes. It also hides the stakes.
Size for the viewing distance. Figures seen from a street 40 to 60 feet away need to be large to register. A standing figure of 5 to 6 feet reads as life size. A black cat around 2 to 3 feet tall reads clearly. Bats and crows under about 16 inches across disappear at night unless they are right next to the path.
Draw your own. Sketch original shapes or trace from photographs you took yourself. Tracing well-known movie or cartoon characters onto the front lawn is a common way to end up with a figure that looks off anyway.
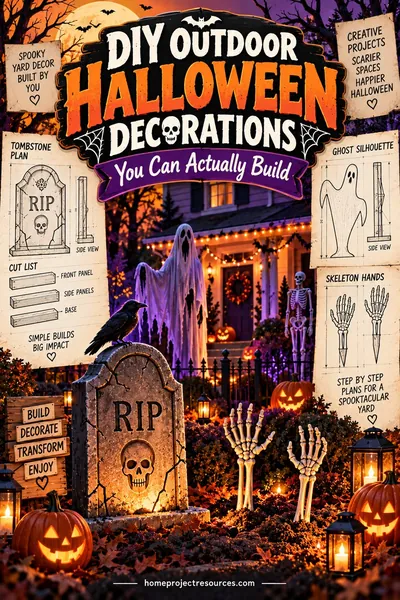
Plan a scene, not a lineup. Three figures that interact read better than six standing in a row: a witch stirring a cauldron while a cat watches, or a procession of hooded figures walking toward the porch. Silhouettes work well behind a graveyard fence, and the rest of that scene is covered in DIY outdoor Halloween decorations. A spider silhouette climbing toward a giant rope spider web on the porch ties two displays together.
Exterior plywood or corrugated plastic
| Material | Weight | Weather resistance | Cutting | Wind behavior | Lifespan | Best for |
|---|---|---|---|---|---|---|
| 1/2 inch exterior plywood | Heavy, a full sheet is a two-person carry | Very good once edges and faces are sealed | Jigsaw | Rigid, needs strong stakes | Many seasons | Tall figures, the main pieces of a scene |
| 3/4 inch exterior plywood | Very heavy | Very good once sealed | Jigsaw, slower | Rigid, heavy to stake | Many seasons | Freestanding figures that must not flex |
| 1/4 inch exterior plywood | Light | Fair, can warp | Jigsaw, fast | Flexes, needs a backing frame | A few seasons | Small figures mounted on a fence or wall |
| Medium density overlay plywood | Heavy | Excellent, smooth resin face made for signs | Jigsaw | Rigid | Many seasons | The smoothest painted finish |
| Corrugated plastic sheet, 4 mm | Very light | Waterproof, never rots | Utility knife | Flutters and bends without stiffeners | Several seasons, fades in sun | Small and medium figures, renters |
| Corrugated plastic sheet, 10 mm | Light | Waterproof | Utility knife or jigsaw | Much stiffer | Several seasons | Larger figures that still need to be light |
| Interior plywood or thin paneling | Varies | Poor, glue lines fail when wet | Jigsaw | Delaminates and curls | One wet season | Avoid outdoors |
For most people, 1/2 inch exterior plywood is the right choice. It is stiff enough that a 6 foot figure does not wobble, light enough to carry one figure at a time, and it holds paint for years. Choose a grade with at least one smooth, sanded face with few patches, since that face becomes the front. Medium density overlay plywood is the premium version, with a paper and resin face that paints like glass.
Corrugated plastic is the lightweight option. It cuts with a knife, never rots, and is easy to store. The flutes, the little channels inside the sheet, run in one direction. The sheet is stiff along the flutes and floppy across them, so orient tall figures with the flutes running vertically. Plastic also comes in black, which can skip painting altogether.
Avoid interior sheet goods outdoors. Interior plywood and thin decorative panels use glues that let go when wet. They look fine for a week, then the face veneer bubbles and peels.
Transferring the pattern
The projector method
A projector is the fastest way to trace a detailed figure at full size.
- Prime the sheet first. Pencil and marker show far better on white primer, and priming before cutting saves time later.
- Stand the sheet against a wall in a dark garage or room, and secure it so it cannot tip.
- Set the projector straight on. Center the lens on the sheet and keep it level and square to the surface. A projector tilted up or aimed from the side stretches the image into a trapezoid, and your witch comes out with a giant head and tiny feet.
- Size the image with a tape measure. Move the projector back and forth until the figure measures the height you want on the sheet.
- Trace with a pencil, then go over the final line with a marker once you are happy. Mark any inside cutouts, such as eyes or the gap between an arm and body, with an X so they are not missed.
Nest several figures on one sheet before tracing to get the most out of it, and leave at least 1 inch between shapes for the saw.
The grid method
No projector? A grid scales any drawing accurately.
- Draw a grid on your printed design. On a design printed 10 inches tall, a grid of 1/2 inch squares gives 20 squares from top to bottom.
- Work out the scale. If the finished figure will be 60 inches tall, each of those 20 squares becomes 3 inches on the plywood.
- Draw the big grid on the primed sheet in light pencil, at 3 inch squares.
- Copy square by square. Look at where the outline crosses each small square and mark the same spot on the matching large square. Connect the marks with smooth curves.
The grid method is slower but has no distortion, and it is easy to stop and pick up again the next day.
A third option for simple shapes is to print the design in tiles across many letter-size pages, tape them together, rub pencil graphite over the back along the lines, and trace over the front so the graphite transfers to the sheet.
Power tool safety before you cut
A jigsaw is one of the safer saws to learn on, but a sheet of plywood on sawhorses invites a few specific mistakes. Follow these every time.
- Wear eye protection and hearing protection. Plywood throws chips, and the saw is loud for a long cutting session.
- Wear a dust mask for sanding. Plywood dust includes glue, and a well-fitting N95 style mask is the minimum for sanding edges.
- Never reach under the sheet while cutting. The blade sticks out below the plywood by an inch or more, and you cannot see it.
- Support both sides of the cut so the waste piece does not sag and pinch the blade, which makes the saw jump. Two long 2x4s across the sawhorses, one on each side of the cut line, do the job.
- Clamp the sheet so it cannot slide or lift.
- Keep the cord behind you and out of the cut path.
- Unplug the saw or remove the battery before changing a blade.
- Let the blade stop fully before lifting the saw out of a cut. A moving blade catching the edge on the way out can kick the saw back at you.
- Use a GFCI protected outlet when cutting outdoors, and keep children and pets out of the work area.
- Cut corrugated plastic with a sharp utility knife against a straightedge, always drawing the blade away from your body and your other hand.
Cutting the silhouette
Blade choice. For plywood silhouettes you want a clean-cutting wood blade of around 10 teeth per inch for the outline and a narrow scroll blade for tight curves. A reverse tooth or down-cut blade keeps the top face from splintering. If you only have a standard up-cutting blade, lay the sheet with the good face down and trace a mirror image on the back. Types of saws has the full comparison of blade styles and tooth counts.
Cut just outside the line. Stay about 1/16 inch to the waste side of the marker line. Sanding brings the edge back to the line, and a cut that wanders inside it cannot be fixed.
Make relief cuts on tight curves. Before cutting a sharp inside curve, such as the space under a hat brim, cut straight in from the edge to the line in a few places. Waste pieces fall away as you go, and the blade never has to twist in a tight bend.
Drill starter holes for inside cutouts. For eyes, a gap between an arm and a body, or a crescent moon cut from the middle of a sheet, drill a 3/8 inch hole inside the waste area, drop the blade in, and cut outward to the line.
Let the saw do the work. Push forward gently and steer. Forcing a jigsaw bends the blade, which leaves an edge that is square on top and angled on the bottom.
Corrugated plastic. Score along the line with a utility knife, then cut through with a second pass. Cutting along the flutes is easy. Cutting across them takes firmer pressure. A jigsaw with a fine blade handles tight curves in thicker plastic.
Sanding and sealing the edges
The edges of plywood are where weather gets in. Each layer of veneer exposes end grain that soaks up water like a straw, and a wet edge swells, splits, and peels paint within a season.
- Sand the edges with 80 grit to bring them to the line and remove saw marks, then 120 grit to smooth them. A sanding block or a sanding sponge follows curves well.
- Soften the corners. Round the sharp corner where the face meets the edge with a few light passes. Paint pulls away from a sharp corner and stays on a rounded one.
- Fill the voids. Plywood edges often show small gaps where an inner layer has a knot or a missing piece. Press exterior wood filler into them, let it dry, and sand flush.
- Wipe off the dust with a dry cloth before priming.
Priming and painting for weather
Prime everything, including the back and every edge. Painting only the front lets the unpainted back take on moisture while the front stays dry, and the sheet cups and warps. Use an exterior primer. A stain-blocking exterior primer seals plywood grain and knots best. Give the edges two coats.
Paint with exterior paint in a flat sheen. Flat black is the classic silhouette color because it does not reflect light, so the figure stays a clean shape against the glow behind it. Glossy black catches porch lights and street lights and shows every bump in the grain. Use a small foam roller on the faces and a brush on the edges, and apply two coats.
Paint the back too. The back does not need to be pretty, but it does need to be sealed. One coat of any exterior paint over primer is enough.
Mind the weather on the label. Latex paint needs dry weather and temperatures above the minimum on the can, which is often around 50 degrees Fahrenheit. Let the final coat dry overnight before handling and give it a couple of dry days before it faces rain.
Adding detail. A silhouette can carry a small amount of color and still read well: glowing yellow eyes on a black cat, an orange lantern in a hooded figure's hand. Use fluorescent paint for details you will light with a black light.
Corrugated plastic. If you are not using black sheets, scuff the surface lightly with a fine abrasive pad, wipe it with rubbing alcohol, and apply a primer made for plastic before the topcoat. Regular primer peels off plastic.
Bracing and staking tall figures against wind
A flat figure standing in the yard is a sail. Wind pressure rises with the square of wind speed, so a gust twice as fast pushes about four times as hard.
| Wind | Rough push on each square foot of a flat figure | On a figure with 12 square feet of solid area |
|---|---|---|
| Light breeze, 15 mph | Under 1 pound | About 8 pounds |
| Fresh breeze, 25 mph | About 2 pounds | About 23 pounds |
| Strong gusts, 35 mph | About 4 pounds | About 45 pounds |
| Stormy gusts, 45 mph | About 6 pounds | About 75 pounds |
That push acts around the middle of the figure, several feet off the ground, which is why a tall cutout on a short stake leans a little more every windy night until it falls. Measure solid area by the plywood itself, not the rectangle around it. A 4 by 5 foot witch outline may only be 11 or 12 square feet of actual plywood.
Stiffen the back with cleats
Screw furring strips, such as 1x3s, to the back of any figure taller than about 3 feet. Run one or two vertical cleats from near the top down to the ground strip, and add a horizontal cleat across the widest part. The cleats stop the sheet from flexing and give the stakes and braces something solid to fasten to.
Attach the cleats with exterior construction adhesive and 1-1/4 inch exterior screws driven from the front through 1/2 inch plywood into the 3/4 inch thick cleat. Set the screw heads slightly below the surface, fill over them, and touch up with black paint. At night they are invisible.
Choose a staking method
| Method | How it works | Best for |
|---|---|---|
| Wood leg stakes | Pointed 2x2 legs screwed to the back cleats, driven about 18 inches into the ground | Figures up to about 4 feet in soft soil |
| Rear kickstand brace | A 1x3 brace hinged or screwed to the horizontal cleat, angled back to its own short 2x2 stake | Every figure over 4 feet, in addition to legs |
| Metal sign post sleeves | Pipe straps on the back cleat slide over a steel post or conduit driven into the ground | Heavy figures, rocky or hard soil, easy seasonal setup |
| Wire stakes in the flutes | Heavy steel wire or rod pushed into the vertical flutes of corrugated plastic and into the ground | Light plastic figures |
| Fence or porch mount | Screws or clamps through the cleats to a fence rail or porch post | Figures that can lean on something solid |
The kickstand is what keeps tall figures up. Leg stakes resist the figure sliding and rocking. A brace running from about two thirds of the way up the back down to a stake 2 to 3 feet behind the figure forms a triangle, and a triangle does not fold. On a very exposed lawn, add a brace on each side.
Check under the lawn before driving stakes. Irrigation lines and buried pet fence wires are often only a few inches down. Mark them before you drive anything, and call your local underground utility locating service before driving long posts.
Watch the forecast. When gusts are forecast well above a fresh breeze, lay tall figures face down on the lawn for the night. Taking them down for a storm is faster than repairing a snapped figure or a dented car.
Backlighting so they read at night
A black silhouette in a dark yard is invisible. The trick is to light what is behind the figure, not the figure itself.
Light a wall behind the figure. Stand the figure 2 to 4 feet in front of a light-colored house wall, garage door, or fence, and place a flood light on the ground between the figure and the wall, aimed up at the wall. The wall glows and the figure becomes a sharp black shape in front of it. Hide the light directly behind the figure so nobody on the street sees the fixture. Orange, purple, or green light on a pale wall looks dramatic.
Build a moon. On a dark house, a large pale disk makes the glowing background. Cut a circle 4 to 5 feet across from plywood or corrugated plastic, paint it pale yellow or white, and stake it a few feet behind the figure. A flood hidden low in front of the moon, or behind the figure and aimed at the moon, lights the disk. A witch on a broom in front of a glowing moon is the classic Halloween image for a reason.
Add a halo. Stick a flexible LED strip light around the back of the figure, set about 1 inch in from the edge, and stand the figure 6 to 12 inches from a wall or fence. The light spills out around the outline and draws a glowing rim around the shape.
Use LED lights only. Halogen and incandescent flood lights get hot enough to scorch paint and char plywood when they sit close to it. LED floods and strips stay cool. Battery or solar lights avoid cords entirely for figures far from an outlet.
Put everything on a timer. Outdoor lighting needs a GFCI outlet and a timer, and the plug and cord planning in how to hang Christmas lights on a house applies in October as well.
Add low fog at their feet. Ground fog drifting past the base of a lit figure hides the stakes and the ground strip, which is the one part of a silhouette that gives the trick away up close. Our guide to how to make a fog machine for Halloween covers the chiller that keeps fog that low.
Walk to the street and look. Check each figure from where visitors will see it. Move lights until no hot spot of bare bulb is visible and the outline is clean on every side.
Worked example: a witch, a reaper, and a cat
Three figures for a front lawn scene: a witch on a broom 5 feet tall and 4 feet wide, a hooded reaper 6 feet tall and 3 feet wide, and a black cat 30 inches tall and 2 feet wide, all cut from 1/2 inch exterior plywood.
Plywood. The witch uses a 4 by 5 foot section of one sheet, and the cat fits in the 4 by 3 foot piece left over. The reaper needs 6 feet of length, so it comes from a second sheet, which leaves a 4 by 2 foot scrap for a pair of crows. Two sheets total.
Bracing lumber.
| Figure | Part | Stock | Count and length | Linear feet |
|---|---|---|---|---|
| Witch | Vertical cleats | 1x3 | 2 at 4.5 ft | 9 |
| Witch | Horizontal cleat | 1x3 | 1 at 3 ft | 3 |
| Witch | Kickstand brace | 1x3 | 1 at 4 ft | 4 |
| Witch | Leg stakes, brace stake | 2x2 | 2 at 3 ft, 1 at 2 ft | 8 |
| Reaper | Vertical cleats | 1x3 | 2 at 5.5 ft | 11 |
| Reaper | Horizontal cleat | 1x3 | 1 at 2 ft | 2 |
| Reaper | Kickstand brace | 1x3 | 1 at 5 ft | 5 |
| Reaper | Leg stakes, brace stake | 2x2 | 2 at 3 ft, 1 at 2 ft | 8 |
| Cat | Cleat | 1x3 | 1 at 2 ft | 2 |
| Cat | Leg stakes | 2x2 | 2 at 1.5 ft | 3 |
Board feet. Nominal board feet are thickness in inches times width in inches times length in feet, divided by 12. The 1x3 pieces total 36 linear feet, and each foot of 1x3 is 0.25 board feet, so that is 9 board feet. The 2x2 pieces total 19 linear feet, and each foot of 2x2 is about 0.33 board feet, so that is about 6.3 board feet.
What to buy. Nesting the cuts into 8 foot boards with room for saw kerf takes six 1x3s (5.5 and 2, twice, then 4.5 and 3, then 4.5, 5, and 4 on their own boards) and three 2x2s (3, 3, and 1.5 twice, then 2 and 2). That is 12 board feet of 1x3 and 8 board feet of 2x2. Pressure-treated 2x2s last longer for the parts driven into the ground. Enter your own list in the board feet calculator to check it.
Lighting. The reaper stands 3 feet in front of the pale garage door with a purple LED flood behind it. The witch flies in front of a 4 foot plywood moon on stakes. The cat sits on the ground strip of the graveyard fence line with a short amber LED strip halo on its back.
Time. One evening to prime the sheets and project the patterns, one afternoon to cut and sand, and a weekend of short sessions for primer, two coats of paint, and cleats.
Storing silhouettes for next year
- Pull the stakes, keep the cleats. Unscrew the leg stakes and braces and bundle them with tape labeled by figure. The cleats stay on the back and keep the figure flat.
- Let everything dry first. A damp plywood figure stored in a stack grows mildew and sticks to its neighbor.
- Store flat or hang on a wall. Stack figures face to face with a sheet of cardboard between each one, or hang them on wall hooks by a cleat.
- Touch up in September. Sand and repaint any chipped edge before setup, since a chip is where water gets in.
Frequently asked questions
What is the best material for Halloween yard silhouettes?
Half inch exterior plywood is the best all around choice. It is stiff enough for tall figures, holds paint for years, and cuts easily with a jigsaw. Corrugated plastic is lighter, waterproof, and cuts with a knife, which suits small figures and anyone short on storage space, but it needs stiffeners to keep from flapping in wind.
How do I transfer a silhouette pattern onto plywood?
Project the image onto a primed sheet in a dark room and trace it, keeping the projector centered and square to the sheet so the figure is not distorted. Without a projector, draw a grid over a printed design and a larger grid on the plywood at the same number of squares, then copy the outline square by square.
What jigsaw blade should I use for plywood cutouts?
A clean-cutting wood blade of around 10 teeth per inch for outlines and a narrow scroll blade for tight curves. A reverse tooth or down-cut blade prevents splintering on the top face. With a standard blade, cut with the good face down.
How do I keep plywood yard decorations from blowing over?
Stiffen the back with furring strip cleats, screw pointed 2x2 leg stakes to the cleats, and add a kickstand brace angled back to its own stake on any figure over about 4 feet tall. Lay tall figures down on nights with strong gusts forecast.
What paint should I use on outdoor plywood silhouettes?
Exterior primer on every face and edge, followed by two coats of exterior paint in a flat sheen. Flat black keeps the figure a clean shape at night. Seal the edges with two coats of primer, since plywood edges soak up water fastest.
How do you light a silhouette so it shows up at night?
Light the surface behind it rather than the figure. Stand the figure a few feet in front of a pale wall, garage door, or painted moon disk, and aim an LED flood at that surface from behind the figure. An LED strip on the back edge adds a glowing outline.
How thick should plywood be for yard cutouts?
Half inch for most figures up to about 6 feet tall. Three quarter inch is stiffer but very heavy and harder to stake. Quarter inch is only suitable for small figures fastened to a fence or a backing frame.
How long do plywood Halloween cutouts last?
Many seasons if every edge and face is primed and painted, the figures dry fully before storage, and chips get touched up each year. Unsealed edges are the usual failure, swelling and peeling within a single rainy season.
Related: Build the rest of the yard scene with DIY outdoor Halloween decorations, add a giant rope spider web to the porch, and compare blades and saws in types of saws. Total your bracing lumber with the board feet calculator.