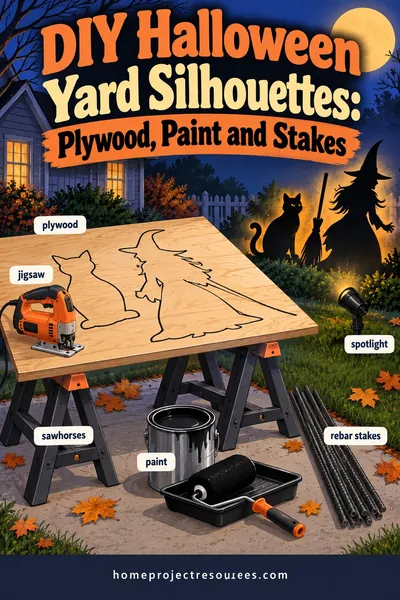
DIY Outdoor Halloween Decorations You Can Actually Build

The best diy outdoor halloween decorations are the ones that survive a windy October night, and that comes down to three things: a rigid skeleton (2-inch foam, 3/4-inch PVC, or 1x3 lumber), a real anchor into the ground (rebar or 12-inch landscape staples, not a plastic tent peg), and a coat of water-based paint so rain doesn't finish the job before the trick-or-treaters arrive. Below are five builds that follow those rules: foam tombstones, a PVC ghost frame, a graveyard fence, a photo booth backdrop, and low-voltage graveyard lighting. Every one lists materials by dimension and count so you can walk into the lumber aisle with a list instead of a vague idea.
Updated September 2026
Buying lumber for the fence and backdrop? Our free board feet calculator turns a cut list of 1x3s and 2x4s into the board feet you actually need, so you don't come home two pickets short.
DIY outdoor Halloween decorations start with a site plan
Before you cut anything, walk your front yard with a tape measure and a notepad. Three numbers decide everything else.
First, the run of the fence. Measure the edge of the lawn you want to enclose. A typical front yard edge along the sidewalk runs 20 to 30 feet, which is three or four 8-foot panels.
Second, the depth of your graveyard. Tombstones read best when they're staggered in two or three rows with 3 to 4 feet between them, so a 12-foot-deep bed holds three rows comfortably.
Third, your power source. Find the nearest exterior outlet and note whether it's GFCI protected (it should have TEST and RESET buttons). Measure the cord run from that outlet to the far corner of the display. If it's over 50 feet, plan on solar lights or a low-voltage transformer near the outlet rather than a daisy chain of extension cords.
Write those three numbers down. The material counts below all scale from them, and a big vertical prop like a giant rope spider web strung across the porch or garage front sizes off the same measurements.
Foam tombstones from one sheet of insulation board
Foam tombstones are the backbone of a DIY graveyard, and one 4-foot by 8-foot sheet of 2-inch extruded polystyrene (XPS, the pink or blue rigid insulation board) gives you a dozen of them.
Materials for 12 tombstones
| Item | Size | Count |
|---|---|---|
| XPS rigid foam board | 2 in x 4 ft x 8 ft | 1 sheet |
| Rebar or fiberglass stakes | 3/8 in x 24 in | 24 (2 per stone) |
| Exterior latex primer | Quart | 1 |
| Exterior latex paint, gray and black | Quart each | 2 |
| Foam-safe construction adhesive | Tube | 1 (for any layered details) |
| Wood skewers or 1/4-inch dowel | 12 in | 12 (to key rebar into the foam) |
The cut plan
A 48-inch by 96-inch sheet divides into three columns of 16 inches and four rows of 24 inches. That's 12 blanks at 16 inches wide by 24 inches tall, which is a realistic headstone size and reads clearly from the sidewalk. If you'd rather have a few taller monuments, cut two columns at 16 by 24 and use the third column for two pieces at 16 by 48.
Cut foam with a hand saw, a hot wire cutter, or a utility knife with a fresh blade scoring both faces. A jigsaw works but sprays crumbs everywhere, so do it over a tarp. Round the tops with a flush-cut saw, then rasp the edges with a coarse sanding block so they look worn rather than freshly cut.
Aging the foam so it looks like stone
Two tricks make foam look like granite. The first is texture: press a wire brush or a wadded ball of aluminum foil into the face before priming. The second is paint layering. Prime with exterior latex primer, base coat in medium gray, then dry-brush a lighter gray across the high spots and dab a watery black wash into the cracks and lettering.
Carve names and dates with a soldering iron on its lowest setting, a wood-burning tool, or the tip of a hot glue gun. Work outdoors or with a window open, because heated foam gives off fumes you don't want to breathe.
One thing that ruins the whole project: never use solvent-based spray paint straight on bare XPS. The propellant and solvents dissolve the foam, and you'll watch your tombstone pit and shrink in front of you. Water-based primer first, always. If you want to use a spray for the final texture coat, apply it over a fully cured latex primer and test on a scrap.
Anchoring tombstones in wind
A 2-inch foam headstone weighs about a pound, which means a 20 mph gust will send it into the neighbor's yard. The fix is two stakes per stone. Push two lengths of 3/8-inch rebar or fiberglass driveway markers into the bottom edge of the foam, about 4 inches in from each side and 8 inches deep into the foam, then drive the exposed 14 to 16 inches into the ground. Adding a smear of foam-safe adhesive on a wooden skewer inside each stake hole keeps the rebar from wallowing out the foam over a few weeks.
For heavy clay or a lawn that's dried hard, pre-punch the holes with a screwdriver and a mallet. For sandy soil, go to 24-inch stakes and angle them slightly outward so they resist pulling straight up.
A PVC ghost frame that stands on its own
A floating ghost is just a cheesecloth or white sheet draped over a rigid form. The form is 3/4-inch schedule 40 PVC, which is stiff enough to hold shape but light enough to move around the yard by hand.
Materials for one 5-foot ghost
| Item | Size | Count |
|---|---|---|
| Schedule 40 PVC pipe | 3/4 in x 10 ft | 2 |
| PVC tee fittings | 3/4 in | 3 |
| PVC 90-degree elbows | 3/4 in | 2 |
| PVC end caps | 3/4 in | 2 |
| Rebar for the ground stake | 1/2 in x 24 in | 1 |
| Foam ball or wig head | 8 to 10 in | 1 |
| Cheesecloth or an old white sheet | 6 ft x 9 ft minimum | 1 |
| Zip ties | 8 in | 10 |
Cut list and assembly
From the two 10-foot lengths, cut:
- One spine at 54 inches (the height of the ghost from the ground to the neck).
- Two arm pieces at 24 inches.
- One neck stub at 6 inches.
- Two shoulder stubs at 3 inches.
- Two leg spreaders at 18 inches for the base.
Build the shoulders first. Push a tee onto the top of the spine, add a 3-inch stub out of each side of the tee, then a second tee on each stub with an arm running outward and downward through an elbow so the arms droop. Put the 6-inch neck stub straight up out of the top tee and press the foam head onto it. End caps go on the arm tips so the fabric doesn't snag.
Don't glue any of it. Dry-fit joints are tight enough for a fabric-draped frame, and an unglued frame breaks down into a bundle that fits in a 3-foot bin at the end of the season.
Making it stand
Slide the bottom of the spine over a 24-inch length of 1/2-inch rebar driven 12 inches into the ground. The pipe's inner diameter is a snug fit over half-inch bar, and that single stake holds the ghost upright in gusty weather because the frame is so light. If you're placing it on a patio or porch where you can't drive a stake, add the two 18-inch leg spreaders through a tee at the base to make a cross foot, and set a brick on each leg.
For a witch, use the same frame with a broomstick zip-tied to one arm and a 30-inch triangle of black foam board on the head for a hat. Wrap the frame in black landscape fabric instead of cheesecloth and stuff the chest area with crumpled newspaper inside a trash bag to give her a torso.
A graveyard fence in 8-foot panels
The graveyard fence is what turns a handful of props into a scene. Build it as freestanding 8-foot panels so you can take it down in ten minutes and lean the panels against the garage wall.
Materials for one 8-foot panel
| Item | Size | Count |
|---|---|---|
| Rails (top and bottom) | 1x3 x 8 ft | 2 |
| Pickets | 1x3 x 8 ft | 4 (cut into 32-inch pieces, 3 per board) |
| Exterior wood screws | 1-1/4 in | 24 |
| Rebar stakes | 3/8 in x 24 in | 2 |
| Zip ties or wire to lash rails to stakes | 8 in | 4 |
| Flat black exterior paint | Quart | 1 per 3 panels |
That's 6 boards of 1x3x8 per panel. On the board feet math, a 1x3x8 is 2 board feet (1 inch x 3 inches x 8 feet, divided by 12), so each panel is 12 board feet and a 4-panel front-yard run is 48 board feet. Run your own count through the board feet calculator if your panels are a different length.
Building the panel
Lay the two rails on a flat driveway 20 inches apart (top of the bottom rail to bottom of the top rail). Set the 32-inch pickets across them with 6-inch gaps, which gives you 11 pickets per 8-foot panel with a picket flush at each end. Drive two screws through each picket into each rail. Cut the picket tops into points with a miter saw at 45 degrees, or leave them square if you're going for a broken-down look and snap a couple of them at random heights.
A coat of flat black paint, then a quick dry-brush of gray, makes pine look like old iron from ten feet away. For real rust, mist it with a rusty-orange craft paint on a sponge after the black dries.
Installing without post holes
You don't dig for a temporary fence. Drive a 24-inch rebar stake 14 inches into the ground at each end of the panel, leaving 10 inches showing, and zip-tie the bottom rail to the stake at two points. Where two panels meet, share one stake. The bottom rail sits 2 inches off the grass so it doesn't wick water. If you want the permanent version that stays up year-round, our fence post depth page covers how deep real posts go.
A photo booth backdrop that won't blow over
A backdrop is a big flat sail, so this is the one build where wind planning matters most. Keep it against a wall, a garage door, or a porch railing whenever you can, and always give it feet.
Materials for an 8-foot by 7-foot backdrop
| Item | Size | Count |
|---|---|---|
| Uprights | 2x4 x 8 ft | 2 |
| Top and bottom rails | 2x4 x 8 ft | 2 |
| Feet | 2x4 x 8 ft | 1 (cut into two 4-foot feet) |
| Exterior wood screws | 3 in | 24 |
| Corner braces or 12-inch plywood gussets | 4 | |
| Black landscape fabric or a painter's drop cloth | 9 ft x 12 ft | 1 |
| Sandbags or concrete blocks for the feet | 30 lb or 8x8x16 in | 2 |
| Staples or binder clips for the fabric | 30 |
Assembly
Screw the two rails between the two uprights to make an 8-foot-wide by 7-foot-tall rectangle (the uprights are 8 feet, so the top rail sits 12 inches down from the top, which leaves a header to hang a sign or lights from). Screw a 4-foot foot across the bottom of each upright, centered, so the frame stands like a T at each end. Gusset the four corners so the rectangle can't rack.
Stretch black fabric across the back and staple it every 8 inches. Add depth with cheesecloth strips, a foam tombstone screwed to the frame, or a string of orange lights along the header.
Weight each foot with a 30-pound sandbag or a concrete block. The math on wind is simple: the fabric catches gusts, and the taller and wider the frame, the more weight the feet need. An 8-by-7 backdrop on a still night is fine with a block per foot. If the forecast says 20 mph or more, take the fabric off and leave the frame, or lay the whole thing flat until the wind passes.
Graveyard lighting: low-voltage or solar
Lighting is what makes the display work after dark, and it's also where most of the safety mistakes happen. You have two good options and one bad one.
Low-voltage landscape lighting
A 12-volt landscape lighting kit runs off a transformer that plugs into your GFCI outlet, and everything past the transformer is low voltage you can safely run across wet grass. A basic layout for a front-yard graveyard:
- One transformer rated for at least 60 watts, mounted near the outlet under an eave.
- 50 feet of 16-gauge low-voltage landscape cable.
- Four to six LED spotlights (3 to 5 watts each), pushed into the ground at the base of the biggest tombstones, angled up at 45 degrees.
- Green or purple lens filters, or colored bulbs, for the cemetery look.
Push the stakes in low and aim up. Uplighting from the ground casts long shadows on the fence and the house, which is the entire effect.
Solar spotlights
Solar spots are the zero-cord option and they're fine for a display that runs three or four hours after dusk. Their limits are real, though: a cloudy week drops the run time, and cheaper units have a dim, cool light that flattens the scene. Two rules make them work. Place the panel where it gets full afternoon sun, even if that means running the panel lead 10 feet from the light itself. And put one solar spot per tombstone rather than trying to light three stones with one head.
The bad option
Line-voltage string lights and a chain of extension cords laid across the lawn. It works until it rains. If you do run 120-volt anything outdoors, follow these cord rules without exception:
- Only outdoor-rated cords, marked W or SJTW on the jacket, never an indoor cord.
- Every outdoor connection lifted off the ground and inside a weatherproof cord cover, or at minimum wrapped and hung on a stake so it can't sit in a puddle.
- Plugged into a GFCI outlet, and only a GFCI outlet.
- Never through a door or window that then gets closed on it.
- Never buried under mulch or leaves, where it's invisible to a mower and holds moisture against the plug.
If you're hanging lights on the house as part of the display, our Christmas light hanging guide covers clip types by surface and the run plan, and the same math applies in October. And for how many strands you can put on one circuit, the LED vs incandescent page has the amps.
Weatherproofing everything before the first rain
Foam soaks up nothing but paint chips off it; wood soaks up everything. A few rules by material:
XPS foam. Fully primed and painted, foam shrugs off rain. The failure points are unpainted cuts (water gets in and freezes) and the stake holes. Seal the bottom edge and stake holes with the same latex paint.
Pine and furring strips. Two coats of exterior latex, including the end grain, and stand the panels on 2-inch blocks rather than on the wet ground. Untreated pine left in contact with grass for a month will start to gray and check.
PVC. Needs nothing, but sunlight chalks it over a few seasons. A coat of plastic-bonding primer and flat black paint hides it and makes the frame disappear under fabric.
Fabric. Cheesecloth tears in wind and stains in rain. Treat it as single-season and buy a little extra. Landscape fabric and painter's drop cloths survive several years.
Electrical. Transformers under cover, connections off the ground, timers set to shut off by 11 p.m. so nothing runs unattended all night. The same cover and GFCI rules apply to a fogger, and building a Halloween fog machine and chiller covers where to place one so the fog stays low.
Worked example: a 24-foot front yard graveyard
Here's a full material list for a typical setup: a 24-foot fence line along the sidewalk, 12 tombstones in three rows, two ghosts, one backdrop against the garage door, and six low-voltage spotlights.
| Build | Lumber and materials | Count |
|---|---|---|
| Fence, 3 panels | 1x3 x 8 ft boards | 18 (36 board feet) |
| Fence stakes | 3/8 in x 24 in rebar | 4 (shared at joints) |
| Tombstones | 2 in XPS 4x8 sheet | 1 |
| Tombstone stakes | 3/8 in x 24 in rebar | 24 |
| Ghosts, 2 | 3/4 in x 10 ft PVC | 4 |
| Ghost fittings | 3/4 in tees, elbows, caps | 6, 4, 4 |
| Ghost stakes | 1/2 in x 24 in rebar | 2 |
| Backdrop | 2x4 x 8 ft | 5 (26.7 board feet) |
| Backdrop weights | 30 lb sandbags | 2 |
| Lighting | 12 V transformer, 50 ft cable, 6 LED spots | 1, 1, 6 |
| Paint | Exterior latex, gray, black, primer | 1 quart each, 1 gallon primer |
Total lumber is about 63 board feet, 28 rebar stakes, and one sheet of foam. Two weekend afternoons builds it, and one evening sets it up.
Teardown and storage that keeps it for next year
Most DIY Halloween props die in the garage, not in the yard. A few habits fix that.
Take everything down within a week of Halloween, before the November rain. Pull the stakes first and bundle them with tape by build so you're not sorting rebar next year.
Tombstones store flat, stacked with a sheet of cardboard between each so the paint doesn't stick. A 16-by-24-inch stone fits in a standard under-bed bin, and 12 of them stack about 26 inches tall.
Ghost frames break down to their cut pieces. Label each piece with a paint marker (spine, arm L, arm R) and bundle with a zip tie. Fabric gets washed, dried completely, and stored in a sealed bag with the frame.
Fence panels lean flat against a wall, off the concrete on two scraps of 2x4 so the bottom rails stay dry. Three panels take up about 8 feet of wall length and 4 inches of depth.
If your garage is already at capacity, the garage storage systems guide has a section on overhead racks for exactly this kind of seasonal bulk.
Frequently asked questions
How thick should foam be for Halloween tombstones?
Two-inch XPS is the sweet spot. One-inch board flexes and snaps at the stake holes, and 3-inch is harder to cut and doesn't look any better from the sidewalk. If you can only find 1-inch sheets, glue two together with foam-safe adhesive and clamp them flat overnight.
How do I keep foam tombstones from blowing away?
Two stakes per stone, driven at least 14 inches into the ground and 8 inches into the foam. Rebar or fiberglass driveway markers both work. In very sandy soil, go to 24-inch stakes and angle them slightly outward. A single stake lets the stone pivot and eventually tear itself free.
Can I use spray paint on foam tombstones?
Not on bare foam. The solvents in most spray paint dissolve polystyrene and leave pits and craters. Prime first with a water-based exterior latex primer, let it cure fully, then test any spray on a scrap before you commit to a finished stone.
What size PVC is best for a ghost frame?
Three-quarter-inch schedule 40 is the right balance of stiffness and weight for a ghost up to about 6 feet tall. Go to 1-inch pipe for anything taller or for a witch with a heavy stuffed torso. Half-inch pipe is too whippy and bends in wind.
Are solar lights bright enough for a graveyard?
For accent lighting, yes, if you place one spot per tombstone and give the panel full afternoon sun. They aren't bright enough to light a photo booth backdrop for pictures, so use a low-voltage LED spot on a transformer for that one spot, or plan on flash.
How do I run extension cords safely across a lawn?
Use only outdoor-rated cords (marked W or SJTW), plug into a GFCI outlet, keep every connection off the ground in a weatherproof cover, and never run a cord through a door or window that gets closed. Better still, put a low-voltage transformer at the outlet so nothing across the grass is line voltage.
When should I take outdoor Halloween decorations down?
Within a week of Halloween, and before the first heavy rain if you can. Foam and painted pine hold up fine through October, but a month of November wet and freeze will delaminate paint from foam and gray out untreated wood.