How to Make Flat Paint Gloss, and When a Clear Coat Works

If you are searching for how to make flat paint gloss, here is the honest answer up front: you cannot buff, polish, or rub dried flat paint into a shine. The dull look is built into the paint film itself, so friction only makes blotchy shiny streaks and wears the paint thinner. There are exactly two ways to get a higher sheen on a flat surface. You can repaint it with a paint made in the sheen you want, or you can brush a clear topcoat over it. On walls, repainting is almost always the better call. On furniture and small decorative pieces, a clear coat is often exactly right. The difference comes down to area, lap marks, and a yellowing risk that shows up months later on light colors.
This guide covers the whole sheen question: what the sheen scale actually measures, why flat paint behaves the way it does, clear topcoats on walls versus furniture, repainting in a higher sheen, going the other direction from semi-gloss down to flat, and the touch ups that flash as shiny patches on a finished wall.
Updated September 2026
Repainting in a new sheen? Our free paint calculator turns your wall measurements into gallons for two coats, with doors and windows deducted, so you buy the right amount of the new finish the first time.
The sheen scale, and what the words on the can mean
Sheen is a measurement of how much light bounces off a painted surface at a set angle. Labs shine a light at the film and read how much reflects back, reported in gloss units. The 60 degree reading is the one most manufacturers use for wall paints, and flat and very low sheens are often also read at 85 degrees, a grazing angle where small differences show up. A mirror reads far above 100. Flat paint barely registers.
The names on the can are marketing categories laid over that measurement, and they are not standardized across brands. One company's eggshell can be brighter than another company's satin. The Master Painters Institute publishes gloss levels that give a useful reference range, and the table below follows that general scale.
| Sheen name | Typical 60 degree reading | How it looks | Hides wall flaws | Wipes clean | Touch ups blend |
|---|---|---|---|---|---|
| Flat | 0 to 5 | No visible shine at any angle | Best | Poorest | Best |
| Matte or velvet | 0 to 10 | Soft, faint glow at a low angle | Very good | Fair | Very good |
| Eggshell | 10 to 25 | Low luster, like the shell it is named for | Good | Good | Fair |
| Satin | 20 to 35 | Visible soft sheen | Fair | Very good | Fair to poor |
| Semi-gloss | 35 to 70 | Clearly shiny, reflects window light | Poor | Excellent | Poor |
| Gloss | 70 to 85 | Wet look, reflects shapes | Very poor | Excellent | Very poor |
| High gloss | Above 85 | Near mirror | Shows everything | Excellent | Very poor |
Three rules follow from that table and they drive every decision on this page. Every step up in sheen makes the paint tougher and easier to wash. Every step up also makes dents, patches, roller marks, and touch ups easier to see. And sheen reads differently in different light, so a satin wall facing a big window looks noticeably shinier than the same satin on a hallway wall.
Color matters too. Deep colors look shinier than pale colors in the same sheen, because deep base paints carry more colorant and less of the white pigment that scatters light. A navy eggshell can look like a satin. Paint a sample board before you commit to a sheen in a dark color.
For surface by surface sheen picks in a steamy room, see the sheen section of our bathroom painting guide. This page stays on the mechanics of changing a sheen, not on choosing one for a specific room.
Why flat paint cannot be buffed to a shine
Paint is three main things: binder, pigment, and a liquid that evaporates. The binder is the resin that forms the film and glues everything to the wall. The pigment gives color and hide. What decides the sheen is the ratio between them once the liquid is gone.
Gloss paint is binder rich. There is more than enough resin to flow around every pigment particle and cover them, so the surface dries as a smooth, continuous skin. Light hits that skin and bounces off in one direction, which your eye reads as shine.
Flat paint is pigment rich. Wall flats often run at a pigment volume above 40 percent of the dried film, and they include extender pigments like clay, silica, and calcium carbonate on purpose. There is not enough binder to cover every particle, so millions of microscopic pigment peaks stick up through the surface. Light hits that rough surface and scatters in every direction. That scattering is what hides flaws, and it is also why flat paint looks flat.
Buffing works on a car because a car has a thick clear coat of pure resin on top. Polish levels the high spots of that resin and the surface gets smoother. Flat paint has no resin layer to level. When you rub it, you do one of two things:
- You burnish it. Friction flattens the pigment peaks in the exact spot you rubbed, and that spot now reflects more light than the wall around it. This is the same shiny streak you see where a chair back or a hand has rubbed a flat wall for years. It is a defect, not a finish, and you cannot make it even across a whole wall.
- You wear through it. Flat paint has the weakest film of any sheen. Keep rubbing and you remove paint, especially on deep colors, which show a chalky or pale scuff where the pigment came off.
Paste wax, furniture polish, and oil soaps are no better on a wall. They sit in the rough surface, stay slightly tacky, collect dust, and leave a contaminated layer that the next coat of paint will not stick to without heavy cleaning and a primer. Skip them.
How to make flat paint gloss: the two routes that actually work
Once buffing is off the table, you are left with two real options and one honest non-option.
| Route | What you do | Best for | Main risk |
|---|---|---|---|
| Repaint in a higher sheen | Clean, repair, two coats of a paint made in the new sheen | Walls, ceilings, trim, whole rooms | Higher sheen shows every wall flaw |
| Clear topcoat | Seal the flat paint, then brush or roll a clear finish | Furniture, murals, small decorative panels | Lap marks on large areas, yellowing on light colors |
| Leave it and live with it | Wash gently, touch up with the original can | Low traffic walls where flat is the right choice | Scuffs and burnish marks over time |
Most people asking how to make flat paint gloss are really asking one of two practical questions. Either the wall scuffs too easily and they want it washable, or they bought the wrong sheen and want to rescue it without a full repaint. Both questions end in the same place for walls: repaint in eggshell, satin, or higher. A clear coat is not a shortcut around repainting a room. It is usually more work and a bigger risk.
Clear topcoats over flat paint: walls versus furniture
Clear finishes fall into a few families, and they behave very differently over time.
| Clear finish type | Sheens available | Yellowing over light colors | Where it makes sense |
|---|---|---|---|
| Oil-based polyurethane | Satin to gloss | High. Ambers on day one and keeps darkening | Wood floors and stained wood, not over white or pale paint |
| Water-based polyurethane, oil modified | Satin to gloss | Moderate. A warm cast builds over months | Stained or darker painted furniture |
| Water-based acrylic clear coat | Matte to gloss | Low, but not zero when applied heavy | Painted furniture and small pieces in pale colors, crafts |
| Clear acrylic wall glaze or mural varnish | Matte to gloss | Low when rated non-yellowing | Murals and decorative wall finishes |
| Furniture wax | Low luster only | Low, but can trap dirt and turn dingy | Chalk style and flat painted furniture |
Why a clear coat works well on furniture
A dresser, a side table, or a set of chairs is the ideal job for a clear coat. The surfaces are small, so you can keep a wet edge from one end of a drawer front to the other. You can lay a piece flat so the finish levels instead of sagging. You can sand lightly between coats with a fine sanding sponge. And furniture needs the extra toughness, because flat paint on a tabletop will not survive cups, keys, and cleaning spray.
The method is simple. Let the paint dry for the full recoat time on the can, and longer is better. Wipe off dust with a barely damp cloth. Apply the first coat of clear thin, because flat paint is porous and drinks the first coat unevenly, which leaves a blotchy sheen if you try to build it all in one pass. Let it dry, sand very lightly, wipe, and apply a second and third thin coat. Always work with the grain or along the long direction of the piece.
Why a clear coat on a wall is usually a mistake
A wall is a large vertical surface, and water-based clear finishes dry fast. That combination means lap marks. Every place where a roller pass overlaps a pass that has already started to set shows as a stripe of slightly higher sheen. Clear finishes make those laps far more visible than paint does, because there is no pigment to disguise them. Cutting in around outlets and trim with a brush adds a picture frame of different sheen around every edge.
It also changes the future of that wall. Paint will not bond well to a cured clear finish, so the next repaint means washing, scuff sanding the whole surface, and priming with a bonding primer before any color goes on. A nail hole or a scuff can no longer be touched up with the original paint, because the original paint is now under a layer of clear.
There are fair exceptions. A hand painted mural in a child's room, a faux finish, a stenciled accent wall, or a chalkboard wall can all justify a clear coat made for walls. In those cases, use a product sold specifically as a non-yellowing acrylic wall varnish, work in small sections a few feet wide from ceiling to floor, keep a wet edge, and never stop in the middle of a section.
Yellowing on light walls and light furniture
This is the part that catches people, because it does not show on day one.
Oil-based polyurethane is amber in the can and gets more amber with age. Over white or pale paint, it turns a crisp white into cream within weeks and toward a honey tone within a year or two. Oil-based finishes also yellow faster in the dark, which is why the area behind a picture frame or a dresser can end up darker than the exposed wall. Never put oil-based poly over a light color you want to stay light. When you do use an oil-based finish on a darker piece, work with windows open and a fan blowing air outdoors, and lay used rags flat outside to dry, because oily rags bunched in a pile can heat up and catch fire on their own.
Water-based products are much better, and many are labeled non-yellowing. Most of them stay close to clear. But "close to clear" is doing a lot of work on a pure white surface. A thick build of any clear finish adds a faint warm or milky tone, and some water-based polyurethanes include oil modifiers for durability that amber noticeably. The shift is small enough to ignore on a gray or blue piece. It is obvious on a white wall sitting next to untreated white trim and a white ceiling, because your eye compares the two whites directly.
Before you clear coat anything light:
- Paint a scrap board with the same paint and let it dry fully.
- Clear coat half of the board with the exact product and number of coats you plan to use. Leave the other half bare.
- Put the board where the real piece will live, and check it in daylight after a week and again after a few weeks. A sunny window and a dim closet will both tell you something.
- If you can see a difference between the two halves now, it will only get more obvious with time.
Apply clear finishes thin. Two or three thin coats yellow less, level better, and cloud less than one heavy coat. A clear coat that goes milky or cloudy was usually applied too thick, applied over paint that was not dry, or applied in high humidity.
For cabinets, a clear coat over wall paint is the wrong system entirely. Cabinets need a real enamel that cures hard on its own, and our guide on how to paint kitchen cabinets covers the primer and enamel choices that replace the clear coat idea.
Repainting in a higher sheen
For a wall, this is the answer. The good news is that flat paint makes an easy base for a higher sheen, because it is porous and gives the new coat plenty of grip. You do not need to sand a sound flat wall for adhesion.
The work is mostly in preparation, because the new sheen will reveal what the flat paint was hiding.
Look at the wall with raking light first. Hold a bright work light or a phone flashlight flat against the wall so the beam skims across the surface. Every nail pop, patch edge, roller ridge, and dent will throw a shadow. Circle each one lightly in pencil. What you see in raking light now is roughly what an eggshell or satin will show in daylight later.
Repair and spot prime. Fill and sand the marked flaws. Then prime every patch. Joint compound absorbs paint differently from the painted wall around it, and that difference shows as a dull spot in a higher sheen even after two coats. Our guide to patching drywall covers the fill and sand steps.
Wash the wall. A flat wall collects handprints, cooking film, and dust in its rough surface. Wash with a mild detergent, rinse with clean water, and let it dry.
Plan on two full coats. The first coat of a higher sheen over flat will look uneven, because the flat paint absorbs it unevenly. That is normal. The second coat is what brings the sheen up to its true, uniform level. Do not judge the finish after one coat.
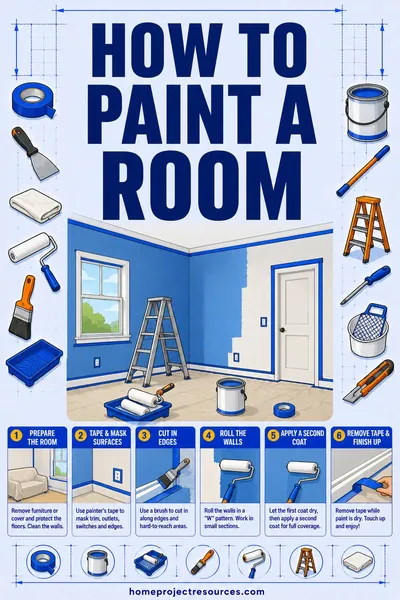
Keep a wet edge and roll full walls. Higher sheens show lap marks and roller direction more than flat does. Roll a wall from corner to corner without stopping, finish each section with light strokes in one direction, and do not go back into paint that has started to set. The full sequence, from ceiling to trim, is in our guide on how to paint a room, so this page does not repeat it.
Buy the quantity for two coats. Coverage per gallon changes with surface texture and color change, and the details are in paint coverage per gallon. Run the room through the paint calculator and buy it all at once so every can comes from the same batch.
A useful halfway step: when your complaint about flat paint is only that it scuffs, a matte or eggshell in a scrubbable formula often solves it without the shine. Many modern matte paints are far more washable than older flats, and they hide flaws nearly as well.
The reverse: taking semi-gloss or gloss down to flat
Going from shiny to dull is the harder direction, because nothing sticks well to a slick film. Paint rolled straight over semi-gloss often looks fine for a week and then peels off in sheets the first time tape touches it.
Find out what the old paint is. Older trim and many older bathrooms and kitchens have oil-based gloss paint. Rub a small hidden spot with a cotton ball soaked in rubbing alcohol. If paint comes off on the cotton, it is latex. If nothing comes off, treat it as oil-based. Latex over unprimed oil-based paint fails, so that answer decides your primer.
Clean it thoroughly. Glossy surfaces in kitchens and baths carry grease and soap film. Degrease, rinse, and let it dry.
Break the gloss. Scuff sand the whole surface with 180 to 220 grit until the shine is uniformly dull. You are not removing paint, only roughing the surface so primer has something to grip. In a home built before 1978, test the old paint for lead before any sanding, and if it tests positive, follow lead-safe work practices or hire a certified renovator. On detailed trim where sanding is impractical, a liquid deglosser can supplement the sanding, but it does not replace cleaning.
Prime with a bonding primer. Over oil-based paint or any hard gloss, use a bonding primer. Over sound, scuffed latex semi-gloss, a quality bonding primer is still the safe choice.
Topcoat with two coats of flat or matte. Flat paint over a primed surface covers easily. Remember that flat is the least washable finish, so on doors, trim, and high traffic walls, matte or eggshell is the practical low sheen.
For furniture that already has a glossy clear finish, you can dull the look without paint by scuffing it and applying a matte clear coat of the same type. That works because you are putting a clear film over a clear film, which bonds well once scuffed.
Touch ups that flash as shiny patches
Almost everyone who has touched up an eggshell or satin wall has seen it. The color matches perfectly, but the repaired spot catches the light as a patch of different sheen. Painters call it flashing, and it is the everyday version of the sheen problem.
It happens for predictable reasons:
- Film thickness. A touch up adds a second layer on top of the original coats. That spot now has a thicker film with more binder at the surface, and it dries shinier.
- Different tool. The wall was rolled, and the touch up was brushed. A brush leaves a smoother, shinier film than a roller's stipple texture.
- Aged paint. Paint that has sat in the can separates. If it is not stirred thoroughly, the top of the can is binder rich and dries glossier.
- Cured wall. Paint keeps changing as it cures over several weeks. Fresh paint on a months old wall dries a little differently.
- Bare patches. Touching up over unprimed joint compound makes a dull spot instead of a shiny one, because the compound absorbs the binder.
How to touch up so it disappears:
- Stir the original paint for a full two minutes, scraping the bottom of the can.
- Prime any bare patch first, and let it dry.
- Use the same tool that painted the wall. For a rolled wall, use a small roller with the same nap, not a brush.
- Load the roller lightly and apply thin. Feather the edges outward past the damaged spot so there is no hard border.
- Let it dry fully and look at it from across the room in normal light before adding more.
If it still flashes, the fix is to repaint the wall from corner to corner, not the whole room. Stopping at a corner hides the transition, because the light hits the two walls at different angles anyway. This is the main reason flat and matte remain the right sheens for ceilings and for walls that get patched often.
Worked example: a scuffed flat hallway
A narrow hallway was painted in a pale flat by a builder. After two years it has hand smudges at shoulder height, a shiny burnished band where a bag brushes the wall, and three nail holes from old frames. The owner wants it washable.
Buffing is out. The burnished band is proof: rubbing already made shine, and it is streaky.
A clear coat is out. It is a long vertical wall, water-based clear would lap badly, and a pale color next to white trim would show any warm tint.
The plan is a repaint in eggshell. Raking light with a flashlight reveals the nail holes, two patch edges from the original construction, and a roller ridge. Each is filled, sanded, and primed. The walls are washed, rinsed, and left to dry. Two coats of eggshell go on, each wall rolled corner to corner without stopping. After the first coat, the old patches look slightly dull, which is expected. After the second, the sheen is even. The leftover paint is labeled with the room and date, and the roller cover is washed and saved in a bag for future touch ups with the same nap.
Frequently asked questions
Can you make flat paint shiny without repainting?
Only with a clear topcoat, and that is practical on furniture and small decorative surfaces, not whole walls. Buffing, polishing, and waxing do not work, because flat paint has no smooth resin layer to polish. Rubbing only creates uneven burnished streaks and wears through the film.
Will a clear coat over white paint turn yellow?
Oil-based polyurethane will, and noticeably. Water-based clear finishes labeled non-yellowing stay much closer to clear, but a heavy coat can still look warm or milky next to untreated white. Test on a scrap board painted with the same color, and compare it to a bare section after a few weeks.
Can I mix flat and semi-gloss paint to get satin?
It can be done within the exact same product line, but the result is unpredictable and manufacturers generally advise against it. If you do try it, mix the entire quantity in one container so every wall matches, and test a sample first. Buying the color in the sheen you want is simpler, because the paint counter can mix the same formula in any sheen that product line offers.
Do I need to sand flat paint before painting over it in satin?
Not for adhesion, if the flat paint is sound and clean. Flat paint is porous and gives the new coat plenty of grip. Sand only to smooth repairs, roller ridges, and bumps, because a higher sheen will show them clearly.
Why does my touch up look shinier than the rest of the wall?
The touch up added a thicker film in one spot, or it was brushed onto a rolled wall, or the paint was not stirred well. Use the same roller nap as the original job, apply it thin and feathered, and prime any bare patch first. If it still shows, repaint that wall from corner to corner.
Can I put polyurethane over flat wall paint?
You can, but on walls it usually causes more problems than it solves: lap marks, a picture frame of different sheen around every edge, yellowing with oil-based products, and a surface the next coat of paint will not bond to without sanding and priming. Reserve it for furniture, murals, and small decorative areas.
Is eggshell or satin better when I want more shine than flat?
Eggshell is the smaller step. It adds washability and a low luster while still hiding most wall flaws. Satin adds more shine and more toughness, but it shows patches, dents, and touch ups more clearly. For a first move away from flat on a wall with some imperfections, eggshell is the safer choice.
How do I paint flat over semi-gloss so it does not peel?
Clean it, scuff sand the entire surface dull with 180 to 220 grit, and prime with a bonding primer, especially if an alcohol rub test shows the old paint is oil-based. Then apply two coats of flat or matte. Skipping the scuff and primer is how new paint peels off a glossy surface.
The short version
Flat paint cannot be buffed into gloss, because its dull look comes from pigment sitting above the binder, and rubbing only burnishes streaks and wears the film. To raise the sheen of a wall, wash it, repair and prime the flaws that raking light reveals, and roll two coats of a paint made in the new sheen. Save clear topcoats for furniture, murals, and small pieces, keep them thin, avoid oil-based poly over light colors, and test for yellowing before you commit. Going the other way, from semi-gloss to flat, needs cleaning, scuff sanding, and a bonding primer. And when a touch up flashes, match the tool and the film thickness, or repaint that one wall corner to corner.
Before you open a can, measure the walls with the paint calculator so you buy enough of the new sheen for two full coats.