How to Patch Drywall

The method depends entirely on the size of the hole. Nail holes and dents get spackle and a putty knife. Holes up to about 2 inches get a self-adhesive mesh or metal patch. Holes from 2 to about 6 inches get a California patch, which is a scrap of drywall with its paper facing left long to act as its own tape. Anything larger gets cut back to the studs, or gets wood backing screwed in behind it, and takes a real piece of drywall.
That's how to patch drywall in one paragraph: match the method to the hole and every one of these is a straightforward repair. The part that decides whether anyone can see it afterward is not the patch at all. It's how wide you feather the compound and whether you prime before painting.
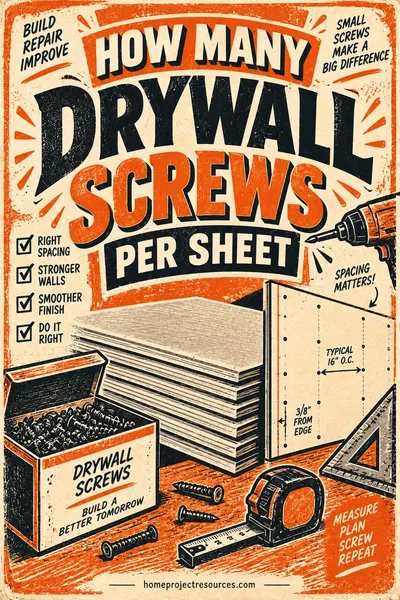
Doing a bigger repair or a whole wall? Our free drywall calculator gives you sheets, screws, tape, and joint compound from your room dimensions.
Updated August 2026
A note on numbers. This page gives you dimensions, quantities and scope, not dollar figures. Material and contractor pricing varies by region, by season and by the specifics of your job, and we do not set any of it. Work out what you need here, then get quotes that can be compared to each other.
How to patch drywall: pick your method by hole size
| Hole size | Method | Materials | Repair area (roughly) | Hands-on time |
|---|---|---|---|---|
| Nail holes, screw holes, dents | Lightweight spackle, one or two passes | Spackle, 2 in putty knife, 220 grit | 2 to 3 in | 5 minutes plus dry time |
| Cracks at seams or corners | Scrape out, re-tape, three coats | Paper tape, compound, 6 in knife | 8 to 12 in wide | 20 minutes plus dry time |
| Up to about 2 in | Self-adhesive mesh or peel-and-stick metal patch | Patch, compound, 6 and 10 in knives | 10 to 12 in | 20 minutes plus dry time |
| 2 to 6 in | California patch (butterfly patch) | Drywall scrap, compound, knives | 14 to 18 in | 30 minutes plus dry time |
| 6 to 12 in | Backer strips plus a drywall plug, or a patch bridging one stud | Drywall, 1x3 or plywood strips, screws, tape | 20 to 30 in | 45 minutes plus dry time |
| Larger than 12 in, or multiple holes | Cut back to stud centers, screw in a new piece, tape all four edges | Drywall, screws, paper tape, compound | Full section | 1 to 2 hours plus dry time |
Everything below assumes the wall is in reasonable shape behind the damage. If there's water staining, soft board, or mold, that's a different job. Find and fix the leak first, cut out everything soft, and let the cavity dry completely before you close it up.
Check what's behind the wall before you cut. Electrical cable, plumbing, and low-voltage wiring all run through stud bays. Cut shallow, angle the blade, and probe with a bent coat hanger through the existing hole before you commit to a bigger opening. This matters most in the 12 inches above outlets and switches and in walls backing onto bathrooms and kitchens.
Small holes: spackle and stick-on patches
Nail holes and dents
- Press the edges in. If a nail or a picture hanger pushed a raised lip of paper up around the hole, tap it flat with a putty knife handle or slice the loose paper off. A raised lip guarantees a visible bump.
- Load a small amount of lightweight spackle on a 2-inch putty knife and press it in, then scrape flush in one pass.
- Let it dry. Lightweight spackle dries in 20 to 60 minutes for a shallow fill.
- It will shrink slightly. Do a second pass. Almost everyone skips this and almost every one-pass repair shows as a small dimple under a raking light.
- Sand very lightly with 220 grit. Wipe the dust.
Holes up to about 2 inches
This is the anchor pull-out, the small doorknob nick, the hole where a shelf bracket used to be.
Self-adhesive mesh patch is a fiberglass mesh square with adhesive backing. Peel-and-stick metal patch is the same idea with a thin aluminum plate under the mesh, which is stiffer and better for anything close to 2 inches.
- Trim any loose paper or crumbling gypsum from the hole edges so the surface is flat.
- Center the patch over the hole and press it down firmly. It needs to bond to sound paper all the way around, so give it an inch of overlap in every direction.
- Coat 1: a thin layer of joint compound over the whole patch with a 6-inch knife, pressed into the mesh so the weave fills. Extend 2 inches past the patch. Dry fully.
- Coat 2: a wider layer with a 10-inch knife, feathered out past coat 1 on every side.
- Coat 3: wider still, feathered aggressively, in lightweight topping compound.
- Sand, dust, prime, paint.
The failure with mesh patches is trying to hide them in one thick coat. Mesh has thickness of its own, so it sits proud of the wall and needs a genuinely wide feather to disappear. Three thin coats over 12 inches beats one thick coat over 6 inches every time.
The California patch, explained properly
For a hole between about 2 and 6 inches, the California patch (also called a butterfly patch or a hat patch) is the best method there is, and it's rarely explained well. It's a piece of drywall that carries its own tape.
Here's the idea. Drywall is gypsum core sandwiched between paper facings. If you cut a patch piece oversized and remove the gypsum core from a border around the edge, you're left with a plug that fits the hole exactly plus a 1-inch flange of bare paper all around it. That paper flange is identical to paper drywall tape. Bed it in compound and it's stronger and thinner than a patch plus separate tape, because there's no double thickness at the seam.
The steps
1. Square up the hole. Cut the damaged area into a clean rectangle with a drywall saw or a utility knife. Squares and rectangles are far easier to match than a ragged circle. Say your hole becomes a clean 4 x 4 inch square.
2. Cut the patch piece 2 inches larger in each direction. For a 4 x 4 hole, cut a 6 x 6 inch piece from scrap drywall of the same thickness. Same thickness matters; a 1/2 inch patch in a 5/8 inch wall leaves a recess you'll be filling forever.
3. Score the back, 1 inch in from each edge. Flip the patch face down. Using a straightedge and a utility knife, score through the back paper and into the gypsum core only, 1 inch in from all four sides. You're drawing a 4 x 4 square on the back of a 6 x 6 piece. Do not cut through to the front paper.
4. Snap and peel. Snap the gypsum along each score line and peel the waste core away from the front paper. Work the border off in strips. What's left is a 4 x 4 gypsum plug in the center with a 1-inch tab of clean front paper sticking out on all four sides, which is where the "butterfly" name comes from.
5. Bevel the plug edges slightly with a knife or a rasp so it drops into the hole without binding. Test fit. It should sit flush, with the paper flange lying flat on the wall surface.
6. Butter the wall. Spread a thin, even layer of joint compound on the wall in a band about 2 inches wide all around the hole, where the paper flange will land. Also skim a little into the edges of the hole.
7. Set the patch. Push the plug into the hole and press the paper flange down into the compound. Then squeeze the excess compound out from under the flange with a 6-inch knife, working from the center outward on each side, exactly like bedding tape. Too much compound under the flange leaves a hump. Too little leaves a bubble that will show as a blister later.
8. Skim it and let it dry. Leave a thin coat over the flange. That's coat 1.
9. Coats 2 and 3. Same as any seam, covered below.
Why it beats the alternatives
- No backing needed. Nothing has to be screwed in behind the wall, and you don't have to find a stud.
- No separate tape. Tape over a butted patch adds thickness right at the seam, which is the worst place for it.
- Thinner overall. The paper flange is paper thin, so the finished repair sits much closer to flush and needs less compound to hide.
- Fast. Five minutes of cutting and the patch is in.
Its limit is size. Past about 6 inches, an unsupported gypsum plug flexes and can crack, so add backing instead.
Larger holes: backing and a real piece of drywall
Once a hole is bigger than a California patch can carry, the patch needs something solid behind it.
Option 1: backer strips (6 to 12 inches)
- Cut the hole into a clean rectangle.
- Cut two strips of 1x3 lumber or 1/2 inch plywood a few inches longer than the hole is tall.
- Slip each strip into the cavity, hold it tight against the back of the existing drywall on one side of the hole, and screw through the wall face into the strip above and below the opening. Two screws per side.
- Cut a drywall plug to fit the opening snugly and screw it to the strips.
- Tape all four seams with paper tape bedded in compound, or mesh tape if you're using setting-type compound.
- Three coats and sand.
Set every screw head just below the surface without tearing the paper, the same dimple you'd aim for hanging a full sheet.
Option 2: cut back to the studs (12 inches and up)
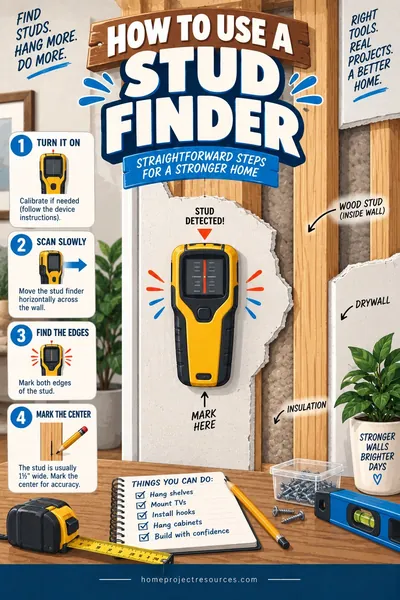
- Find the studs on both sides of the damage with a stud finder.
- Cut the opening back so the vertical edges land on the center of a stud on each side. That gives you 3/4 inch of stud to screw the old drywall to and 3/4 inch for the new piece.
- Add horizontal blocking at the top and bottom edges if the opening is tall, so all four edges are supported.
- Screw in a new piece of the same thickness.
- Tape all four seams, three coats, sand.
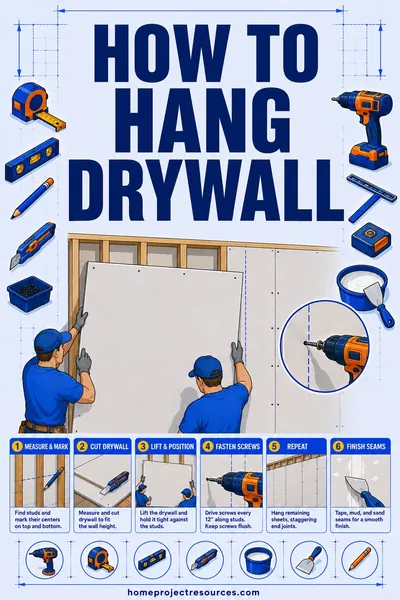
One thing to know about a patch like this: your seams are butt joints, meaning the sheet edges have no factory taper. There's no recess for the compound to sit in, so the joint has to be built up slightly above the wall surface and feathered very wide to hide. A well-finished butt joint is often 16 to 24 inches wide. Plan for that before you decide where to cut. Full detail on butt joints and back-blocking is in how to hang drywall.
Popped nails and screws
Not a hole yet, but the same repair family. Drive a new screw into the stud about 1.5 inches above or below the popped fastener, pulling the board tight. Then either drive the old fastener back below the surface or remove it. Fill both dimples, three thin coats, sand, prime.
Feathering: why a 4 inch hole becomes a 16 inch repair
This is the part that separates an invisible patch from an obvious one, and it has nothing to do with the patching technique.
A patched area sits at a slightly different height than the wall around it. Joint compound is opaque, so it hides the seam, but it can't hide a change in the surface plane. Your eye picks up a step or a hump instantly under any light coming across the wall at an angle, and every room has a window or a lamp that does exactly that.
Feathering means tapering the compound out so gradually that the transition happens over a distance too long for the eye to register as an edge.
The working rule: extend the compound 4 to 6 inches past the patch on every side.
Do the math on a doorknob hole:
- Hole: 4 inches
- Squared up and California patched: patch plug 4 inches, paper flange out to 6 inches
- Coat 1, over the flange plus 2 inches: about 10 inches
- Coat 2, 2 to 3 inches wider on each side: about 14 inches
- Coat 3, wider again: about 16 to 18 inches
So yes, a 4 inch hole is realistically a 16 inch repair area, and if you sand and prime only the middle 6 inches you'll see the patch from across the room. This is the number one reason DIY patches show.
Three habits that make feathering work:
- Use progressively wider knives. 6 inch for coat 1, 10 inch for coat 2, 12 inch for coat 3. Trying to feather 16 inches with a 6 inch knife doesn't work.
- Hold the knife at a low angle and increase pressure toward the outside edge. More pressure at the edge scrapes the compound down to nothing there while leaving it full in the middle.
- Judge with a raking light. Set a work light on the floor a couple of feet from the wall, shining almost parallel to the surface. That light is the only honest judge of a drywall finish, and it will show you every ridge you thought you'd feathered out. Check under it after every coat, not just at the end.
Three coats, sanding, and dust
Compound choice
Lightweight all-purpose joint compound in a tub is the default. It's premixed, easy to sand, forgiving, and dries by evaporation, which takes roughly 24 hours per coat depending on thickness and humidity.
Setting-type compound ("hot mud") comes as a powder labeled 20, 45, or 90, for the minutes until it hardens. It cures chemically rather than drying, it shrinks far less, and it's much stronger. It's harder to sand.
The practical combination: use setting-type compound for the first fill on a deep patch, because it barely shrinks and lets you recoat the same day, then switch to lightweight all-purpose or topping compound for coats 2 and 3, because you'll actually be able to sand them.
Mix only what you can use inside the working time printed on the bag. Hardened hot mud in a bucket is scrap, and it will not soften with more water.
Spackle is not joint compound. Spackle is for holes smaller than a pencil eraser. It shrinks less and dries faster, but it doesn't feather and it doesn't build. Anything bigger than a nail hole gets joint compound.
The three coats
Coat 1, the bed coat. Compound over the patch and its tape or flange, pressed down so it's tight to the board with only a thin layer underneath. 6 inch knife. Squeeze out the excess. Dry fully.
Coat 2, the fill coat. A wider layer feathered past coat 1 on each side. 10 inch knife. This is the coat that does most of the leveling.
Coat 3, the finish coat. Wider still, in lightweight topping compound, which sands with almost no effort. 12 inch knife. Feather aggressively. Aim to leave so little to sand that you barely need to.
Scrape ridges off between coats with the edge of a clean knife instead of sanding them. It's faster and it makes no dust.
Sanding
Light sanding between coats, real sanding after coat 3. Use 120 to 150 grit for knocking down ridges and 220 grit for the final pass. A sanding sponge gives you more control than a block on a small patch.
Do not sand through to the paper. Oversanding fuzzes the drywall's paper facing, and fuzzy paper swells when you paint over it, which turns a smooth patch into a rough one. If you go through, skim a thin coat of compound over the fuzz and start again.
A damp sponge is a good alternative on small patches: it smooths the compound with almost no airborne dust. It takes practice and it's slower, but for one patch in a finished room it's often the better trade.
Removing the dust, which is not optional
Drywall dust is fine, it's everywhere, and paint will not stick to it. Primer over dust is primer over a release layer.
- Vacuum the wall and the floor with a brush attachment. A shop vac without a fine-dust filter blows most of it back into the room, so use a HEPA or drywall filter bag.
- Wipe the repair area with a barely damp sponge or microfiber cloth.
- Let it dry completely before priming, usually an hour.
Texture matching, honestly
If the wall is smooth, skip this section. If it has texture, this is the step that will take you the longest.
Common wall and ceiling textures:
| Texture | How it's applied | Difficulty to match |
|---|---|---|
| Smooth (Level 4 or 5) | Nothing, just finish and sand | Easy |
| Orange peel | Thinned compound sprayed from a hopper gun or an aerosol can | Moderate, needs practice |
| Knockdown | Sprayed like orange peel, then flattened with a wide knife after 10 to 15 minutes | Hard, timing dependent |
| Skip trowel / hand texture | Compound applied and dragged with a trowel | Hard, entirely technique |
| Popcorn ceiling | Sprayed aggregate texture | Hard, and see the warning below |
The honest note: orange peel and knockdown take practice. The spray pattern depends on compound thinning, nozzle setting, air pressure, and distance from the wall, and all four interact. Nobody gets it on the first try.
So do this:
- Practice on a test board. A scrap of drywall or a sheet of cardboard, propped vertically the way a wall sits. Spray, adjust, spray again. Ten minutes of test board saves an afternoon of scraping wet texture off a wall.
- Match the pattern size first, then the density. Thinner compound and higher pressure give a finer spatter; thicker compound gives bigger blobs.
- On knockdown, time the flattening. Spray, wait until the peaks lose their wet shine, typically 10 to 15 minutes, then drag a wide knife across lightly. Too early smears it; too late does nothing.
- Feather the texture edge too. Blend it into the existing texture rather than stopping at a hard line. Reduce the spray as you move outward.
- Prime and paint after texturing, not before.
Aerosol texture cans are cheap and work fine for a single small patch. A hopper gun with a compressor costs several times what a can does and is worth it once you are past a few patches, or if you can borrow or rent one.
A safety note on popcorn ceilings: ceiling texture applied before about 1980 may contain asbestos, and some products remained in use after that. Do not scrape, sand, or dry-cut a popcorn ceiling of unknown age. Have a sample tested by a lab first. Testing is inexpensive next to the cost of an abatement job, and it is the only way to know.
Prime the patch, or it flashes
This is the step people skip, and it's the reason a perfectly executed patch shows through fresh paint.
Joint compound is far more porous than painted drywall. Paint applied over it soaks in, so the patch dries with less sheen and slightly different color than the wall around it. That difference is called flashing, and it appears as a dull ghost in the shape of your repair, visible from an angle. Adding a second coat of paint over unprimed compound usually reduces it without fixing it.
The fix:
- Prime the entire repair area, meaning the whole feathered zone, not just the patched hole. Use a drywall PVA primer, or a general purpose latex primer. Use a stain-blocking primer if you're covering water stains, smoke, or marker.
- Let the primer dry fully, typically 1 to 4 hours.
- Paint the wall corner to corner, not just the patch. Even with perfect color matching, a spot repair usually shows because a fresh roller stipple and a ten-year-old wall reflect light differently. Paint the whole wall, stopping at inside corners and trim where there's a natural break.
- Match the sheen, not just the color. Sheen mismatch is far more visible than a slight color mismatch. Flat next to eggshell shows even in the same color.
If the wall has a heavy raking light on it from a big window, consider a skim coat over the whole affected area rather than a spot patch. That's the Level 5 approach described in how to hang drywall, and it's the only reliable way to hide repairs in hard light.
Full technique on rolling the finished wall, cutting in, and coverage rates is in how to paint a room.
Worked example: a 4 inch doorknob hole in a hallway
The classic. A door swings back too hard, the knob punches through, and you have a roughly 4-inch hole with cracked paper radiating out from it.
Step 1: assess. 4 inches, in the middle of a stud bay, smooth painted wall, no wiring in that spot (it's high on the wall at knob height, not above an outlet). California patch is exactly the right method.
Step 2: square it up. Cut the hole to a clean 4 x 4 inch square with a utility knife, cutting past the cracked paper on all sides.
Step 3: cut the patch. From a scrap of 1/2 inch drywall, cut a 6 x 6 inch square. Score the back 1 inch in from each edge, snap, and peel the border core away. Result: a 4 x 4 plug with a 1-inch paper flange all around.
Step 4: set it. Butter a 2-inch band of compound around the hole, press the plug in, flatten the flange, squeeze out the excess with a 6-inch knife.
Step 5: three coats.
| Coat | Knife | Width | Dry time |
|---|---|---|---|
| 1, bed | 6 in | about 10 in | 24 hours |
| 2, fill | 10 in | about 14 in | 24 hours |
| 3, finish (topping) | 12 in | about 16 to 18 in | 24 hours |
Step 6: sand. 150 grit to knock down, 220 to finish, checked under a work light held at a low angle to the wall.
Step 7: dust, prime, paint. Vacuum, damp wipe, PVA primer over the full 18-inch zone, then repaint the wall corner to corner in matching sheen.
Materials, and what decides what you spend:
| Item | What drives the number |
|---|---|
| Drywall scrap (or a 2x2 ft panel) | Free if you have an offcut. A 2x2 handy panel is the cheapest way to buy some, and a full sheet costs more and is harder to get home |
| All-purpose joint compound, small tub | Buy the smallest tub sold. Compound has a shelf life once opened, so a big bucket for one patch is money thrown away |
| Lightweight topping compound (optional) | Optional. Skipping it means more sanding, not a worse result |
| 6, 10, and 12 in knives | The largest line by far, and a one-time purchase. If you own knives already this whole job is nothing but consumables |
| Sanding sponges, 150 and 220 grit | Two sponges, and among the cheapest items in the store |
| PVA drywall primer, quart | A quart is plenty. Buying a gallon for one patch is the most common overbuy on this list |
The honest summary is that the consumables for one patch cost very little, and the knives are the whole expense. Borrow them once and you will know whether you want your own set.
Time: about 90 minutes of hands-on work, spread across three days because of coat drying. The elapsed time is the real cost, not the effort.
Hiring it out: a single small patch almost never gets priced on its own merits, because it runs into a contractor's minimum service call, and it is three separate trips for coats. That minimum is the number that dominates the quote, so one hole and several holes often land close together. If you are going to hire it, walk the whole house first, list every ding, nail pop and crack, and get them all done in one visit. When you call for quotes, give each contractor the same list and ask specifically whether the price includes texture matching and priming, since those are the two things a low bid usually leaves out.
And prevent the repeat: a door stop or hinge-pin stop is the cheapest part of this whole project by a wide margin.
Frequently asked questions
What is a California patch and when should I use one?
It's a drywall patch cut 2 inches larger than the hole, with the gypsum core scored and peeled off a 1-inch border on the back so the front paper is left as a built-in tape flange. Use it for holes roughly 2 to 6 inches across. It needs no backing behind the wall, needs no separate tape, and finishes thinner and flatter than a plug plus tape.
How wide do I need to spread joint compound over a patch?
Extend the compound 4 to 6 inches past the patch on every side, using progressively wider knives: 6 inch for the bed coat, 10 inch for the fill, 12 inch for the finish. A 4-inch hole realistically becomes a 16 to 18 inch repair area. Feathering that wide is what makes a patch invisible, and skipping it is the most common reason DIY repairs show.
Can I use spackle instead of joint compound?
Only for holes smaller than a pencil eraser. Spackle dries fast and shrinks little, but it doesn't build up in layers and it doesn't feather, so it can't hide anything bigger than a nail hole. Anything larger needs joint compound applied in three feathered coats, and deep fills are best started with a setting-type compound so the first layer barely shrinks.
How many coats of joint compound does a patch need?
Three. A bed coat that sets the tape or paper flange, a fill coat that does most of the leveling, and a finish coat feathered wide in topping compound. Each coat needs to dry fully before the next, typically 24 hours for all-purpose compound, and each one goes on wider than the last. Scrape ridges off between coats instead of sanding to cut down dust.
Do I have to prime a drywall patch before painting?
Yes. Joint compound is far more porous than painted drywall, so paint soaks into it and the patch dries at a different sheen. That's called flashing, and it shows as a dull ghost in the shape of your repair. Prime the whole feathered area with a PVA drywall primer, then repaint the wall corner to corner rather than spot painting.
How do I match orange peel or knockdown texture?
Practice on a test board first, propped vertically like a wall. Adjust compound thinning, spray distance, and pressure until the spatter size matches the existing wall, then spray the patch and feather the texture outward into the surrounding area. For knockdown, wait until the peaks lose their wet shine, usually 10 to 15 minutes, then drag a wide knife lightly across. Both take a few attempts.
How do I fix a hole bigger than 6 inches?
Add backing. For holes up to about 12 inches, slip 1x3 or plywood strips into the cavity, screw them to the back of the existing drywall on each side, then screw a drywall plug to the strips. For anything larger, cut the opening back so the edges land on stud centers and screw in a new piece. Either way, tape all four seams and expect the butt joints to need a 16 to 24 inch feather.
How long does patching drywall take?
Hands-on time for a typical 4-inch hole is about 90 minutes, but it's spread over three days because each coat needs roughly 24 hours to dry. Using a setting-type compound for the first fill lets you recoat the same day and can cut it to two days. The waiting is the schedule, not the work, so start on a Friday if you want it painted by Sunday.
Related: How to hang drywall covers sheet layout, screw spacing, butt joints, and the three finishing coats on new work. How to paint a room has the primer, sheen, and coverage detail for finishing the wall. The drywall calculator gives you sheets, screws, tape, and compound for anything bigger than a patch.