How to Hang Drywall

Hang the sheets horizontally on walls, stagger the seams so no joint runs floor to ceiling, keep butt joints off the studs where your framing allows it, and leave a 1/2 inch gap at the floor so the sheet isn't sitting in whatever ends up on that slab. Fasten with screws every 16 inches in the field and every 8 inches along the edges, and drive each one just deep enough to dimple the paper without tearing it. Ceilings go up before walls, always.
Everything else about hanging drywall is a variation on those five rules. The one that trips up nearly every first-timer is screw depth, and it's covered in detail below.
Updated August 2026
A note on numbers. This page gives you layout, sheet counts, screw spacing, fastener specs and seam technique, not dollar figures. Board, compound and hanging labor are priced by region, by supplier and by how busy the crews are, and we do not set any of it. Work out your quantities here, then price them locally.
Get your sheet count before you rent the truck. Our free drywall calculator gives you sheets, screws, tape, and joint compound from your room dimensions, including waste. Drywall is heavy and awkward, and a second trip to the store is a genuinely bad afternoon.
Sheet sizes and thickness by application
Pick the sheet before you plan the layout, because sheet length changes how many seams you end up with.
| Thickness | Where it goes | Notes |
|---|---|---|
| 1/4 inch | Curved walls, skim layer over existing drywall | Too flexible for framing, it's a facing product |
| 3/8 inch | Repairs matching old work, curves | Rare in new construction |
| 1/2 inch | Standard walls | The default for residential wall framing at 16 in on center |
| 1/2 inch sag-resistant (ceiling board) | Ceilings on 24 in on center framing | Stiffer core, made specifically for this |
| 5/8 inch Type X | Ceilings, garage walls, fire-rated assemblies | Fire rating plus much better sag resistance |
| Moisture resistant | Bathroom walls outside the shower, laundry | Often green faced. Not a tile backer |
| Mold resistant (paperless or treated) | Bathrooms, basements | Fiberglass mat instead of paper, nothing for mold to eat |
| Cement board or a rated tile backer | Inside showers and tub surrounds | Drywall of any type does not belong behind tile in a wet area |
Standard ceilings should get 5/8 inch, not 1/2 inch, and this matters more than people expect. Ceiling drywall carries its own weight plus any insulation dust and moisture it takes on, and 1/2 inch regular board sags visibly between joists at 24 inch spacing. If your ceiling joists or trusses are at 24 inches on center, 5/8 inch or 1/2 inch sag-resistant board isn't optional.
Sheet sizes are 4 ft wide by 8, 9, 10, or 12 ft long. Longer sheets mean fewer seams, and fewer seams means less taping, which is the part that takes skill. On an 8 ft ceiling, a single 4x12 sheet run horizontally covers a 12 ft wall in two courses with only one horizontal seam and no vertical seam at all.
The tradeoff is weight and handling:
| Sheet | Approximate weight |
|---|---|
| 1/2 in, 4x8, lightweight | 39 to 42 lb |
| 1/2 in, 4x8, standard | 51 to 57 lb |
| 1/2 in, 4x12, standard | 77 to 85 lb |
| 5/8 in, 4x8, Type X | 70 to 73 lb |
| 5/8 in, 4x12, Type X | 105 to 110 lb |
A 4x12 sheet of 5/8 inch is a two-person lift and it does not fit around a tight stairwell. Measure your access path before you buy long sheets.
How to hang drywall horizontally or vertically, answered properly
On residential walls, hang horizontally. Here's the actual reasoning, not just "because that's how it's done."
An 8 ft wall taken horizontally with two 4 ft courses puts one continuous horizontal seam at 48 inches off the floor. That's chest height, where you can tape it standing up with both hands and good leverage. It's also the height where a seam is least visible, since it doesn't catch raking light from windows the way a vertical seam does.
The seam-length math matters too. A 12 ft wall hung horizontally has 12 linear feet of tapered seam. The same wall hung vertically with three 4 ft wide sheets has two vertical seams of 8 ft each, so 16 linear feet, plus those seams sit in the worst possible orientation for light.
Horizontal also ties the studs together across their span, which stiffens the wall and reduces the chance of a seam cracking if a stud moves.
Vertical is correct in specific cases:
- Commercial fire-rated assemblies, where the tested assembly is usually specified with vertical sheets and every joint landing on framing. If an assembly is rated, you follow the tested detail exactly.
- Walls taller than 8 ft 1 in where two horizontal courses no longer reach, and a third narrow strip would create an ugly extra seam. A 9 ft wall is often better hung vertically with 4x9 or 4x10 sheets, or horizontally with 4 ft and 5 ft courses if you can get the material.
- Metal stud framing in commercial work, where vertical hanging is the convention and the studs are dead straight anyway.
- Narrow walls under about 4 ft wide, where one vertical sheet covers the whole thing with no seam at all.
For a house, with wood studs, 8 ft ceilings, and a DIYer doing the taping, horizontal wins on every count.
Ceilings first, and why a helper is not optional
The ceiling goes up before any wall sheet. Two reasons: the wall sheets then push up tight against the ceiling sheets and help support their edges, and the ceiling-to-wall corner ends up cleaner.
A 4x12 sheet of 5/8 inch weighs over 100 pounds and has to be held flat overhead while you find joists and drive screws. This is where DIY drywall projects go wrong, and where people get hurt.
Rent a drywall lift. A day rate on one is trivial next to the cost of a broken sheet or a wrecked back, and it's the single best money you'll spend on the project. A lift holds the sheet dead flat against the joists while you screw it off, and one person can do a whole ceiling with one.
If you don't rent a lift, you need two people plus a pair of deadmen (T-shaped braces cut about 1/2 inch taller than the ceiling height) to wedge the sheet up while you fasten it.
Run ceiling sheets perpendicular to the joists, and start in a corner. Mark your joist locations on the wall plates before you cover them, because the moment the sheet goes up you can't see the framing.
Screw depth: the single most common DIY mistake
A drywall screw holds by clamping the sheet against the framing through the face paper. The paper is the tension layer. The gypsum core is crumbly on its own and holds almost nothing.
So the target is: drive the screw until it dimples the paper slightly below the surface, without tearing through it.
- Too shallow: the head stands proud and the compound can't bury it. You'll see it in the finished wall and feel it with a taping knife.
- Correct: a shallow dimple about 1/32 inch deep, paper intact all around the head, compound fills it flush.
- Too deep: the screw punches through the face paper. That screw is now holding nothing. The gypsum around it will crumble, the sheet will move, and you'll get a popped screw and a cracked seam later.
If you break the paper, don't try to save it. Back the screw out, or leave it and drive a new one about 1.5 inches away, at proper depth. Then fill the hole.
Use a drywall dimpler. It's a cheap nose cone attachment for a drill or an impact driver that sets a fixed depth and cams out when it gets there. A dedicated drywall screw gun with an adjustable clutch does the same thing faster. Doing this by feel with a standard drill is possible, and every single person who tries it breaks paper on the first fifty screws.
Screw type and length
| Board thickness | Framing | Screw |
|---|---|---|
| 1/2 in | Wood | 1-1/4 in coarse thread |
| 5/8 in | Wood | 1-5/8 in coarse thread |
| 1/2 in | Metal stud, 25 gauge | 1 in fine thread |
| 5/8 in | Metal stud, 25 gauge | 1-1/4 in fine thread |
| Double layer | Wood | Long enough to reach 5/8 in into framing |
Coarse thread for wood, fine thread for metal. Getting this backward gives you screws that strip out or that won't seat.
Screw spacing
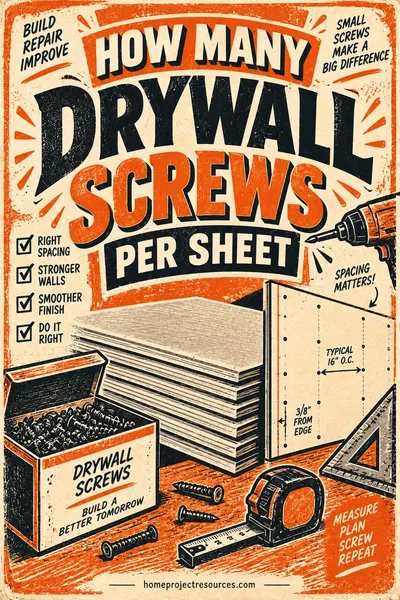
Working spec for residential walls: 16 inches on center in the field, 8 inches on center along the edges. Ceilings usually get tighter field spacing, commonly 12 inches on center, because gravity is working against you.
Keep screws at least 3/8 inch in from the sheet edge. Closer than that and the screw crumbles the edge and does nothing.
Rough quantity: about 35 screws per 4x8 sheet, or roughly a pound of screws per 100 square feet of board. Your local code or the assembly you're building may specify differently, and a fire-rated or shear-rated assembly always wins over a rule of thumb, so check before you start on anything rated.
Butt joints versus tapered joints
Look at the edge of a sheet of drywall. The long edges are tapered, meaning the board is slightly thinner for the last few inches. That taper creates a shallow valley when two sheets meet, and the tape and compound fill that valley and finish flush with the wall.
The short ends are not tapered. They're cut square through the full thickness. When two short ends meet, that's a butt joint, and there's no valley for the compound to sit in.
To hide a butt joint, you have to build the compound up above the surrounding wall surface and feather it out wide enough that the eye doesn't read it as a hump. A well-finished butt joint is often 16 to 24 inches wide. A poorly finished one is a visible ridge, and it's the most common flaw in amateur drywall.
Three ways to deal with butt joints:
1. Have fewer of them. Buy sheets long enough to span the wall. A 12 ft wall gets 4x12 sheets and has zero butt joints. This is the best solution and it's free.
2. Put them where nobody looks. If you can't avoid a butt joint, land it behind where a bookcase goes, low on a wall, or in a closet. Never put a butt joint in the middle of a feature wall or directly across from a window.
3. Back-block them. This is the trick that turns butt joints from a problem into a non-issue.
The back-blocking trick
Instead of landing the butt joint on a stud, land it between studs, over a backing block.
Cut a piece of 3/4 inch plywood or a manufactured butt-joint backer about 8 inches wide and as long as the sheet is tall. Fasten it behind the joint so it spans the gap between two studs, and let the joint float on it.
Because the block is behind the sheets and not fastened to a stud, screwing the two sheet ends into the block pulls the ends slightly inward, creating a shallow recess right at the joint. Now the butt joint behaves like a tapered joint, and it takes far less compound and far less feathering to hide.
Manufactured butt-joint backers do this with a molded profile and are among the cheapest things in the drywall aisle. A shop-made version is two strips of thin cardboard or a scrap of 1/8 inch hardboard glued near the outer edges of a plywood strip, which creates the same slight bow.
This is also why "keep butt joints off the studs where you can" is good advice. A butt joint centered on a stud has zero recess, sits proud, and is the hardest joint in the house to hide.
Also: stagger your butt joints. Never let a butt joint in the upper course line up with one in the lower course. Offset them by at least 4 ft, ideally a full stud bay or more. A continuous vertical joint through both courses is a straight crack line waiting for the first seasonal movement.
Cutting drywall
Score and snap
For any straight cut, this is the whole method:
- Mark the cut on the face side.
- Run a sharp utility knife along a T-square or straightedge, cutting through the face paper and just into the gypsum. One firm pass, not three timid ones.
- Snap the sheet away from the scored side. The core breaks along the line.
- Fold the sheet back and cut the back paper along the crease.
Change blades often. A dull knife tears paper instead of slicing it, and torn paper edges fuzz up under the compound.
For ripping a sheet lengthwise, a drywall rasp cleans up the cut edge afterward and makes the sheet easier to fit.
Cutouts for electrical boxes
Two methods, and the choice depends on how confident you are.
The measure-and-cut method works if you're careful. Measure from a fixed reference, not from the last thing you measured. Pick a corner, a floor line, or the edge of the previous sheet, and take every dimension from that same point.
This matters more than it sounds. If you measure box A from the corner, then box B from box A, then box C from box B, each small error carries forward and adds to the next. By the fourth box you can easily be 3/4 inch off. Measuring everything from one fixed reference means each error stays isolated to one box.
Take two dimensions to each box: the distance from your reference along the wall, and the distance from the floor (or ceiling). Transfer both to the sheet, draw the box outline, and cut with a drywall saw or a rotary cutout tool.
Add about 1/8 inch of clearance all the way around. A tight cutout that has to be forced over a box will crack the corners.
The rotary tool method is faster and it's how pros do it. Hang the whole sheet over the box without cutting anything, then use a spiral cutout tool with a drywall bit: plunge through inside the box outline, move the bit sideways until it touches the inside edge of the box, ride it out and around the box perimeter, and the cutout falls free. It takes about fifteen seconds per box and it's exactly accurate because you're tracing the actual box.
Make sure the box is set flush with the finished drywall surface and that no wires are pushed against the inside face where the bit will run.
Around doors and windows
Don't run a seam up from the corner of a door or window opening. That corner is a stress concentration point and any joint landing there will crack.
Instead, run the sheet past the opening and cut the opening out of the middle of the sheet. This is called wrapping the opening, and it's why the pros hang a sheet right over a doorway and cut it out afterward. A little more waste, a lot fewer callbacks.
Corners and corner bead
Inside corners get paper tape folded along its crease and set in compound. There's no metal involved on a standard inside corner. Hang the sheets so one side butts into the other, and don't try to close a tight gap with force.
Leave the corner slightly loose rather than crammed. A sheet forced into a corner bows and the bow shows.
Outside corners need corner bead, which protects the edge from impact and gives the taper a straight line to work to.
| Corner bead type | How it goes on | Best for |
|---|---|---|
| Metal, nail-on or screw-on | Fastened every 8 to 10 in through the flanges | Standard, cheapest, dents if hit hard |
| Paper-faced metal | Bedded in compound, no fasteners | Straightest result, best crack resistance, the pro choice |
| Vinyl | Bedded in compound or stapled | Won't rust or dent, good for basements and humid areas |
| Bullnose | Bedded or fastened | Rounded corner look, needs matching inside corner pieces |
| Flexible / arch bead | Bedded | Curved openings and arches |
Whatever you use, check the corner with a level after you set it. A bead that's out of plumb is baked into the finished wall and can't be fixed with compound.
Worked example: sheeting a 12 x 14 room with 8 ft ceilings
Wall area. Perimeter (12 + 14) x 2 = 52 ft. Times 8 ft = 416 sq ft.
Ceiling area. 12 x 14 = 168 sq ft.
Total surface: 584 sq ft.
Now the sheet count, done properly by wall rather than by dividing total area.
Walls, using 4x12 sheets hung horizontally:
- Two 12 ft walls: each takes exactly two 4x12 sheets stacked. 4 sheets.
- Two 14 ft walls: each needs 12 ft plus a 2 ft filler per course, two courses. That's 2 full sheets plus fillers cut from a third. 5 sheets covers both walls with the offcuts used as fillers.
Walls total: 9 sheets.
Ceiling, 12 x 14, using 4x12 sheets: three sheets run 12 ft across the width covers 12 ft of the 14 ft length, leaving a 2 ft strip. 4 sheets, with the fourth ripped down.
Ceiling total: 4 sheets.
Grand total: 13 sheets of 4x12. Buy 15 to cover damage, bad cuts, and the sheet that gets a corner knocked off in the truck.
Don't subtract for a standard door and window. The offcuts get used as fillers, and openings smaller than about 25 sq ft generally aren't worth deducting.
Supporting materials for 584 sq ft:
| Material | Quantity | Notes |
|---|---|---|
| Screws | About 6 lb | Roughly 1 lb per 100 sq ft |
| Paper tape | About 430 linear ft | Roughly 370 ft per 500 sq ft of board |
| All-purpose joint compound | About 5.5 gallons | Roughly 4.5 gal per 500 sq ft for three coats |
| Corner bead | Per outside corner, measured | Buy the length of the corner plus a few inches |
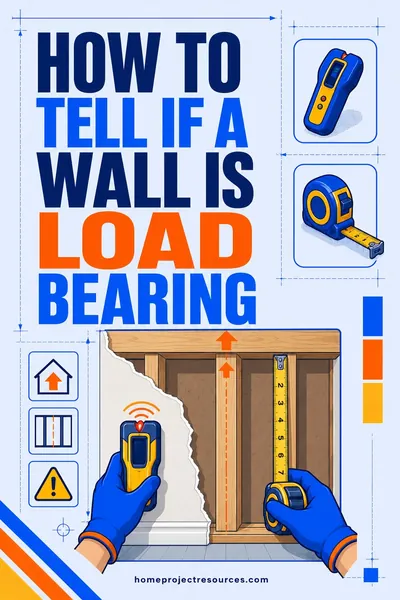
The drywall calculator runs all of this from your dimensions, and if you need to work out the surface area of an irregular room first, the square footage calculator handles it. Before you touch any wall you plan to remove or modify, read how to tell if a wall is load bearing first, because that's a question you want answered before demolition and not after.
Finishing: the three coats, honestly
Hanging is the easy half. Taping is the half that takes practice, and it's worth being straight about that.
Coat 1, the tape coat. Bed paper tape into a layer of compound over every seam and inside corner, and squeeze out the excess so the tape is tight against the board with a thin layer underneath. Fill the screw dimples at the same time. Let it dry fully, usually 24 hours for all-purpose compound.
Coat 2, the fill coat. A wider layer over the tape, feathered out past the first coat on each side. Use a wider knife than you used for coat 1, typically a 10 inch. Second pass on the screws.
Coat 3, the finish coat. Wider still, typically a 12 inch knife, using lightweight topping compound which sands easily. Feather aggressively. On butt joints this coat may span 20 inches or more.
Then sand. Use a pole sander with 150 to 220 grit, or better, a sanding sponge and a vacuum-attached sander to keep the dust down. Sand with a bright work light held at a very low angle to the wall so it rakes across the surface. That light is the only honest judge of a drywall finish, and it will show you every ridge you thought you'd feathered out.
Most residential work is finished to Level 4, which is fine for flat and eggshell paint. Level 5 adds a skim coat over the entire surface and is what you need for gloss paint, dark colors, or walls hit by strong raking light from a large window.
Hiring the taper while hanging it yourself
This is a legitimate and common cost split, and it's one of the better value decisions in a DIY remodel.
Hanging drywall is heavy, tedious work that rewards patience and care. Taping is a craft skill. A professional taper works fast because they've done it thousands of times, and their coats go on thin and even, which means less sanding and less dust in your house.
How the scopes compare. Everything in drywall is quoted per square foot of drywall surface, not per square foot of floor, which is the first thing to confirm when you call. Here is how the scopes stack up against each other:
| Scope | Where it sits relative to the others |
|---|---|
| Materials only (board, screws, tape, mud) | The smallest piece, roughly a quarter of a full turnkey price |
| Hang only, labor | About the same as the materials |
| Tape and finish only, labor, to Level 4 | Roughly double the hanging labor. This is the craft half |
| Full hang, tape, and finish, labor and materials | The sum of the three above |
| Level 5 finish, add | Adds roughly a quarter again on top of a full price |
That table is the whole argument for the split. Taping is the most expensive line and the hardest to do well, and hanging is the cheapest line and the easiest to learn, so hanging it yourself and hiring the finish captures most of the saving with the least risk to the result. Doing everything yourself saves the labor but costs you a weekend of sanding, and the finish quality will honestly show it on the first attempt. Doing everything yourself in a garage or a basement utility room is a great place to learn. Doing it for the first time in your living room is not.
When you call for quotes, give every contractor the same three things: the square footage of drywall surface, the finish level you want, and who is supplying and stocking the board. Then ask what is excluded, because sanding, dust protection, disposal and priming are the four items that quietly move between quotes.
Common mistakes
Breaking the face paper with screws. Covered above, and it's the big one. Use a dimpler.
Forcing sheets tight into corners. Leave a small gap. Compound fills it. Force bows the sheet.
Landing seams at door and window corners. Guaranteed crack. Wrap the opening instead.
Butt joints stacked in both courses. Creates a continuous vertical line. Offset them.
No gap at the floor. Drywall wicks water. Half an inch off the floor, covered by baseboard.
Screwing too close to the edge. Crumbles the edge, holds nothing. Stay 3/8 inch in.
Hanging over insulation that's bulging. Compressed insulation pushes the sheet out and you get a wavy wall. Trim it flush with the studs.
Not marking the framing. Once the sheet is up, you're guessing. Mark joist and stud locations on the floor and ceiling before you cover them.
Skipping the raking light check. Sanding under flat overhead light gives you a wall that looks perfect until the sun comes through the window in March.
Hanging 1/2 inch on a 24 inch on center ceiling. It will sag. Use 5/8 inch or sag-resistant board.
Frequently asked questions
Should drywall be hung horizontally or vertically?
Horizontally on residential walls. It puts one continuous seam at about 48 inches off the floor, which is comfortable to tape and least visible under raking light, and it reduces the total linear feet of seam you have to finish. Vertical is correct for commercial fire-rated assemblies where the tested detail requires it, for walls taller than about 8 ft where two horizontal courses won't reach, and for narrow walls a single sheet can cover with no seam.
How far apart should drywall screws be?
Use 16 inches on center in the field of a wall and 8 inches on center along the edges, and tighten the field spacing to about 12 inches on ceilings. Keep every screw at least 3/8 inch in from the sheet edge so it doesn't crumble the gypsum. A fire-rated or shear-rated assembly may specify different spacing, and that specification always overrides a rule of thumb.
How deep should a drywall screw go?
Just deep enough to dimple the face paper without tearing it, roughly 1/32 inch below the surface. The paper is what carries the load, so a screw that punches through it holds essentially nothing and will pop later. Use a dimpler bit or a screw gun with a depth clutch instead of trying to judge it by feel.
Do I need 5/8 inch drywall on the ceiling?
For ceilings framed at 24 inches on center, yes, or use 1/2 inch sag-resistant ceiling board made for the purpose. Regular 1/2 inch board sags between joists at that spacing, and the sag is permanent once it happens. 5/8 inch Type X is also required by code in many garage ceilings and in fire-separation assemblies, so check your local requirements.
Why do butt joints look bad and how do I fix them?
Sheet ends have no taper, so there's no recess for the compound to fill and the joint has to be built up above the wall surface. That leaves a hump unless it's feathered out 16 to 24 inches. The fix is to use sheets long enough to avoid butt joints entirely, or to back-block them: land the joint between studs on a backing block so screwing the ends in pulls them slightly inward and creates a shallow recess.
What size gap do you leave at the bottom of drywall?
About 1/2 inch off the floor. The gap keeps the board out of any water that ends up on the floor, since gypsum wicks moisture straight up the sheet. It also gives you room to lever the sheet up tight against the course above with a foot lifter. Baseboard covers it.
Can I hang drywall by myself?
Walls, yes, with a foot lifter and patience. Ceilings, not safely with full sheets. Rent a drywall lift for the day, which lets one person do a whole ceiling, or use a helper plus deadman braces. Trying to hold a 100 pound sheet overhead while finding joists is how people get hurt and how sheets get broken.
How much does it cost to hang and finish drywall?
It is quoted per square foot of drywall surface, not per square foot of floor, so confirm which one a bid is using before you compare two of them. Materials are roughly a quarter of a turnkey price. Hanging labor is about the same again. Taping and finishing to Level 4 is the biggest single piece, roughly double the hanging labor, which is why hanging it yourself and hiring only the taping is such a common split. A Level 5 finish adds meaningfully on top. Region, ceiling height, and how much cutting the room needs move all of it.
Related tools: Drywall Calculator | Square Footage Calculator
Related reading: How to Tell if a Wall Is Load Bearing | Cost to Paint a Room