How to Paint Kitchen Cabinets

The finish on painted cabinets is decided by prep, not by paint. Degreasing, sanding, and choosing the right primer are roughly 80 percent of the result, and skipping any one of them is the reason painted cabinets peel at the door edges within a year.
Do it in this order: empty and degrease with a strong alkaline cleaner, label every door and its hardware, sand to a uniform dull surface, prime with a product matched to your cabinet material, then apply two thin coats of a real cabinet enamel. Budget 4 to 7 working days for an average kitchen, most of which is drying time, not working time.
Need to know how much paint to buy? Run your door count and box dimensions through our free paint calculator and you'll get gallons for primer and topcoat instead of guessing at the store.
Updated August 2026
A note on numbers. No dollar figures on this page. Paint lines, cabinet shop rates and regional labor move too far and too often for a printed range to help anyone. What follows is the materials math, the per door variables painters actually price on, and the questions that keep two or three quotes comparable.
Why painted cabinets peel, and what actually prevents it
Almost every failed cabinet paint job traces back to one of four things, and none of them is the brand of paint on the can.
- Grease was still there. Kitchen cabinet doors near the range collect an invisible film of aerosolized cooking oil. Primer sticks to the grease, the grease does not stick to the wood, and the whole stack peels off in a sheet.
- The surface was still glossy. Factory cabinet finishes are conversion varnish or catalyzed lacquer, both of which are extremely slick. Paint needs mechanical tooth to grip.
- The wrong primer went on a slick substrate. Thermofoil and laminate need a bonding primer. A standard latex primer will look fine for two months and then chip off in flakes at every edge.
- Wall paint was used instead of enamel. Wall paint never hardens enough for a surface that gets fingernails, pans, and cleaning spray.
Fix those four and the job lasts 8 to 15 years. Miss one and you'll be sanding it all off next summer.
Step 1: Degrease before you do anything else
This is the step people skip, and it is the one that decides whether the rest of the work matters.
Cooking grease is not water soluble and it does not come off with a damp rag. It migrates. Even cabinets on the far wall of the kitchen carry a thin oily film, and doors above and beside a range carry a heavy one. Sanding over grease just grinds it deeper into the wood pores and spreads it across the whole door.
Use a strong alkaline degreaser, the class of cleaner sold as heavy-duty prep cleaners, TSP, or TSP substitutes. These are the products designed for pre-paint cleaning, not general kitchen sprays. Mix to the label ratio, wear gloves and eye protection, and work in sections.
The routine that works:
- Wet the surface with the degreaser solution and give it 60 seconds to break the film down. Do not let it dry on the wood.
- Scrub with a nylon pad or a stiff brush, paying extra attention to door edges, the top rail, and the area around handles where hand oils build up.
- Wipe with a clean water-damp cloth, then a second clean cloth. Residue left behind interferes with primer adhesion just like grease does.
- Let everything dry completely, at least 2 hours in a ventilated room.
The water bead test: flick a few drops of water onto a dried door face. If the drops bead up and sit there, grease is still present and you degrease again. If the water spreads into a flat film, you're clean.
Doors within 3 feet of a range or a deep fryer often need three passes. That is normal and it is worth the extra 40 minutes.
Step 2: Label doors and hardware so reassembly is not a puzzle
Cabinet doors are not interchangeable, even when they look identical. Hinge cups are drilled to slightly different depths, screw holes wallow out over time, and a door that hung perfectly on one opening will sit a sixteenth of an inch off on the next one. Reassembling 24 unlabeled doors by trial and error takes hours.
Do this before a single screw comes out:
- Number the openings. Put a piece of blue tape inside each cabinet opening, on the frame where it will not get painted, and write a number on it. Left to right, top row first.
- Number the doors to match. Put the same number on the door, on the hinge side edge, using tape. Not on the face, and not with a marker directly on the wood, since marker can bleed through primer.
- Bag the hardware per door. One zip bag per door, labeled with the same number, containing the hinges and screws for that door. Drawer slides go in their own bags.
- Photograph each cabinet run before removal. Wide shot, then a close shot of a hinge and its mounting position. Twenty seconds now saves an hour later.
- Mark the tape number where paint won't cover it. On a flat-panel door, the hinge-side edge is fine. On a face-frame cabinet, the inside of the frame near the hinge works.
If you're painting the door edges too, move the tape number to the back of the door partway through and note the change.
Step 3: Sand to a uniform dull surface
You are not removing the old finish. You are scuffing it so primer has something to grab.
- Previously painted or clear-coated cabinets: 150 to 180 grit. Sand until the entire surface is uniformly dull with no shiny patches left in the corners or profiles.
- Bare or stripped wood: 120 grit, then 180 grit.
- Detailed profiles and raised panels: a sanding sponge or a maroon abrasive pad follows the shape better than a block. A random orbital sander handles the flat fields fast.
Vacuum every surface with a brush attachment, then wipe with a slightly damp microfiber. Skip tack cloths under waterborne primers, since some leave a residue that interferes with adhesion.
Liquid deglossers are an option when sanding is genuinely impractical, on heavily carved doors for example. They dull the surface chemically. They're weaker than sanding and they're not a substitute for degreasing. Use them as a supplement, not a shortcut.
If the house was built before 1978, assume the existing finish contains lead until a test says otherwise. Do not sand or scrape it. Lead test kits are inexpensive and sold at any hardware store, and a certified inspection costs many times a kit while still being a small fraction of the paint job. If the test is positive, hire an EPA Lead-Safe Certified contractor. Dry sanding lead paint in a kitchen is exactly how a family gets exposed.
Primer for kitchen cabinets, by material
Primer is where a cabinet job succeeds or fails, and the right choice depends entirely on what your cabinets are made of. This is the single most useful table on this page.
| Cabinet surface | How to identify it | Primer to use | Notes |
|---|---|---|---|
| Bare or stripped wood | Visible open grain, no sheen, absorbs water | Waterborne or oil-based stain-blocking primer | Two coats on knotty pine, cherry, and mahogany or tannin bleed will yellow the topcoat |
| Previously painted, sound | Paint film, no chips, sands to white powder | Quality waterborne bonding primer | One coat is enough if adhesion tests clean |
| Factory clear-coated oak or maple | Warm sheen, visible wood grain, 1980s to 2000s | Bonding primer, shellac-based or waterborne bonding | Scuff sand first, this finish is very slick |
| Thermofoil | Seamless plastic wrap over MDF, no grain, edges may be lifting | Shellac-based or solvent-based bonding primer only | The highest-risk surface, see below |
| Laminate or melamine | Flat plastic sheet, often with a visible seam at the edge | Shellac-based or solvent-based bonding primer only | Non-porous, standard primers will not hold |
| MDF edges and cut ends | Fuzzy brown fiber, drinks paint | Oil-based or shellac primer, two coats | Seal thoroughly or the edge stays rough forever |
Thermofoil and laminate need extra care
These two are where DIY cabinet painting most often fails, so be specific about them.
Thermofoil is a vinyl film heat-pressed over an MDF core. It is completely non-porous, so nothing soaks in and adhesion is purely chemical. It also delaminates near heat sources, especially the doors flanking an oven or above a toaster area. If the film is already lifting at a corner, paint will not fix that. Either replace the door or accept the visible seam.
For thermofoil: scuff with 220 grit just enough to dull the sheen without cutting through the film, degrease again after sanding, then use a shellac-based or dedicated solvent bonding primer. Waterborne primer on thermofoil is the classic failure.
Laminate and melamine are similar. Both are slick sheet goods over particleboard. Both need a bonding primer, not a general-purpose one. Test one door first: prime it, topcoat it, wait 5 days, then press a strip of painter's tape hard onto the finish and rip it off fast. If paint comes with the tape, your primer is wrong and you found out on one door instead of thirty.
Shellac-based primers smell strong and need denatured alcohol for cleanup, but they stick to almost anything and dry in under an hour. Ventilate aggressively, run a fan out a window, and take breaks.
Filling oak grain for a smooth finish
Open-grain oak painted with any paint gives you a painted oak cabinet, grain lines and all. Some people like it. If you want the smooth, sprayed-furniture look, you have to fill the grain, and here is the honest version: it is a lot of work.
The process:
- Prime the doors first so the filler has a sealed base.
- Squeegee a thin coat of oil-free grain filler or a light spackling compound across the door with a plastic putty knife or a drywall blade, pressing it into the grain and scraping the excess off flat.
- Let it dry fully, usually 2 to 4 hours.
- Sand back to the primer with 220 grit until only the grain lines hold filler.
- Repeat. Oak almost always needs two rounds, and deep-grained red oak sometimes takes three.
- Spot prime the sanded areas and move on.
Realistic time: 20 to 30 extra minutes per door face, two rounds, plus sanding. On a 20-door kitchen that's 12 to 18 additional hours plus a couple of tubs of filler. That is a full extra weekend.
Two alternatives worth knowing. High-build primer sprayed and sanded gets you most of the way there with less handwork, but it needs spray equipment. Or you skip it and lean into the grain, which reads as a country or transitional look and costs nothing.
Paint for kitchen cabinets: enamel, not wall paint
Wall paint and cabinet enamel are engineered for opposite jobs. Wall paint is formulated to stay slightly flexible so it doesn't crack on drywall movement. That flexibility is exactly what you don't want on a door edge that gets bumped by a pan.
Wall paint on cabinets stays soft, dents under a fingernail, blocks (sticks to itself) where a door meets a frame, and chips at the edges within months. No amount of extra coats fixes it.
Use a cabinet or trim enamel. The categories that work:
| Paint type | Hardness | Leveling | Cleanup | Relative cost per gallon | Best for |
|---|---|---|---|---|---|
| Waterborne alkyd enamel | Very good | Excellent, brush marks flow out | Water | Upper end of the trim paint shelf | The default choice for most DIY kitchens |
| Acrylic urethane enamel | Very good | Very good | Water | The priciest of the four | Sprayed and brushed jobs, fast recoat |
| Traditional oil-based enamel | Excellent | Excellent | Mineral spirits | Mid range, often the cheapest true enamel | Maximum hardness, but ambers over time on whites and is restricted in some states |
| Interior latex wall paint | Poor | Fair | Water | The cheapest, and a false economy here | Not for cabinets |
Sheen matters too. Satin and semi-gloss are the practical range, and changing the sheen of paint that is already dry explains why a topcoat, not a technique, is the only way to move it. Satin hides surface imperfections better and is the common choice now. Semi-gloss cleans easiest and shows every flaw in your prep. Flat and eggshell are not durable enough here.
Dark colors need a tinted primer to hit full coverage in two coats. Ask the paint counter to tint your primer toward the topcoat color. It's free and it can save you a whole third coat.
Application: brush and roller versus a sprayer
Both give a good result. They cost different amounts of money, time, and patience.
| Factor | Brush and foam roller | HVLP or airless sprayer |
|---|---|---|
| Finish quality | Good to very good with a self-leveling enamel, slight roller stipple on close inspection | Excellent, factory-smooth, no texture |
| Equipment cost | A modest outlay in brushes, roller covers, and trays | Buying an HVLP costs several times the brush kit; a day or two of rental costs about what the brush kit does |
| Masking and setup time | 1 to 2 hours total | 4 to 8 hours, everything within reach gets covered |
| Overspray risk | None | High, fine mist travels and settles on floors, counters, and appliances |
| Learning curve | Low | Real, expect to waste some paint dialing in the pattern |
| Paint used | Less | 20 to 40 percent more, some is lost to overspray |
| Best use | Face frames, boxes, and small kitchens | Doors and drawer fronts sprayed flat in a garage |
The hybrid most experienced painters use: spray the doors and drawer fronts in a garage or a covered outdoor space, brush and roll the face frames and boxes in the kitchen. The doors are what people look at and touch. Face frames are narrow enough that a good brush leaves an almost invisible finish.
If you brush and roll everything, use a high-density foam roller (4 inch) for flat areas and a quality synthetic angled sash brush for profiles and corners. Roll the flat field, then immediately tip it off by dragging the brush lightly in one direction. Two thin coats always beat one thick coat.
How to paint kitchen cabinets, step by step
Here's the whole sequence in order, with realistic timing for an average kitchen of 20 doors and 8 drawer fronts.
- Empty the cabinets and clear the counters. 1 to 2 hours. Set up a work table in the garage with cleats or paint pyramids to keep doors off the surface.
- Degrease everything, boxes included. 2 to 3 hours plus dry time.
- Label, photograph, and remove doors, drawers, and hardware. 1 to 2 hours.
- Fill dents and old hardware holes if you're changing pull spacing. Wood filler, 1 hour plus dry time.
- Sand all surfaces, vacuum, wipe down. 3 to 5 hours.
- Mask the kitchen: floors, counters, backsplash, appliances. 1 to 2 hours.
- Prime doors, drawer fronts, face frames, boxes. 2 to 4 hours. Dry 4 to 24 hours per the label.
- Sand the primer lightly with 220 grit and wipe. This is the step that separates a good job from a great one. 1 to 2 hours.
- First topcoat. 2 to 4 hours. Doors get backs first, then fronts after the backs set.
- Light 320 grit scuff between coats, wipe. 45 minutes.
- Second topcoat. 2 to 4 hours.
- Wait. Do not rehang for at least 24 to 72 hours depending on product.
- Rehang doors, reinstall hardware, adjust hinges. 2 to 3 hours.
- Leave doors slightly ajar or place felt bumpers, and go easy for two more weeks.
Total hands-on time: 25 to 40 hours. Total calendar time: 4 to 7 days.
Worked example: how much paint and how much time
A 12 by 14 foot kitchen with 20 doors and 8 drawer fronts.
Surface area: - Average door 15 by 30 inches = 3.1 sq ft per face, 6.2 sq ft both sides. 20 doors = 124 sq ft - Drawer fronts 22 by 6 inches = 0.9 sq ft per face, 1.8 both sides. 8 fronts = 15 sq ft - Face frames, box interiors visible at the opening, and exposed end panels = about 90 sq ft - Total per coat: roughly 230 sq ft
Paint needed: - Primer covers 250 to 300 sq ft per gallon on cabinets. One coat over 230 sq ft = 1 gallon - Enamel covers 350 to 400 sq ft per gallon brushed. Two coats over 230 sq ft = 460 sq ft = 1.5 gallons, so buy 2 and keep the rest for touch-ups - Spraying instead? Add 30 percent: about 2 gallons of enamel
Where the materials money goes, largest line first:
- Cabinet enamel, 2 gallons. Usually the biggest single line, and the one worth spending on
- Degreaser, sandpaper, tape, plastic, brushes, roller covers. Collectively close behind the paint, and the line people forget to budget for
- Bonding primer, 1 gallon. Roughly half the enamel line
- New hinges and pulls if you're upgrading. Entirely your choice, and it can exceed everything above it combined
Price those four at your own store and the total for a mid-size kitchen still lands at a small fraction of any hired option. That gap is the whole argument for doing it yourself.
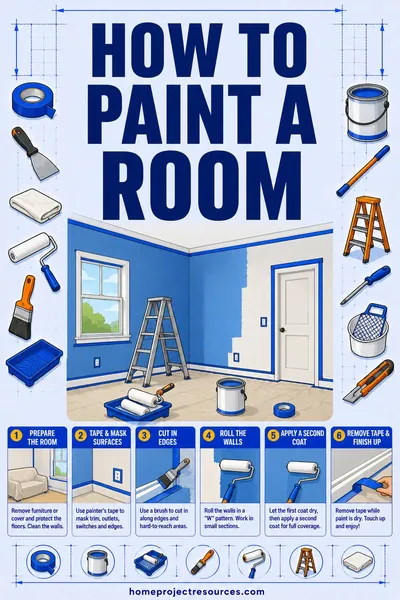
Run your own door count through the paint calculator to size this for your kitchen. If you're also repainting the walls in the same room, our interior house painting cost guide covers those numbers separately, and how to paint a room walks through the wall and trim sequence.
Dry time versus cure time, and why doors get stacked too early
These are two different things and confusing them ruins otherwise perfect work.
Dry to touch is 30 minutes to 2 hours. Recoat time is 4 to 24 hours. Full cure, meaning the paint film has reached its final hardness, is 14 to 30 days for most waterborne cabinet enamels and up to 30 days for oil-based.
Between recoat and full cure, the paint is dry enough to handle but soft enough to dent, print, and stick to itself. That last one, blocking, is what leaves a permanent mark where a door pressed against a face frame.
Rules for the cure window:
- Do not stack painted doors on top of each other, ever. Even with spacers, even after a week. Store them flat with air on both faces or standing on edge.
- Rehang after 24 to 72 hours, but put felt bumpers on the door corners so the painted faces never touch bare.
- Leave doors cracked open for the first few days if the kitchen layout allows it.
- No liners, no shelf paper, nothing set down on painted shelf surfaces for 2 weeks.
- Clean with a dry or barely damp cloth only for the first month. No sprays, no degreasers, no scrubbing.
- Warm and dry speeds cure, cold and humid slows it. Below 60 degrees F or above 65 percent humidity, add days.
Two weeks of gentle use is the whole ask. People who ignore it get dented door edges and paint that lifts off the frame in a strip.
Cost to paint kitchen cabinets: DIY, hired, or reface
| Option | Where it sits, 20 to 30 doors | Time | Lifespan | Best when |
|---|---|---|---|---|
| DIY brush and roll | The baseline, materials only | 4 to 7 days, 25 to 40 hours of work | 8 to 12 years | Cabinet boxes are solid, you have the weekends |
| DIY with rented sprayer | Modestly above the baseline, for the rental and the extra paint | 4 to 7 days, 30 to 45 hours | 8 to 15 years | You have a garage to spray in |
| Hired painter, on site | Roughly ten times the DIY baseline, because it is nearly all labor | 3 to 5 days in your kitchen | 8 to 12 years | You want it done without living in a jobsite for a week |
| Hired, doors sprayed off site | Meaningfully above an on site painter, for transport and shop time | 1 to 2 weeks, doors leave the house | 12 to 20 years | You want a true factory finish |
| Cabinet refacing | Above either painting option, since it buys new doors | 3 to 5 days | 15 to 25 years | You want new doors and a new look, boxes stay |
| Full cabinet replacement | The most expensive by a wide margin, and the widest spread | 2 to 5 weeks | 20 to 40 years | Layout changes, water damage, or failing boxes |
Regional labor swings every hired line above by a quarter or more in either direction, so treat two or three local quotes as the real number. Ask each painter to price the same door and drawer count, the same interiors decision, and the same hardware plan, or the bids are not describing the same job.
If painting is starting to look like a stopgap, our cabinet refacing cost guide compares refacing to painting head to head, and the kitchen remodel cost breakdown puts cabinets in context with counters, flooring, and appliances.
What makes a cabinet painting quote go up
- Door count. Most painters price per door and drawer front, and the spread between a plain slab and a detailed one is wide. Twelve extra doors is real money.
- Detailed door profiles. Raised panels and applied moldings take two to three times as long as flat slab doors.
- Grain filling on oak. A separate, labor-heavy step that adds a meaningful percentage to a full kitchen.
- Color change from dark to white. More coats, tinted primer, longer schedule.
- Thermofoil or laminate. Some painters won't warranty it. Those who will charge a premium for the bonding primer and extra prep.
- Interiors painted too. Doubles the surface area and adds 30 to 60 percent to the price.
- New hardware with different hole spacing. Filling and re-drilling 60 holes is billable time.
- Occupied kitchen. Masking a working kitchen and cleaning daily costs more than an empty house.
Safety and old-house notes
- Pre-1978 homes: assume the existing cabinet finish and any painted trim contains lead until tested. Do not sand, scrape, or heat-strip it. Test first, and hire an EPA Lead-Safe Certified contractor if it comes back positive.
- Pre-1990 homes: sheet vinyl flooring, floor tile, and pipe wrap can contain asbestos. If you're pulling a cabinet base or cutting flooring to fit new toe kick, don't cut or sand those materials. Test them.
- Shellac and solvent primers need real ventilation. Open windows, run a box fan blowing out, and wear an organic vapor respirator, not a dust mask.
- Rags soaked in oil-based enamel can self-heat and ignite. Lay them flat outdoors to dry fully, or seal them in a water-filled metal can before disposal.
- If you're removing a cabinet run and there's wiring, an outlet, or under-cabinet lighting in the way, kill the circuit at the breaker and confirm the wires are dead with a non-contact voltage tester before touching anything. The wall switch is not proof. Moving a circuit or adding one is licensed electrician work and usually needs a permit.
- Gas ranges: don't slide one out to reach a cabinet unless you're comfortable with the flexible connector. A cracked connector is a gas leak. Call the utility or a plumber.
Frequently asked questions
Do I have to sand kitchen cabinets before painting?
Yes, in nearly every case. Sanding creates the mechanical tooth that primer needs to grip, and factory cabinet finishes are far too slick without it. A liquid deglosser can supplement sanding on heavily carved doors, but it's weaker and it doesn't remove grease. The one real exception is bare, never-finished wood, which just needs a light 180 grit pass to knock down the fuzz.
What is the best primer for kitchen cabinets?
It depends on the surface. Sound previously painted wood takes a quality waterborne bonding primer. Factory clear-coated oak, thermofoil, laminate, and melamine need a shellac-based or solvent-based bonding primer, and waterborne primer on those surfaces is the most common cause of peeling. Knotty woods like pine and tannin-rich woods like cherry need a stain-blocking primer or the topcoat will yellow in patches.
Can you paint laminate or thermofoil cabinets?
Yes, with the right primer and honest expectations. Scuff sand lightly, degrease again, and use a shellac or solvent bonding primer. Prime and topcoat one door first, wait 5 days, then do a tape pull test before committing to the whole kitchen. If the thermofoil film is already lifting or bubbling near a heat source, paint won't fix that and the door needs replacing.
How long does cabinet paint take to fully cure?
14 to 30 days for most waterborne cabinet enamels. Dry to touch happens in an hour or two, recoat in 4 to 24 hours, but full hardness takes weeks. During the cure window, don't stack doors, don't set anything on painted shelves, and clean with a dry cloth only. Cold or humid conditions stretch cure time significantly.
Should I spray or brush kitchen cabinets?
Spray the doors and drawer fronts if you have a garage or covered space to do it in, and brush and roll the face frames and boxes in the kitchen. That hybrid gives you a factory-smooth finish where it shows without the 6 to 8 hours of masking a whole kitchen for spray. Brushing everything with a self-leveling waterborne alkyd still produces a very good result, with slight texture visible only up close.
How much does it cost to paint kitchen cabinets?
DIY materials for a typical 20 to 30 door kitchen are a small fraction of any hired option, because the job is almost entirely labor. Hiring a painter to work on site costs roughly ten times the materials. Doors sprayed off site cost more again, refacing more than that, and full replacement sits in a different league entirely. What moves your own number is door count, door profile, whether interiors are painted, and whether the wood needs grain filling. Get two or three local quotes on one identical scope.
Why is my cabinet paint peeling off in sheets?
Almost always grease that was never removed, or a primer that couldn't bond to a slick surface. Paint peeling in a clean sheet with the primer attached points to an adhesion failure at the substrate, which means degreasing or primer choice. Paint chipping only at edges and corners points to using wall paint instead of enamel, or to hard use during the cure window.
Can I paint just the cabinet doors and leave the boxes?
You can, but the color mismatch shows immediately along every face frame edge. If the existing box color is very close to your new color, you may get away with it. Painting the face frames and visible box edges adds about 90 sq ft of surface area, roughly a third of the total, and it's the difference between a repaint that looks intentional and one that looks unfinished.
Related: Getting the walls done in the same push? How to paint a room covers the sequence and cut-in technique, and cost to paint a house interior has the whole-home numbers. Weighing paint against new doors? Compare cabinet refacing cost and the full kitchen remodel cost breakdown before you commit.