How to Replace a Light Fixture

Turn off the breaker, then confirm the wires are dead with a non-contact voltage tester before you touch anything. The wall switch is not proof. A switch can be wired to the neutral, the box can carry a second circuit, and a fixture that goes dark can still have live conductors sitting in it.
Once the circuit is verified dead, the actual swap is straightforward: support the old fixture, photograph the wiring, disconnect, check the box and its weight rating, mount the new strap, connect like to like, tuck the wires, and restore power. Budget 30 to 60 minutes for a simple ceiling light, longer if the box needs replacing.
Repainting the ceiling while the fixture is down? That's the easy time to do it. Our paint calculator gives you the gallons for the room in about 20 seconds, and how to paint a room covers the order of operations.
Updated August 2026
A note on numbers. This page gives you wiring specs, box ratings, code requirements and the safe sequence, not dollar figures. Fixtures, parts and electrical labor are priced by region, by supplier and by season, and we do not set any of it. Do the work here, and price anything you hand to an electrician with two or three written quotes.
How to replace a light fixture: the whole job in six steps
The order matters, and the first step is the one that keeps you safe.
- Kill the breaker and prove the wires are dead with a non-contact voltage tester.
- Support the old fixture and photograph the wiring before you disconnect it.
- Identify the wires, testing rather than trusting color in an older home.
- Check the box: is it solid, is it grounded, is it rated for the weight you're hanging.
- Mount the strap, connect ground, neutral, hot, and tug test every splice.
- Tuck the wires, hang the fixture, restore power, and test.
A like-for-like swap runs 30 to 60 minutes. Replacing the box adds an hour or two.
Step 1: kill the power at the breaker and prove it's dead
This is a numbered step, not a warning box, because skipping it is how people get hurt. Standard 120 volt residential branch circuits are entirely capable of stopping a heart.
- Turn the light on at the wall switch, then go to the panel.
- Switch off the breaker you believe feeds that light. If nothing is labeled clearly, flip breakers one at a time until the light goes out.
- Put tape over the breaker handle or a lockout clip on it, and if anyone else is home, tell them what you're doing. Somebody helpfully flipping a breaker back on is a real hazard.
- Leave the wall switch in the ON position. With the breaker off, a switch left on means the switch leg is not isolating anything from you, which is exactly what you want when you go to test. You want to see the true state of the box, not a false dead reading created by an open switch.
- Test with a non-contact voltage tester before you touch a single wire. Bring the tester near each conductor in the box, not just the two connected to the fixture. Test the hot, the neutral, the ground, and any spare wires bundled off to the side.
- Verify your tester works. Before and after testing the box, hold it against a receptacle or an extension cord you know is live. A dead battery reads exactly like a dead wire. This 5 second check is what separates a tester from a lucky guess.
Why you test every wire in the box, not just the fixture's
Ceiling boxes are junction points. It's common to find two, three, or four cables landing in one box, and there is no rule that says they all belong to the same circuit. A box in a hallway ceiling might carry the hallway light circuit plus a pass-through for the bedroom receptacles, which is on a different breaker entirely.
The fixture goes dark, so the light circuit is clearly off. The other cable in that box is still at 120 volts, still spliced under a wire nut, and still perfectly capable of hurting you when your hand goes in there. Test everything. If the tester chirps on any conductor after you've killed the breaker you thought was right, go back to the panel and keep looking.
Two-tester rule for anyone who wants to be sure. A non-contact tester is fast but it can be fooled by shielded cable or metal boxes. If you want certainty, follow up with a contact multimeter or a two-lead voltage tester: hot to neutral, hot to ground, neutral to ground. All three should read zero volts.
Step 2: support the old fixture before you disconnect it
Fixtures are heavier than they look, and the wiring is not what's holding it up until the moment you take the screws out. Then, briefly, it is.
- For a small flush-mount light, one hand supports while the other unscrews. Get a helper if the fixture is over about 10 pounds.
- For a chandelier or a pendant, hook it. A stiff wire hook, an S-hook, or a bent coat hanger looped through the mounting strap holds the fixture while you free both hands to work the connections.
- For anything over 20 pounds, use a helper or a step ladder platform, not a hook. A dropped chandelier takes the box out of the ceiling with it.
Photograph the wiring before you touch it
Take three or four pictures with your phone before you undo anything: the whole box, a close shot of each wire nut, and the mounting hardware. Include a shot showing which wire goes where.
This costs 30 seconds and it saves the entire job when you find yourself staring at a box with two white wires, two black wires, a red, and a bare copper, trying to remember which pair was connected. It's especially valuable in older homes where the wire colors don't follow modern convention.
Step 3: understand the wires
| Wire color | Standard meaning | Where it connects on the fixture |
|---|---|---|
| Black | Hot, ungrounded conductor | Fixture black, sometimes marked smooth or with writing |
| White | Neutral, grounded conductor | Fixture white, sometimes marked with a ribbed edge |
| Bare copper or green | Equipment ground | Green screw on the mounting strap, plus fixture ground lead |
| Red | Second hot, usually a switched leg or a three-way traveler | Depends on the setup, photograph it before removal |
| White with black tape or marker | Re-identified as a hot, not a neutral | Treat as hot, connect accordingly |
On the fixture's own cord, when both leads look the same color, the neutral is usually the one with ribbing, printing, or a silver-colored terminal. The hot is the smooth one with a brass terminal.
The honest warning about older homes
Wire color convention is a code requirement, not a law of physics, and plenty of houses were wired by people who ignored it or by later homeowners who did their own work. In houses from the 1950s through the 1970s especially, you'll find white wires used as switch legs with no marking, black used where you'd expect white, and cloth-insulated conductors where the color has gone the same brownish gray on every wire.
So test, don't assume. With the breaker back on for a moment and the fixture disconnected, a two-lead voltage tester or multimeter tells you which conductor is actually hot and which is actually the neutral. Test, write it down, then shut the power back off and verify dead again before you make connections. Never make or break a connection with the power on.
If the insulation is cloth-covered and crumbling when you flex it, stop. Brittle insulation on old conductors means the box needs an electrician, not a new fixture.
Step 4: the ground wire, and what to do when there isn't one
The ground gives fault current a path back to the panel so the breaker trips instead of energizing the fixture body. On a metal fixture, that's the difference between a tripped breaker and a live chandelier.
If the box has a bare copper or green ground: connect it to the green screw on the mounting strap and to the fixture's green or bare lead, all under one wire nut or with a pigtail.
If the box has no ground at all, which is normal in homes wired before the mid 1960s, you have three legitimate options:
- Metal box that is itself grounded by armored cable (BX) or metal conduit. Test it. A tester between hot and the box should read the same as hot to neutral. If it's grounded, you can bond the fixture to the box with a green screw in the tapped hole.
- Run a proper ground. Replacing the cable or adding a ground conductor back to the panel is the correct fix, and it's electrician work.
- Install a fixture listed for use without a ground, which means a fully insulated, non-metallic fixture with no exposed metal parts. Many plastic and glass flush mounts qualify. Read the instructions.
What is never acceptable: connecting the fixture ground to the neutral, or capping the ground and installing a metal fixture in an ungrounded box and calling it done. Both leave a metal fixture with no fault path.
Step 5: check the box and its weight rating
The plastic or metal box in the ceiling has a rating, and it's usually stamped inside. This is where most fixture swaps go wrong months later.
| Box type | Typical weight rating | What it's for |
|---|---|---|
| Standard plastic (PVC) ceiling box, nail-on | 35 lb for luminaires when marked, some are lower | Ordinary flush and semi-flush lights |
| Standard metal octagon box on a bar hanger | 50 lb for luminaires, check the stamp | Heavier lights and small chandeliers |
| Fan-rated box, braced to joists | 35 lb ceiling fan, or up to 70 lb when marked | Ceiling fans, and any fixture that moves |
| Heavy fixture support, direct joist mount | 50 lb and above, per the assembly listing | Large chandeliers, per manufacturer instructions |
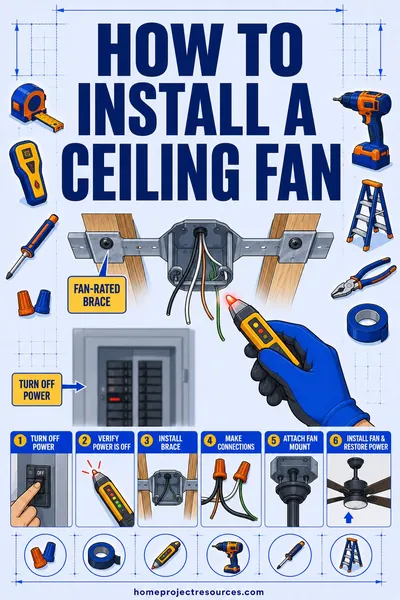
Ceiling fans require a fan-rated box. This is a code rule, not a suggestion. A standard lighting box is designed to hold a static weight hanging straight down. A fan adds continuous vibration and a rotating mass, and a standard box will loosen and eventually fail under it. Nail-on plastic boxes work themselves off the joist, and the whole assembly comes down. A fan-rated box is marked "For Use With Ceiling Fans" or "Acceptable For Fan Support," and it either mounts to an expandable brace between joists or screws directly into framing.
If you're replacing a light with a fan, or with anything over the box's rating, the box gets replaced first. A retrofit fan brace goes in through the existing hole without cutting drywall, which makes this less painful than it sounds. If you do end up opening the ceiling, how to patch drywall covers closing it back up cleanly.
Also check the box is solid. Grab it and wiggle. If it moves in the ceiling, it needs to be re-secured before anything hangs from it.
Step 6: mount the strap and make the connections
- Screw the new mounting strap to the box using the screws that came with the fixture. The strap is the metal bar that bridges the box; the fixture bolts to it, not to the box directly.
- Strip about 3/4 inch of insulation from each house conductor if the ends are damaged or too short. Nick-free strippers only. A nicked conductor is a future break.
- Connect ground first. House ground to strap green screw to fixture ground, all together.
- Connect neutral to neutral, white to white.
- Connect hot to hot, black to black.
- Use the right size wire connector. A wire nut sized for two 14 gauge conductors won't hold three 12 gauge ones. The package lists the combinations. Twist the conductors together first if you like, then thread the nut on clockwise until it's snug and the insulation is drawn up inside.
- Tug test every connection. Pull firmly on each wire individually. If one slides out, the connection was never made. This is the single best 10 second check in the whole job.
- Tuck the wires back in the box in a folded accordion, connectors first, conductors bent gently. Don't jam them. Don't force the fixture up against a wad of stiff wire, which strains the connections and can crack a plastic box.
- Mount the fixture to the strap, level it, and install the bulbs and diffuser.
- Restore power and test. Then check that the fixture is snug against the ceiling with no gap.
A note on bulb wattage
The fixture has a maximum wattage per socket printed inside. Exceeding it with old incandescent bulbs is a genuine fire risk in an enclosed fixture. LEDs draw so little that this is rarely an issue now, but check that any LED you use in a fully enclosed fixture is rated as enclosed-fixture safe, or the heat will shorten its life dramatically.
When to stop and call an electrician
Stop the job and call a licensed electrician if you find any of these:
- Aluminum branch circuit wiring. Dull silver solid conductors, common in homes wired roughly 1965 to 1973. Aluminum expands, contracts, and oxidizes at connections and is a documented fire risk. It needs approved connectors (COPALUM crimps or listed AlumiConn connectors) installed by someone trained for it. Do not just wire nut it to copper.
- Knob and tube wiring. Individual conductors running through porcelain knobs and tubes, no ground, cloth insulation. Anything connected to it needs a professional assessment.
- Scorch marks, melted insulation, or a burnt smell in the box. That's evidence of a fault that has already happened once.
- A box that moves, is cracked, or is buried behind drywall with no accessible cover.
- No ground and you want a metal fixture. Get the circuit grounded properly.
- Three or more cables in the box and you can't tell what's what, or you find a switch loop you don't understand.
- The breaker trips when you restore power. Something is shorted. Don't keep resetting it.
Permits: most jurisdictions treat a like-for-like fixture swap as maintenance and don't require one. Adding a new fixture, running new cable, moving a box, or changing a circuit usually does require a permit and an inspection. Rules vary by city and county, so call your building department. If your home is a rental or has an HOA, check there too.
Old-house note: in homes built before 1978, assume ceiling and wall paint contains lead until it's tested. Do not sand or scrape around the box. In homes built before 1990, popcorn ceiling texture is a well-known asbestos risk, and scraping around a fixture canopy is one of the classic ways people disturb it. Do not scrape it. Get it tested first and use a certified abatement contractor if it's positive.
What the job costs, DIY versus electrician
The fixture itself costs the same either way, though an electrician who supplies it will mark it up. What separates the two columns is labor, and on a simple swap the labor is the larger half.
| Line item | DIY | Licensed electrician |
|---|---|---|
| Fixture, basic flush mount | You buy it | Same, or supplied at a markup |
| Fixture, mid-range or chandelier | You buy it | Same |
| Wire connectors, strap, small parts | Minor | Included |
| Non-contact voltage tester | Cheap, and you own it forever | Owned |
| Labor, simple swap | Your 45 minutes | The main line on the invoice |
| Labor, with box replacement | Your 2 hours | Roughly double a simple swap |
| Fan-rated box retrofit brace | Inexpensive part | Several times the part, installed |
| Adding a ground to an ungrounded circuit | Not a DIY job | The most expensive item here, per circuit |
| Typical electrician service call minimum | Not applicable | Charged before any work happens |
Electrical labor rates vary widely by region, and many electricians bill a flat rate per fixture rather than hourly. Two questions decide what you actually pay: is there a minimum service call charge, and does a second or third fixture on the same visit cost less than the first. It almost always does. A written local quote is the only number that applies to your job.
Worked example. Swapping three plain flush mounts in a hallway for LED semi-flush fixtures costs you three fixtures, a handful of connectors, a voltage tester you keep forever, and about 2 hours. Hiring it out costs the same three fixtures plus a minimum service call plus a smaller per-fixture charge for the second and third, and it typically lands at roughly two and a half to three times the DIY materials. The saving is real, and this is the one job in this list where the safety steps are what earn it.
Frequently asked questions
Can I replace a light fixture without turning off the breaker?
No. Turning off the wall switch is not the same thing. Switches are sometimes wired to the neutral instead of the hot, and ceiling boxes often carry a second circuit that the switch doesn't control. Shut the breaker off and confirm with a non-contact voltage tester before touching any conductor.
How do I know which breaker controls the light?
Turn the light on, then flip breakers one at a time until it goes out. Label the panel while you know. If the panel is unlabeled and you have a helper, a phone call from the room being tested makes this take five minutes instead of thirty. Confirm at the box with a tester regardless.
What if there's no ground wire in my ceiling box?
You have three legitimate paths. Test whether a metal box is itself grounded through armored cable or conduit and bond to it if so. Install a fully insulated fixture listed for use without a ground. Or have an electrician bring a ground to the circuit. Never bond the fixture ground to the neutral.
Do I need a special box for a ceiling fan?
Yes, always. A fan needs a listed fan-rated box marked for fan support and braced to framing. A standard lighting box holds static weight only, and a fan's continuous vibration works it loose over months or years until the whole assembly falls. Retrofit fan braces install through the existing hole without cutting drywall.
What do the wire colors mean in a light fixture box?
Black is hot, white is neutral, bare copper or green is ground, and red is usually a second hot or a three-way traveler. A white wire wrapped in black tape has been re-identified as a hot. In older homes these conventions are often ignored, so test with a meter rather than trusting color.
How much does an electrician charge to replace a light fixture?
It is usually billed as a flat rate per fixture rather than hourly, and almost every shop has a minimum service call charge that a single simple swap will not exceed, which is why one fixture is the worst value you can ask for. Replacing the box or adding a fan brace roughly doubles the labor. Batching several fixtures into one visit lowers the per-fixture price substantially, so make a list before you call.
Can I put a heavier chandelier on an existing box?
Only if the box's stamped rating covers the fixture's weight and the box is securely fastened to framing. Standard plastic boxes are commonly rated 35 pounds for luminaires and metal octagon boxes 50 pounds, but ratings vary and old boxes may have none. Anything heavier needs a rated support assembly installed per its instructions.
Why does my new light flicker or buzz?
Usually a dimmer that isn't rated for LED loads, which is the most common cause by far. Swap to an LED-compatible dimmer. Other causes are a loose connection in the box, which the tug test would have caught, or a bulb that isn't dimmable. If flickering affects several fixtures or the whole room, shut it down and call an electrician, because that suggests a loose neutral.
Related: With the fixture down is the easiest time to repaint. How to paint a room covers cut-in order and coverage, and the paint calculator gives you the gallons. If the box swap meant opening the ceiling, how to patch drywall walks through the patch and the texture match.