How to Install Laminate Flooring

Three things prevent almost every laminate failure: let the planks acclimate in the room for at least 48 hours, leave a 1/4 inch expansion gap at every wall and every fixed object, and stagger the end joints by at least 12 inches. Get those right and the rest of the job is mostly patience and clean cuts. Get the expansion gap wrong and the floor will buckle in the middle of the room within a season, and no amount of good technique elsewhere will save it.
Updated August 2026
A note on numbers. This page gives you coverage math, expansion gaps, underlayment specs and the subfloor tolerances that decide whether the floor lasts, not dollar figures. Flooring, underlayment and installation labor are priced by region, by product line and by season, and we do not set any of it. Calculate your quantities here, then price them at two or three suppliers.
Know how many boxes to buy before you go to the store. Our free flooring calculator converts your room dimensions into boxes including waste, so you don't end up two planks short of the last row with a discontinued lot number.
Why the expansion gap is the whole job
Laminate is a floating floor. It isn't nailed down and it isn't glued down. It sits on top of the subfloor as one big connected sheet, held together only by the click joints between planks.
That sheet expands and contracts with humidity. The core of most laminate is high-density fiberboard, which is a wood product, and wood products take on and give up moisture with the seasons. A room that sits at 30 percent relative humidity in February and 60 percent in August will move a laminate floor measurably.
Here's the number that makes it real. A typical laminate floor moves roughly 1/16 inch per 10 feet of run for a meaningful humidity swing. Across a 20 foot room that's an eighth of an inch of growth in each direction, and a large open-plan area can move more than a quarter inch.
Now think about what happens if that movement has nowhere to go.
The floor is a rigid connected sheet. It can't compress. If both ends are pinned, the only direction left is up. The middle of the room lifts off the subfloor, joints separate as the peak forms, and you get a floor that creaks, flexes underfoot, and eventually pops apart at the seams. Installers call it tenting or peaking, and it's the number one laminate warranty claim.
The gap is what gives that movement somewhere to go. Baseboard or quarter round covers it, but critically, the trim is nailed to the wall, not to the floor. The floor slides underneath.
Things that pin a floating floor and cause buckling:
- Trim nailed down through the planks into the subfloor
- Caulk between the plank edge and the baseboard
- Transition strips screwed through the flooring
- A toilet flange bolted through the floor
- Heavy built-in cabinets or a kitchen island set on top of the flooring
- A large bookcase or an upright piano loaded against a wall, which can pin the edge under friction alone
- Door jambs and casings that weren't undercut, so the plank butts hard against them
- Radiator pipes, ductwork, and floor vents with no gap cut around them
The rule for anything heavy and permanent: install cabinets and islands first, then run the floor up to them with a gap, or leave the floor free to move under them. Never trap the floor under a fixed load.
How big should the gap be?
Most manufacturers specify 1/4 inch minimum, and 3/8 inch for rooms over 30 feet in either direction. Check your specific product's instructions, because the warranty is written against that number.
Large open areas often need an expansion joint (a T-molding) partway across, typically at spans over 30 to 40 feet, or at any doorway between rooms. That's a manufacturer-specific limit and it's worth looking up before you start rather than after.
Standard 1/2 inch baseboard covers a 1/4 inch gap easily. Quarter round covers up to about 3/8 inch. Use spacers rather than eyeballing it.
Tools and materials
| Item | Why you need it | Buy, rent, or own |
|---|---|---|
| Spacers (1/4 inch) | Hold the expansion gap while you work | Buy a bag. Cheapest item on the list |
| Tapping block | Closes joints without crushing the tongue | Buy. Often bundled with the pull bar |
| Pull bar | Closes the last row against the wall | Buy. Cheap and there is no substitute |
| Rubber mallet | Use with the block, never directly on a plank | Buy |
| Miter saw or circular saw | Cross cuts | Rent or own |
| Jigsaw | Curves, pipes, irregular cuts | Rent or own |
| Table saw or circular saw with a guide | Ripping the last row lengthwise | Rent or own |
| Oscillating multi-tool or jamb saw | Undercutting door casings | Rent or own |
| Tape measure, square, pencil | Layout | Own |
| Knee pads | You'll be on the floor for hours | Buy. You will regret skipping these |
| Underlayment | Cushion, sound, sometimes moisture | Buy by the square foot. Priced well below the flooring |
| 6 mil poly sheeting | Vapor barrier over concrete | Buy by the roll. The cheapest insurance here |
| Transition strips | Doorways, height changes | Buy each. Count your doorways first |
The four small hand tools at the top are the only things most people have to buy specifically for this job, and together they cost less than a couple of boxes of flooring. Everything below them you either already own or rent for the weekend.
A rented flooring saw makes cross cuts faster and cleaner than a jigsaw, and the day rate is easily worth it on anything over about 300 sq ft.
Cut face down or face up? Laminate chips on the exit side of the blade. With a circular saw or jigsaw (blade cuts upward), put the plank face down. With a miter saw or table saw (blade cuts downward through the top), keep it face up. Getting this backward gives you chipped edges on every cut.
Acclimation, subfloor prep, and moisture
Acclimate for 48 hours
Bring the unopened boxes into the room where they're going and lay them flat, ideally stacked crosswise so air circulates. Leave them for 48 hours minimum, with the room at normal living temperature and humidity (roughly 60°F to 80°F and 35 to 65 percent RH).
Planks installed straight off a cold truck will shrink as they warm and dry, and you'll get gaps between planks that never close.
Subfloor flatness is the tolerance nobody checks
Laminate needs a flat subfloor. Most manufacturers spec 3/16 inch over 10 feet, and some are stricter at 1/8 inch over 6 feet.
Check it with a long straightedge or a taut string. Slide the straightedge across the floor in several directions and look for daylight underneath.
Fix what you find:
- Low spots on wood or concrete: self-leveling compound, poured and troweled
- High spots on concrete: grind them down
- High spots on wood: sand or plane
- Squeaky wood subfloor: screw the subfloor down to the joists before you cover it, because you will never get another chance
An unflat subfloor doesn't just feel bad underfoot. The click joints flex over every hollow, and repeated flexing eventually breaks the locking profile. That's how you get a joint that separates and won't click back together.
The subfloor also needs to be clean, dry, and structurally sound. Sweep and vacuum thoroughly. A single pebble under a plank telegraphs through the whole floor.
Moisture barrier over concrete
Concrete gives off moisture vapor, even slabs that look bone dry and even slabs that are decades old. Laminate's fiberboard core will swell if that vapor reaches it.
Over any concrete slab, on any level, install a 6 mil polyethylene vapor barrier. Overlap seams by 8 inches and tape them, and run it a few inches up the walls where it'll be hidden by baseboard. Trim the excess after the floor is in.
Test the slab first if you have any doubt. The cheap version: tape a 2 ft square of clear plastic tightly to the slab, leave it 24 to 72 hours, and look for condensation underneath or darkening of the concrete. If you see either, you have a moisture problem to solve before flooring goes down.
Underlayment, and when your planks already have it
Underlayment does three jobs: it cushions minor subfloor imperfections, it dampens sound, and depending on the type, it blocks moisture.
Many laminate products come with attached underlayment on the back of the plank, usually a thin foam or felt pad. If yours does, do not add a second layer of foam underlayment. Stacking pads makes the floor too soft, which overstresses the click joints and can void the warranty.
Over concrete, planks with attached underlayment still need the 6 mil poly vapor barrier underneath. Attached pad is cushion, not a moisture barrier, unless the manufacturer explicitly says otherwise.
If your planks don't have attached pad:
| Underlayment type | Best for | Notes |
|---|---|---|
| Standard foam, 2 to 3 mm | Wood subfloor, upper floors | Cheapest, no moisture protection |
| Combination foam with film | Concrete slabs | Foam plus attached vapor barrier, seams must be taped |
| Felt or fiber | Sound reduction, apartments | Denser, better STC/IIC ratings, costs more |
| Cork | Sound, slight thermal benefit | Not a vapor barrier on its own |
Roll it out perpendicular to the direction the planks will run, butt the seams (don't overlap foam), and tape them.
Layout planning, and the sliver row problem
This is the step people skip, and it's the one that decides whether the finished floor looks intentional.
Measure the room's width across the direction the planks will run. Divide by the plank width. Look at the remainder.
If the last row would come out narrower than about 2 inches, you have a problem. A sliver row looks wrong, it's fragile, and it's genuinely hard to install because there's barely enough material for the click joint and the pull bar to grab.
The fix: rip the first row narrower so the first and last rows come out roughly equal. Split the difference between them.
Worked example: a 12 ft 4 in wide room, 7 1/2 inch planks
Room width across the plank direction: 12 ft 4 in = 148 inches.
Subtract expansion gaps: 148 - 0.25 - 0.25 = 147.5 inches of flooring.
Divide by plank width: 147.5 / 7.5 = 19.67 rows.
So 19 full rows plus a final row of 0.67 x 7.5 = 5 inches. That's actually fine, since 5 inches is well over the 2 inch minimum.
Now change the room to 12 ft 8 in = 152 inches. 151.5 / 7.5 = 20.2 rows. That's 20 full rows plus a final row of 1.5 inches. Too narrow.
The fix: rip the first row to about 4.5 inches. Then you have 4.5 + 19 full rows (142.5) = 147 inches, leaving 4.5 inches for the last row. Both edges match and neither one is a sliver.
Which direction should the planks run?
Three considerations, in order of how much they usually matter:
- Run parallel to the longest wall. This is the default and it makes rooms look larger with fewer cuts.
- Run toward the main light source. Planks running the same direction as light from the main window hide seams better.
- Start from the straightest wall. Houses aren't square. Pick the wall that's most likely to be straight (usually an exterior wall) and check it with a chalk line before you commit. If the starting wall is bowed, scribe the first row to match it rather than trying to fight it later.
Over a plank subfloor, run laminate perpendicular to the subfloor boards, not parallel with them.
How to install laminate flooring, step by step
Step 1: The first row
Cut the tongue off the long edge of the first row's planks with a table saw or circular saw. This gives you a flat edge to sit against the wall and keeps the row from rocking on the tongue.
Set the row with the cut edge to the wall and 1/4 inch spacers at every 18 inches or so, plus spacers at both ends.
Click the end joints together as you go. Check that the row is dead straight with a chalk line or string. Everything downstream inherits the accuracy of row one, so spend the extra ten minutes here.
Step 2: Staggering the end joints
Start row two with a plank cut so the end joint lands at least 12 inches away from the joint in row one. Check your manufacturer's minimum, which is usually 8 to 12 inches but is sometimes as much as 16 for wide planks.
Then keep going, and here's the part people get wrong: don't use a repeating pattern. Cutting every row by the same offset produces a diagonal staircase of joints across the floor, which is visually obvious and structurally weaker than a random layout.
Vary your starting lengths. A good working method is to cut starters at three or four different lengths and rotate through them irregularly. Use the offcut from the end of one row as the starter for a later row, as long as it's over 12 inches long and doesn't line up with a neighbor.
Also mix planks from at least three boxes as you go. Laminate print patterns repeat every so many planks, and colors vary slightly between production lots. Pulling from multiple boxes scatters both.
Step 3: Working across the room
For most click systems: angle the new plank into the long edge of the previous row at about 20 to 30 degrees, then lower it flat. The joint clicks as it goes down. Then slide it sideways to close the end joint against the plank next to it.
Use the tapping block and mallet to close stubborn joints. Never hit a plank edge directly with the mallet. The locking profile is a thin machined edge and it crushes, after which the joint will never close properly.
Check for gaps at every joint as you go, and look down the rows periodically. It's much easier to pull three rows apart than to discover a creeping gap eight rows later.
Step 4: Cutting around obstacles
Door casings: don't cut the flooring to fit around them. Undercut the casing instead. Lay a scrap plank (plus a scrap of underlayment) flat on the subfloor next to the jamb, rest an oscillating multi-tool or jamb saw flat on it, and cut through the casing at that height. Then slide the flooring underneath. The result looks factory-made and gives the floor room to move.
Pipes: drill a hole 1/2 inch larger in diameter than the pipe, then cut a wedge from the hole to the plank edge. Install the plank, glue the wedge back in behind the pipe, and cover the gap with a split pipe collar. Never caulk the plank to the pipe.
Floor vents: cut the opening at least 1/4 inch larger than the duct all the way around so the flooring never contacts the metal.
Toilets: the flooring goes around the flange with a gap, and the toilet sits on top. The flange bolts must not pin the flooring.
Step 5: The last row
Measure the remaining width at several points along the wall, because walls aren't parallel. Measure at each end and at the middle.
Subtract 1/4 inch for the expansion gap, then rip the planks to width. Scribe the cut if the wall is out of parallel by more than about 1/8 inch across the run.
Use the pull bar to draw the last row tight into the row before it. Hook the bar over the far edge and tap the near end with the mallet. This is what the tool is for, and it's nearly impossible without one.
If the last row is under 2 inches wide and you didn't plan for it, a bead of flooring adhesive in the joint helps hold it, since the click alone won't have much to grab.
Step 6: Trim it out
Pull all the spacers. Vacuum thoroughly.
Install baseboard or quarter round nailed into the wall, never into the floor. Leave a paper-thin gap between the bottom of the trim and the flooring surface so the floor can slide.
Transitions, thresholds, and trim choices
| Situation | What you need |
|---|---|
| Doorway to another laminate or hardwood floor of the same height | T-molding, which also serves as an expansion joint |
| Laminate to a lower floor (vinyl, tile) | Reducer strip |
| Laminate to carpet | Carpet transition (track and Z-bar or a hard-surface reducer) |
| Top of a stair | Stair nose, glued and mechanically fastened |
| Floor to wall | Baseboard, or quarter round over existing baseboard |
| Large open runs over 30 to 40 ft | Interior T-molding as an expansion break |
Baseboard or quarter round? Removing the existing baseboard, installing the floor, and reinstalling the baseboard gives the cleanest result and doesn't add a visual line at the bottom of the wall. Adding quarter round over existing baseboard is faster and avoids repainting, but it steps the trim out into the room by about 3/4 inch and it looks like what it is.
Either way, the trim gets nailed to the wall. Transition strip tracks screwed into the subfloor are fine, as long as the screws land in the expansion gap and not through the flooring.
How much laminate to order
Buy your room square footage plus waste. Laminate is sold by the box, and boxes typically cover 16 to 24 sq ft each, so you'll be rounding up regardless.
| Room type | Waste allowance |
|---|---|
| Simple rectangle, straight lay | 5 to 8 percent |
| Rectangular with closets and a hallway | 8 to 10 percent |
| L-shaped or multiple doorways | 10 to 12 percent |
| Diagonal or herringbone layout | 15 to 20 percent |
| Wide planks (7 in and up) | Add 2 percent, longer cutoffs waste more |
Worked example. A 12 x 16 living room is 192 sq ft. It's a simple rectangle with two doorways, so use 10 percent waste: 192 x 1.10 = 211 sq ft. At 20.1 sq ft per box, that's 10.5 boxes, so buy 11 boxes.
Always buy one extra box beyond what the math says and keep it. Lot numbers get discontinued fast, and a flood or a dropped skillet five years from now will be a lot easier to repair with matching planks in the garage. Our flooring calculator does the box math for any room, and the square footage calculator handles L-shapes and odd rooms if you need to break them into rectangles first.
Where laminate is the wrong choice
Laminate's core is compressed fiberboard. Wet it and it swells, and the swelling is permanent. This is the honest limit of the product.
Bathrooms. Standing water around a tub or toilet, plus daily humidity, is a hard environment. Standard laminate doesn't belong there. Some manufacturers now sell water-resistant or waterproof laminate with sealed cores and treated edges, backed by a written wet-area warranty. Those are legitimate, but check that the warranty specifically names bathrooms.
Basements. Concrete slabs below grade give off more vapor, and basements flood. Even with a proper vapor barrier, a laminate floor that gets an inch of water is a total loss.
Laundry rooms and mudrooms. Same reasoning: appliance leaks and tracked-in snow.
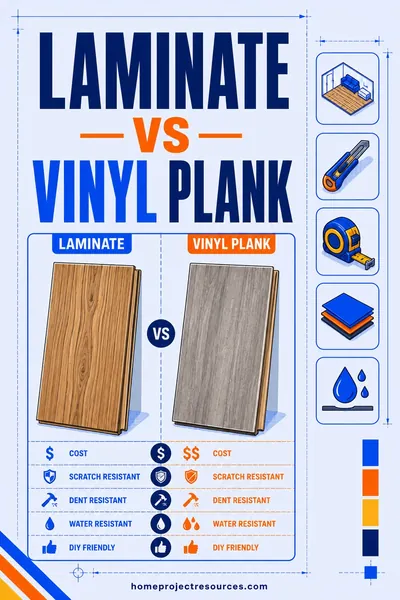
Laminate versus luxury vinyl plank for wet areas
| Laminate | Luxury vinyl plank (LVP) | |
|---|---|---|
| Core material | Wood fiberboard (HDF) | PVC, or a rigid SPC/WPC composite |
| Water behavior | Swells permanently when wet | Unaffected by water |
| Standing water | Not acceptable | Fine, wipe it up |
| Feel underfoot | Harder, more like wood | Slightly softer, warmer |
| Scratch resistance | Generally better, harder wear layer | Good but more prone to dents and scuffs |
| Dent resistance | Better | Worse, heavy furniture legs can indent |
| Realism | Very good on premium lines | Very good on premium lines |
| Typical material cost | Priced per sq ft, and the cheaper of the two | Priced per sq ft, and generally the pricier |
| Sunlight | Stable | Some products can expand in direct sun |
The short version: for a bathroom, basement, laundry room, or anywhere water is a realistic event, install LVP. For bedrooms, living rooms, hallways, and offices where scratch resistance matters more than water, laminate is the better wearing surface and usually the better value. If you're weighing laminate against the softer option, our cost to carpet a room breakdown covers the other side of that decision.
Common mistakes
Skipping acclimation. The planks shrink after installation and you get permanent gaps at the end joints.
Tapping directly on the plank edge. Crushes the locking profile. Always use the tapping block.
Caulking the perimeter gap. Turns a floating floor into a pinned floor. Trim covers the gap. Nothing seals it.
Nailing baseboard into the flooring. Same problem. Nails go into the wall studs or the wall plate.
Installing under cabinets or an island. The weight pins the floor. Set cabinets first, floor up to them.
Doubling up underlayment. Too much cushion overstresses the joints.
Working with a repeating stagger. Looks like a staircase and reads as amateur from across the room.
Not checking the first row for straight. Every error compounds. Chalk line it.
Ignoring a bowed starting wall. Scribe the first row to the wall instead of forcing it. A 3/8 inch bow becomes a visible wedge in the last row otherwise.
One box at a time. Color and pattern clumping. Mix from three or more boxes throughout.
Frequently asked questions
How big does the expansion gap need to be for laminate flooring?
Most manufacturers require 1/4 inch minimum at every wall and every fixed object, and 3/8 inch for rooms over about 30 feet in either direction. Check your product's instructions, because the warranty is written against that specific number. The gap is hidden by baseboard or quarter round, which is nailed to the wall so the floor can still slide underneath.
Do I need underlayment if my laminate has it attached?
No, and adding a second layer is a mistake. Stacked padding makes the floor too soft underfoot, which overstresses the click joints and can void the warranty. Over concrete, though, you still need a 6 mil polyethylene vapor barrier under planks with attached pad, unless the manufacturer specifically states the attached backing is a vapor barrier.
How long does laminate flooring need to acclimate?
48 hours minimum in the room where it's going, at normal living temperature and humidity. Lay the unopened boxes flat with space for air to move around them. Some manufacturers ask for 72 hours, and a few of the rigid-core products say none is needed. The box instructions win.
Can you install laminate flooring over existing tile or vinyl?
Usually yes, as long as the existing floor is well bonded, flat within tolerance, and not cushioned. Tile grout lines deeper than about 1/8 inch should be filled with leveling compound so the planks aren't bridging voids. Never install over carpet, and never over a floor that's loose, hollow-sounding, or has an ongoing moisture issue. Also check that the added height still lets your doors swing and your appliances slide out.
How much do I stagger laminate flooring end joints?
At least 12 inches between end joints in adjacent rows, and check your manufacturer's minimum since some specify 8 inches and some want 16 for wide planks. Just as important, vary the offset so the pattern is random. A fixed offset repeated row after row creates a diagonal line of joints across the floor that's obvious once you notice it.
Why is my laminate floor buckling in the middle of the room?
Almost always because the floor is pinned somewhere at the edges and has nowhere to expand. Check whether baseboard or quarter round was nailed through the flooring, whether the perimeter gap was caulked, whether a transition strip was screwed through the planks, and whether a heavy cabinet or island is sitting on top of it. Relieving the pinch point usually lets the floor settle back down within a few days.
Do you install laminate flooring under or around kitchen cabinets?
Around them, with an expansion gap. Cabinets and islands should be installed first and the flooring run up to the toe kick. Cabinet weight pins a floating floor in place, and when the rest of the floor tries to move, the pinned area becomes the anchor point that causes buckling elsewhere. Appliance bays are the exception, since a dishwasher needs to slide out, so run the floor into those spaces.
How many boxes of laminate do I need for a 12x16 room?
192 sq ft plus about 10 percent waste is 211 sq ft. At a typical 20 sq ft per box, that's 11 boxes. Buy one extra beyond your calculation and store it, because lot numbers get discontinued and a future repair with mismatched planks looks like a patch.
Related tools: Flooring Calculator | Square Footage Calculator
Related reading: Cost to Carpet a Room | Tile Layout Patterns