How to Weatherstrip a Door

Find the leak before you buy anything. A dollar bill test and a light check take five minutes and tell you exactly which gaps matter, which saves you from buying three kinds of weatherstrip for a door that only leaks in one place. Most exterior doors leak worst at the bottom, not along the sides, so the sweep and threshold usually deserve your money before the jamb seals do.
That order matters because the bottom gap is typically 1/4 to 1/2 inch tall across a 36 inch door, which is roughly 9 to 18 square inches of open hole. The side and top gaps on the same door often add up to less than a third of that.
Working on the whole house? Our insulation calculator sizes attic and wall coverage, which is where the bigger air leaks usually live.
Updated August 2026
A note on numbers. No dollar figures on this page. Seal products, handyman rates and service minimums differ by region and by shop, and a printed range would be wrong for most readers. What follows is which seal suits which door, what sits on a real quote, and how to keep two or three bids comparable.
How to weatherstrip a door in seven steps
- Run the dollar bill test at 8 to 10 points around the door to map the loose spots.
- Run the light test at night to see the gaps you cannot feel.
- Measure the two sides, the head, and the bottom gap height.
- Clean the jamb with denatured alcohol and let it dry fully.
- Install the jamb and head seal, cut long by 1/8 inch and pressed into the corners.
- Install the door sweep, or adjust the threshold if you already have an adjustable one.
- Test the latch and re-run the dollar bill test to confirm you sealed it without jamming it.
Budget 1 to 2 hours per door for a first attempt, and about 45 minutes once you have done one.
The dollar bill test, step by step
This is the most useful five minutes in home air sealing, and it needs nothing but a bill.
- Open the door.
- Lay a dollar bill across the jamb so about half of it hangs inside the opening and half hangs outside.
- Close the door on it and latch it fully. Do not just push it to.
- Pull the bill straight out with two fingers.
If it slides out with no resistance, the seal is not touching at that point. That is a leak.
If it drags noticeably or tears, the seal is compressing properly there.
If you cannot pull it at all, the seal is over compressed at that spot, which sounds good but usually means the door is hard to latch and the seal will crush flat within a season.
Test these eight points minimum: top left corner, top center, top right corner, both sides at the height of the latch, both sides at the height of the hinges, and the bottom center. Add both bottom corners if you have time. Corners are where most doors fail, because that is where a seal was cut short or where the door has racked slightly in the frame.
Write down which points failed. That list is your shopping list.
The light test
The dollar bill finds loose contact. The light test finds actual daylight, including gaps too small for the bill to detect at a corner.
The night version, which is best. Wait until dark. Turn off every light inside the room, close the door, and have a helper stand outside with a bright flashlight, tracing slowly around the entire perimeter of the door, a few inches from the frame. Watch from inside. Anywhere light comes through is a real hole.
The daytime version. On a bright day, close the door, turn off the interior lights, and stand inside with your back to the room. Give your eyes a full 30 seconds to adjust before you judge anything. Daylight around the perimeter shows up as a thin bright line. Look at the bottom last, because it is usually so obvious it will spoil your night vision for the finer gaps.
What the pattern tells you. A line of light down one full side means the door is out of alignment in the frame, and no amount of weatherstrip will fix that properly. Adjust the hinges or the strike plate first. Light only at the top corner on the latch side means the door is racked and the seal needs to be thicker at that corner. Light straight across the bottom is the normal one, and it is what a sweep and threshold are for.
The smoke or incense version. On a windy day, hold a stick of incense or a lit match blown out an inch from the perimeter and watch the smoke. Smoke pulled toward the door marks air moving out, and smoke pushed away marks air coming in. This one also finds leaks around the door casing, which is a different repair, since casing leaks are sealed with caulk, not weatherstrip.
Weatherstrip types compared
| Type | Durability | Relative cost per foot | Best location | Ease of install |
|---|---|---|---|---|
| V-strip or tension seal, vinyl | 5 to 10 years | Near the bottom of the range | Door sides and head, inside the jamb stop | Easy, peel and stick or small brads |
| V-strip, bronze or aluminum | 20 years plus | Several times the vinyl version | Sides and head on doors you want to seal once | Moderate, needs nailing and careful cutting |
| Adhesive foam tape, open cell | 1 to 2 years | The cheapest thing on the shelf | Interior doors, attic hatches, temporary fixes | Easiest of all |
| Adhesive foam tape, closed cell EPDM | 3 to 5 years | Modestly above open cell foam | Exterior door stops where the gap varies | Easy |
| Felt, plain or reinforced | 1 to 2 years | Cheapest by a hair, and worth the least | Low traffic interior doors only | Easy, but avoid it on exteriors |
| Rubber or vinyl bulb, compression | 8 to 15 years | Mid range, the usual default | Exterior door stops, the standard for prehung doors | Moderate, kerf-in or nail-on |
| Silicone bulb in a metal carrier | 15 to 20 years | The priciest of the group | Exterior doors in cold climates, where it stays flexible | Moderate to harder, precise cuts needed |
The short recommendations. For a typical exterior door, silicone or rubber compression bulb on the stop plus a good door sweep at the bottom is the combination worth paying for. For interior doors, closed cell foam tape is fine and cheap. Skip felt on anything exterior, since it holds water, compresses permanently, and is done in a season or two.
Why silicone wins in cold climates. Vinyl and rubber stiffen as temperatures drop, so the seal that compresses nicely in October is a hard bar in January, exactly when you need it to work. Silicone stays flexible well below zero. That is the whole argument for the higher price.
A note on kerf-in seals. Most doors installed since roughly the 1990s have a narrow slot, a kerf, routed into the jamb stop. The weatherstrip has a barbed fin that pushes into that slot. If your existing seal pulls out and leaves a thin slot behind, buy kerf-in replacement, not adhesive tape. Take a 4 inch piece of the old seal to the store and match the fin.
Door sweeps and thresholds close the biggest gap
The bottom of the door is where the money is. A 1/2 inch gap under a 36 inch door is 18 square inches of open air, which is close to a 4 by 4 inch hole punched through your wall.
Door sweeps mount to the face of the door, usually on the interior side, and hang a strip of vinyl, rubber, silicone, or bristle down to meet the threshold. They are the simplest fix and one of the cheapest parts in the whole door.
- Vinyl or rubber blade sweeps seal best on a flat, even threshold.
- Bristle sweeps handle uneven thresholds and carpet transitions better, and drag less on the floor, but they leak more air than a blade.
- Automatic drop down sweeps lift when the door opens and drop when it closes, using a plunger that hits the jamb. These are the right answer over carpet or a tile lip, and they cost a few times what a plain blade sweep does.
Mount the sweep so it just kisses the threshold. Contact, not compression. A sweep pressed hard into the threshold wears through in a year and makes the door heavy to open.
Thresholds are the sill piece the door closes down onto. A worn threshold gasket, the rubber or vinyl insert running along the top, is one of the most common causes of a draft that people blame on the sweep. Those inserts pop out and replace cheaply, and you do not need to touch the threshold itself.
Adjustable thresholds, the part most people miss. Look at the top of your threshold. If you see a row of four to six screws running along its length, usually under small plastic caps, you have an adjustable threshold and you can raise or lower the whole top plate without buying anything.
Here is how to use it:
- Pop the caps off with a small flat screwdriver.
- Turn each screw counterclockwise a quarter turn to raise that section, clockwise to lower it.
- Work across all screws evenly, a quarter turn at a time, then close the door and check.
- Aim for light contact with the sweep or bottom seal, then stop.
Raise it too far and the door drags, scuffs the threshold, and gets hard to latch. Adjust in quarter turns and test after every pass. This one free adjustment fixes a lot of doors that people were about to replace.
Measuring and cutting
Measure the two sides and the head separately. Sides run from the threshold up to the head. The head piece runs the full width between the two side pieces, or in some kits butts against them at a corner. Check which style your product uses before cutting.
Cut long by about 1/8 inch on each piece. Weatherstrip compresses at the ends and settles. A piece cut exactly to length leaves a pinhole at each corner, and corners are where doors leak most. That extra 1/8 inch presses into the corner and closes it.
Cut with sharp shears or a utility knife on a scrap board. Metal-carriered silicone needs a hacksaw or metal shears for the carrier, then trim the bulb with a knife. A crushed cut end will not seal.
Dry fit everything before you peel any adhesive backing. Adhesive weatherstrip gets exactly one chance to be in the right place.
Clean the surface first. Wipe the jamb with denatured alcohol and let it dry fully. Adhesive will not bond to dust, old glue residue, or a freshly waxed jamb. In cold weather, warm the jamb with a hair dryer first, because most acrylic adhesives will not tack below about 50 degrees F.
The over compression mistake
This is the single most common error, and it shows up a day later as a door that will not latch.
The instinct is to make everything as tight as possible. But a compression seal only needs to compress 15 to 30 percent of its thickness to seal. Push it further and three things go wrong: the latch will not engage without a shove, the strike plate wears and eventually loosens, and the seal takes a permanent set within one season so it stops sealing at all.
How to catch it before it becomes a problem. After installing, close the door slowly with a light push. It should close and latch under its own momentum from about a foot open. If you have to lean on it, back off. Either use thinner weatherstrip on that section, or move the strike plate out by 1/16 inch, which is a five minute job with a chisel and two screws.
Then re-run the dollar bill test. You want drag, not a tear-proof grip. If the bill will not move at all, that spot is over compressed.
Storm doors, briefly
A storm door adds a second sealed layer and a dead air space in front of the main door. Installation typically costs about as much as the door itself, so budget for roughly double the shelf price of the unit you like.
When a storm door earns its money. On an old, uninsulated wood door you are not ready to replace. On an exposed entry that takes driving rain or wind. On a door with a lot of glass in a cold climate. And where you actually want the ventilation, since a full view storm door with a screen insert is a real summer benefit.
When it does not. On a modern insulated fiberglass or steel door that already seals well, the added energy benefit is small and hard to notice. On a south or west facing door in a hot sunny climate, a storm door can trap enough heat between the two doors to warp a fiberglass slab or void its warranty. Check the main door's warranty language before you add one.
Sealing the existing door properly is a small fraction of a storm door's cost, and almost always the better first move.
The bigger picture: one door is not the problem
Weatherstripping a door is worth doing, but it is a small part of a house's total air leakage. Sealing one door while the attic hatch sits open to the rafters is like patching a screen door on a submarine.
Here is roughly where air actually leaks in a typical single family home, based on the general pattern blower door tests find:
| Leak location | Share of total air leakage | Typical fix | What drives the cost |
|---|---|---|---|
| Floors, walls, and ceiling planes, mostly top plates and chases | 30 to 35 percent | Foam and caulk from the attic side | How many penetrations there are and whether the attic is crawlable; hiring it out multiplies the DIY number several times over |
| Ducts in unconditioned space | 15 to 20 percent | Mastic seal all joints, or aerosol duct sealing | Duct run length and access; aerosol sealing is the priciest option here and the only one that reaches sealed cavities |
| Fireplace and chimney | 10 to 15 percent | Inflatable chimney balloon, damper repair | A balloon is a trivial purchase; a top sealing damper with a chimney sweep visit is many times that |
| Plumbing penetrations | 10 to 13 percent | Foam around pipes under sinks and in the attic | Almost pure materials, a can or two of foam; the cheapest line on this table |
| Doors | 10 to 12 percent | Weatherstrip and sweep, all exterior doors | Seal type and door count; the pro version is mostly the trip charge, not the work |
| Windows | 8 to 12 percent | Caulk the casing, replace sash seals | Caulk is negligible per window; replacing the windows themselves is a different order of magnitude |
| Fans and vents | 3 to 5 percent | Backdraft dampers, sealed housings | Fixture count, and whether the housing has to come out of the ceiling |
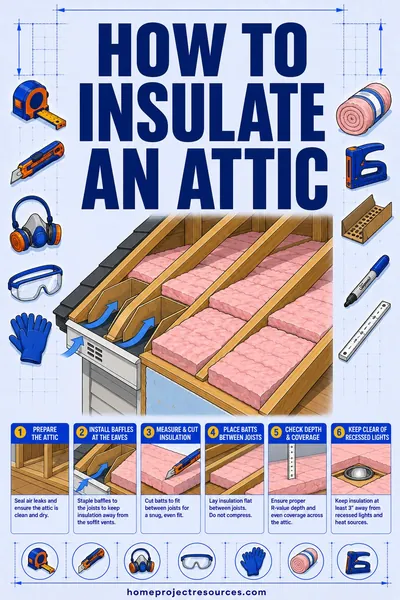
Doors are 10 to 12 percent of the total, and one door is a fraction of that. So do the doors, they are cheap and fast, but the attic plane is where the real money is. Start with how to insulate an attic, and use our insulation calculator to size the job before you buy anything.
Where a pro is worth it. If your house is genuinely drafty and you cannot find the source, a blower door test with an energy auditor tells you exactly where the air moves, ranked. Many utilities subsidize it or run the audit for free. It is the best money you can spend before doing any air sealing work, because it stops you from pouring a much larger sum into the wrong 10 percent.
What weatherstripping actually saves
Be realistic here, because a lot of product copy is not.
Air sealing a whole house, done thoroughly, typically cuts heating and cooling costs somewhere in the range of 5 to 15 percent, and that is the whole house, all leaks. One exterior door is a slice of the 10 to 12 percent that all doors together represent.
In practical terms, weatherstripping a single exterior door in a cold climate shaves a modest amount off a year of heating, and the materials are cheap enough that the job usually pays for itself somewhere between the first winter and the third. The honest version is that the payback depends so much on your climate, your fuel price, and how bad the original gap was that any specific figure would be a guess.
The benefit that is reliable is comfort. A sealed door stops the cold air river that runs across the floor and makes the nearest chair unusable in January. It stops the whistle on windy nights. It keeps out driven rain, dust, pollen, insects, and a fair amount of noise. Those you notice the same day, every day, and they are why the job is worth doing whether or not the utility bill moves enough to see.
Frame it that way and you will not be disappointed. Frame it as an investment that pays for itself by spring and you might be.
What the job costs, and what moves the number
| Item | Where it sits on materials | Hiring it out | Time DIY |
|---|---|---|---|
| V-strip, vinyl, one door | The cheapest real seal you can buy | Almost entirely the trip charge, not the work | 30 to 45 min |
| Compression bulb seal, kerf-in, one door | Roughly double the vinyl V-strip | A little above the V-strip job, same trip charge | 45 to 60 min |
| Silicone bulb in metal carrier, one door | The priciest per door seal on the shelf | The highest of the single door options | 60 to 90 min |
| Door sweep, basic blade | Cheap, in the same neighborhood as V-strip | The cheapest thing you can pay someone to fit | 20 to 30 min |
| Automatic drop down sweep | Several times a basic blade sweep | Above a basic sweep, mostly for the fitting time | 30 to 45 min |
| Threshold gasket insert only | Inexpensive, and often the whole fix | Barely more than the sweep, if you can get someone out | 15 to 30 min |
| Full threshold replacement | Well above any seal on this list | Several times the seal only jobs, and the widest spread | 2 to 4 hours |
| Storm door | The largest material purchase here by far | Roughly the price of the door again in labor | 2 to 4 hours |
| Blower door energy audit | n/a | Priced as a visit, and often subsidized or free | n/a |
Materials and labor are listed separately on purpose, because most weatherstripping quotes bundle them and the labor is the larger half. Three things move a quote more than the product does: how many doors you do in the same visit, whether the threshold has to come out, and whether the shop charges a minimum service call. That minimum is the reason a single door often costs nearly the same as three, and it is the single best argument for batching every exterior door into one appointment.
If you want a real number, call two or three local handymen and give them the identical scope: how many exterior doors, whether the jambs are kerfed, whether the threshold is being replaced or only re-gasketed, and whether they supply the seal or you do. A quote that does not say which seal it includes is not comparable to one that does, and the cheap bid is usually cheap because it is fitting foam tape where the door needed a bulb.
Worked example: one drafty back door
The door. A 36 by 80 inch steel exterior back door in a 1994 house. Original vinyl bulb seal on the jamb, cracked and flattened. No sweep. Threshold has a worn rubber insert and, on inspection, five screws under caps, so it is adjustable.
The tests. The dollar bill slides out freely at both top corners and along the entire latch side. It drags correctly along the hinge side. The night light test shows a clear bright line across the whole bottom and a spot of light at the top latch corner.
Diagnosis. The bottom is the main leak, the latch side seal is dead, and the hinge side is still fine.
The measurements. Two sides at 80 inches each plus a head at 36 inches equals 196 inches, which is 16.3 linear feet. Buy 18 feet to allow for the cut-long rule and one mistake. Bottom gap measures 7/16 inch at center.
The parts.
- Kerf-in silicone bulb seal, 18 ft, the largest line by some margin
- Vinyl blade door sweep, 36 inch
- Replacement threshold gasket insert
- Denatured alcohol and a utility blade, the smallest line of the four
On the total. The seal is roughly half the materials on a job like this, the sweep and gasket split most of the rest, and the cleanup supplies are a rounding error. A pro doing the same three items lands at something like double or triple the materials once the trip minimum is in, which is why it is worth doing every exterior door in the house on the same visit if you hire it out at all.
The work. Pull the old kerf seal, wipe the kerf clean, press in new silicone cut 1/8 inch long per piece, corners first. Pop the old threshold gasket out and press the new one in. Screw the sweep to the interior door face at light contact. Then raise the threshold a quarter turn at a time until the sweep just touches, and stop.
The check. Close the door from a foot open. It latches under its own weight, so nothing is over compressed. Re-run the dollar bill test at all eight points: it now drags everywhere and tears at two. Night light test shows no daylight anywhere.
Time. About 90 minutes including a trip to the store for the right kerf profile, which is the trip almost everyone makes.
Expected saving. A small annual trim on the heating bill in a cold climate, not a number anyone would notice on its own. The floor in front of that door stops being 8 degrees colder than the rest of the room, which is the part the household will actually notice.
When to stop weatherstripping and fix something else
The door is out of square in the frame. A full length light line down one side means the door or the frame has shifted. Try tightening the hinge screws first, replacing one screw per hinge with a 3 inch screw that reaches the framing behind the jamb. That single trick pulls a sagging door back into alignment more often than anything else.
The door itself is warped or rotted. A wood slab that has cupped will not seal at the center no matter what you put on the jamb. Sight down the edge to check.
Water is getting in, not just air. That is a flashing or sill pan problem, and weatherstrip will not fix it. Water intrusion at a door threshold can rot the framing and the subfloor below it. Get it looked at.
The frame itself is loose or the casing is separating from the wall. Air moves around the frame, not through the door. Caulk the exterior casing where it meets the siding, and check the interior casing for gaps to the drywall. If the frame is actually loose, that is a repair job, not a seal job.
Replacement math. If the door is old, single pane glass, or badly damaged, an insulated replacement is an order of magnitude beyond any seal on this page, and the installed spread is wide because slab material, sidelights, frame condition and whether the opening has to be reframed all move it. That is a different decision, and it is closer to the window question than the weatherstrip question. See cost to replace windows for how that math tends to work out, since the honest answer is usually that comfort and appearance justify it more than energy savings do.
Frequently asked questions
What is the best weatherstripping for an exterior door?
A silicone bulb seal in a metal carrier for the sides and head, plus a good sweep at the bottom. Silicone stays flexible in cold weather when vinyl and rubber stiffen and stop sealing, and the metal carrier keeps it straight over a 7 foot run. It costs several times what basic V-strip does per foot, but it lasts 15 to 20 years instead of 5.
How do I know if my door needs new weatherstripping?
Close the door on a dollar bill and pull it out. No resistance means the seal is not touching there, and you should test at least eight points around the perimeter. Also look for the physical signs: cracked or flattened rubber, adhesive tape that has lifted at a corner, or a bulb seal that has taken a permanent dent where the door presses on it.
Why is my door still drafty after weatherstripping?
Check three things. First, the bottom, since a sweep and threshold close the biggest gap and a jamb seal does nothing about it. Second, the casing, because air often moves around the frame through the rough opening, which is a caulking job, not a weatherstrip job. Third, alignment: a door out of square in the frame leaves a gap no seal can close, and the fix is hinge or strike plate adjustment.
Should weatherstripping touch the door when it is closed?
Yes, it should touch and compress slightly, roughly 15 to 30 percent of its thickness. That is enough to seal. If the door needs a hard push to latch, the seal is over compressed and will crush flat within a season, so switch to a thinner profile or move the strike plate out by 1/16 inch.
How do I adjust an adjustable threshold?
Look for four to six screws along the top of the threshold, usually hidden under small plastic caps. Turn them counterclockwise to raise the top plate and clockwise to lower it, moving across all screws evenly a quarter turn at a time. Close the door and check after each pass, aiming for light contact with the door bottom seal and no drag.
How much does it cost to weatherstrip a door?
DIY, it is one of the cheapest repairs in the house: a jamb seal, a sweep, and a threshold gasket for one exterior door. Hiring it out costs several times the materials, and most shops apply a minimum service call, so a single door lands close to what three doors would. Seal type, threshold work and door count are what move the quote. Get two or three local prices on one identical scope and confirm which seal each includes.
Does weatherstripping a door really save money?
Some, but modestly. All the doors in a house together account for roughly 10 to 12 percent of its total air leakage, so one door trims only a small slice off a year of heating, and how small depends on your climate and fuel. The reliable benefit is comfort: no cold floor draft, no whistle on windy nights, less dust and noise, which you notice every day whether or not the bill moves visibly.
Is foam tape or V-strip better for a door?
V-strip lasts longer and handles a door that swings against it, since the spring shape flexes instead of crushing. Foam tape is easier to install and fills an uneven gap better, but open cell foam is done in a year or two and closed cell foam lasts 3 to 5. Use V-strip on exterior door jambs and save foam tape for interior doors and attic hatches.
The short version
Test before you buy. Eight points with a dollar bill and one pass with a flashlight at night tell you which gaps are real, and they usually point at the bottom of the door rather than the sides.
Fix the bottom first with a sweep, a fresh threshold gasket, or a quarter turn on an adjustable threshold you may already have. Then seal the jamb and head with a compression bulb, silicone if your winters are cold, cut 1/8 inch long so the corners close.
Do not over compress it. The door should latch under its own momentum from a foot open. If it needs a shove, back the seal off or move the strike plate.
Then take the same afternoon energy up to the attic, because that is where 30 percent of the leakage lives. How to insulate an attic covers it, and our insulation calculator sizes what you need.