Roof Snow Melt System: Types, Sizing and Install

A roof snow melt system is heat cable or hydronic tubing run along the eaves, through the gutters, and down the downspouts, and its only job is to keep one continuous drainage channel open through the ice so meltwater has somewhere to go. It does not clear the whole roof, and it does not fix the heat loss that built the ice dam in the first place. Sized correctly, it protects the first 2 to 4 feet of roof above the exterior wall line plus the full gutter and downspout path, which is the entire route water needs to escape.
That last part is where most installs fail. A cable that stops short of the wall line, or a heated eave draining into a frozen downspout, just moves the ice problem a few feet.
Updated September 2026
Measure your roof edges first. Our free roofing calculator turns your footprint and pitch into drip edge linear feet, and drip edge length is exactly the eave and rake footage a heat cable bid is priced from. Walk into the conversation with that number and nobody can hand you a vague lump sum.
What a roof snow melt system actually does
Ice dams form because the middle of the roof is warmer than the edge. Snow melts over the heated attic, the water runs down, it hits the cold overhang past the exterior wall, and it refreezes. The dam grows, water backs up behind it, and eventually it finds its way under the shingles and into the ceiling.
A snow melt system does not stop that heat loss. It cuts a channel through the ice so the water that keeps arriving can drain instead of pooling. Think of it as a relief valve, not a cure.
That distinction matters for two reasons. First, it tells you where the cable has to go: from somewhere over the heated space, out past the wall line, into the gutter, and all the way to the ground. Second, it tells you the system is a companion to air sealing and attic insulation, not a substitute. If the attic work is on the table, do that first and you may need less cable, or none.
The five system types, compared
| Type | How it works | Best fit | The catch |
|---|---|---|---|
| Self-regulating cable | A polymer core raises output where it is cold and backs off where it is warm | Most retrofits, gutters, downspouts | Cold start current is high, which limits how many feet go on one breaker |
| Constant wattage cable | Fixed output per foot along the whole length | Short simple runs, single gutters | Many versions cannot be cut in the field, and overlapping it can cook the jacket |
| Mineral insulated cable | Metal sheathed element, high output, built to an exact length at the factory | Commercial roofs, valleys, long service life | Measure wrong and you order again, since there is no field cutting |
| Heated eave panels | An electric element under a metal panel installed along the roof edge | Slate, shake, and roofs where surface cable would look wrong | Roof work to install, and replacement means going back on the roof |
| Hydronic tubing | A boiler circulates warm glycol through tubing at the eave or under the roofing | New construction, big roofs, sites that also melt a driveway | Needs a heat source, a mechanical design, and usually a full roof off |
For a typical house with an ice dam over one or two problem eaves, self-regulating cable is the default answer. It is the only type on that list that a homeowner can reasonably plan, and it fails safe: if a section gets buried under warm slush it simply draws less power instead of overheating.
Where the cable goes: the coverage rules that set your length
Cable length is not a guess. It falls out of four measurements.
1. How far up the slope the zigzag has to reach. The melt path must start over heated space and continue past the cold overhang. Measure your soffit overhang horizontally from the wall, then add 6 to 12 inches so the top of the zigzag sits inside the exterior wall line. That is a horizontal distance, and roofs are sloped, so convert it with the pitch multiplier.
| Pitch | Multiplier | 30 in horizontal becomes |
|---|---|---|
| 3/12 | 1.0308 | 30.9 in up the slope |
| 4/12 | 1.0541 | 31.6 in |
| 6/12 | 1.1180 | 33.5 in |
| 8/12 | 1.2019 | 36.1 in |
| 10/12 | 1.3017 | 39.1 in |
| 12/12 | 1.4142 | 42.4 in |
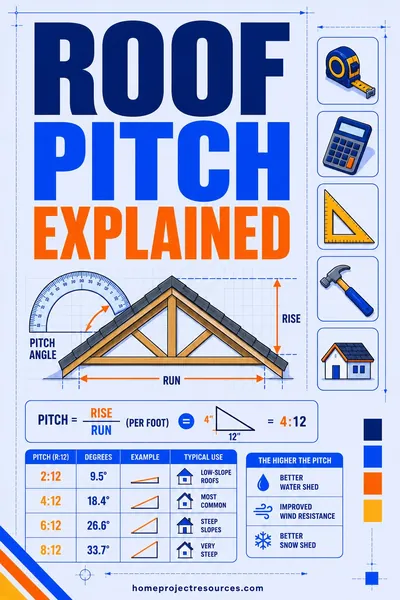
Those multipliers are the same ones the roofing calculator uses, and they come straight from the geometry: the square root of rise squared plus 144, divided by 12. Our guide to roof pitch explained covers how to measure your own pitch from the attic without climbing anything.
2. The zigzag itself. Cable runs up and down in triangles along the eave. Each triangle uses more cable than the eave it covers, and how much more depends on the height of the triangle and the spacing between apexes.
| Zigzag height up the slope | Apex spacing | Cable per foot of eave |
|---|---|---|
| 12 in | 15 in | 1.9 ft |
| 15 in | 15 in | 2.2 ft |
| 18 in | 15 in | 2.6 ft |
| 24 in | 15 in | 3.4 ft |
| 30 in | 15 in | 4.1 ft |
| 36 in | 15 in | 4.9 ft |
Widening the spacing to 24 or 30 inches uses less cable but leaves wider ribs of ice between the loops, and on a low pitch those ribs can bridge into a dam of their own. Fifteen inches is the common middle.
3. Gutters. One straight run along the bottom of the gutter, one foot of cable per foot of gutter. Some installers loop it back for a double run in heavy snow country.
4. Downspouts. Down and back up, so twice the downspout height, plus 2 to 3 extra feet past the bottom outlet. That tail matters more than people expect: a heated downspout that discharges onto a frozen splash block plugs itself solid at the outlet.
Add valleys if you have them. A valley collects snow from two planes and stays shaded, so run cable up and back down roughly two thirds of the valley length.
Worked example: a 26 by 44 foot ranch
Here is the whole takeoff for a single story gable ranch, 8/12 pitch, 18 inch soffit overhang, gutters on both long eaves, four downspouts about 10 feet tall.
Eave footage: two eaves at 44 feet = 88 linear feet
Zigzag reach: 18 in overhang + 12 in inside the wall line = 30 in horizontal. On an 8/12 roof that is 30 x 1.2019 = 36.1 in, so call it 36 inches up the slope.
Roof cable: 88 ft of eave x 4.9 ft of cable per foot = 431 ft
Gutter cable: 88 linear feet of gutter x 1 = 88 ft
Downspout cable: 4 downspouts x 10 ft x 2 (down and back) = 80 ft, plus 4 x 3 ft of discharge tail = 12 ft, so 92 ft
Drops from roof into gutter: the zigzag has to feed into the gutter run, and the real path is never as tidy as the drawing. Add 5 percent: 611 x 1.05 = 642 ft
Order: round to 650 feet of self-regulating cable.
Power draw at 5 watts per foot: 650 x 5 = 3,250 watts. At 120 volts that is 27.1 amps, at 240 volts it is 13.5 amps.
Energy while running: 3,250 watts is 3.25 kilowatts, so eight hours of operation is 26 kilowatt hours. Multiply that by whatever your own utility charges per kilowatt hour and you will know within a few minutes whether an automatic controller is worth it. It almost always is, because the alternative is leaving the system on for weeks.
Circuits, breakers, and the electrical side
This is the part that decides whether the project is a Saturday or a job for a licensed electrician, and on nearly every house the answer is the electrician. Roof de-icing is a fixed outdoor electric heating load, and code requires ground fault protection of equipment on the circuit. That is a specific breaker type, not a standard GFCI receptacle.
Continuous loads get sized at 125 percent, which means a 20 amp breaker carries 16 amps of continuous load. Run that backward and you get the steady state ceiling for a single circuit.
| Cable output at 50F | Watts per 100 ft | Amps per 100 ft at 120 V | Max feet, 120 V, 16 A | Max feet, 240 V, 16 A |
|---|---|---|---|---|
| 3 W/ft | 300 | 2.5 | 640 ft | 1,280 ft |
| 5 W/ft | 500 | 4.2 | 384 ft | 768 ft |
| 8 W/ft | 800 | 6.7 | 240 ft | 480 ft |
| 12 W/ft | 1,200 | 10.0 | 160 ft | 320 ft |
Two warnings about that table. It is steady state arithmetic only, and self-regulating cable draws far more current in the first minutes after it energizes on a cold roof, sometimes two to three times its running draw. Every manufacturer publishes a maximum circuit length chart that accounts for that inrush, and their number will be shorter than the arithmetic. Use theirs.
The other warning: check your panel before you fall in love with a design. The 650 foot example above wants either one 240 volt circuit or two to three 120 volt circuits, and a full panel turns a cable job into a panel job.
Controls: manual, thermostat, or automatic
| Control | How it decides | Energy use | Where it belongs |
|---|---|---|---|
| Manual switch | You remember | Highest, because nobody remembers to turn it off | Never, in practice |
| Ambient thermostat | Runs below a set outdoor temperature, often around 38F | Moderate, runs on cold dry days too | Small budget installs |
| Automatic snow and ice sensor | Runs only when it is both cold and wet | Lowest | Any system large enough to notice on a bill |
An automatic controller with a moisture sensor is the single upgrade that pays for itself fastest, because a manual system left on through a dry cold snap burns full wattage for nothing. Mount the sensor where it sees the same conditions as the cable, not under a soffit that stays dry.
Install steps, in order
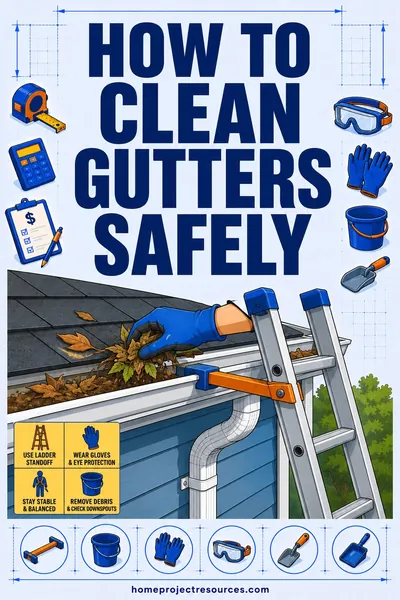
- Fix the drainage path first. Clean and re-pitch the gutters, and confirm every downspout is clear. Our guide on how to clean gutters covers the seasonal version of this.
- Confirm the electrical plan: circuit count, breaker type with ground fault protection of equipment, and where the hardwired junction or outdoor outlet will live.
- Measure the eaves, the gutter runs, the downspout heights, and any valleys. Write them down, then add the 5 percent.
- Map the zigzag on paper with the height and spacing you chose, and mark where it drops into the gutter.
- Attach roof clips to the shingle edges. Use the manufacturer's clips, not screws, and never drive a fastener through a field shingle.
- Run the cable in the pattern, keeping it flat against the roof. Do not let loops cross or overlap.
- Run the gutter section along the gutter bottom, held with gutter clips so it cannot float.
- Drop into each downspout with the down and back loop, and hang it from a downspout hanger so the weight is not on the cable itself.
- Terminate at the factory end cap. Field terminations on self-regulating cable use the kit that came with it, and nothing else.
- Wire the circuit, install the controller and the sensor, and label the breaker.
- Test on a cold day before the first real storm. Feel for warmth every few feet.
- Photograph the layout while it is visible. In February, under snow, you will have no idea where the cable runs.
What drives the quote for a roof snow melt system
Ask any installer to break a roof snow melt system quote into these lines, and vague bids will sort themselves out immediately.
- Total cable footage, stated as a number, and the pattern it assumes. The single biggest variable, and the one an underbid shrinks.
- Cable type and output per foot. A 5 watt cable and a 12 watt cable are different products with different circuit limits.
- Number of eaves, valleys, and downspouts each measured separately.
- Roof height and access. Single story from a ladder versus two stories with staging is a different labor day entirely.
- Roof material and attachment method. Standing seam clamps, shingle clips, and slate hooks are not interchangeable.
- Electrical scope. New circuit or existing? Breaker with ground fault protection of equipment? Conduit length from panel to roof? Panel space available?
- Controller type, and whether a moisture sensor is included or an add-on.
- Permit and inspection, which most jurisdictions require for the new circuit even if not for the cable.
- Warranty terms on both the cable and the labor, and what voids them.
- Season. Emergency winter installs during an active ice dam carry a premium of time, risk, and roof damage. Plan in fall.
Two bids are only comparable when both state cable footage and cable output. If one says 400 feet at 5 watts and the other says "heat cable at eaves," you are not comparing anything. Our guide on how to get contractor bids has the full scope of work template.
Fix the cause, then size the cure
A roof that loses no heat grows no ice dam. Before committing to a large system, spend an afternoon in the attic with a flashlight.
- Air sealing comes first. Every recessed light, bath fan, plumbing stack, and top plate gap is a warm air leak into the attic. Sealing them returns more for the effort than any other attic work.
- Then insulation depth. Compare what you have against our R-value insulation chart, and see how to insulate an attic for the order of operations.
- Then ventilation. The usual target is 1 square foot of net free vent area per 300 square feet of attic floor, split roughly evenly between intake at the soffits and exhaust at the ridge. Insulation stuffed into the soffit bays blocks intake and is a common cause of a warm attic in an otherwise well insulated house.
- Then look for the outlier. Ice on only one eave usually means one specific defect underneath: an uninsulated cathedral section, a blocked soffit bay, a leaky attic hatch, or ductwork in the attic.
A US Department of Energy overview of attic insulation and air sealing is a good starting reference for the sealing work.
Doing that first often shrinks the cable plan from every eave down to one problem edge, and a smaller system is cheaper to run forever.
Maintenance and lifespan
Heat cable is an outdoor product living under snow, ice, and ultraviolet light, so treat it as a serviced system rather than a permanent fixture.
- Each fall, walk the run and check every clip. Clips let go first, and a cable hanging in a loop is a cable that will get torn off by a sliding sheet of snow.
- Look at the jacket for cracks, chew marks, and any place a ladder crushed it against the gutter.
- Test the circuit before the first storm, and again after any breaker trip.
- Never overlap cable on itself, and never run it through a bunched pile at a corner.
- Never use an indoor extension cord. The connection point should be a permanent outdoor rated junction on the de-icing circuit.
- Keep the gutters clear. A gutter full of leaves is a gutter full of ice no matter how much cable is in it.
Expect to inspect annually and to replace sections over time rather than all at once. Combine the check with the rest of your fall walkaround in our roof inspection checklist.
FAQ
Does a roof snow melt system prevent ice dams?
Not really, and any installer who says it does is overselling. It melts a drainage channel through the ice so backed-up water can escape before it gets under the shingles. The dam itself may still form around the channel. Air sealing and attic insulation are what actually stop dams from forming, and the cable is the backup for the eaves you cannot fix.
How far up the roof should heat cable run?
Far enough that the top of the zigzag sits inside the exterior wall line, over heated space. Measure your soffit overhang horizontally, add 6 to 12 inches, then multiply by your pitch multiplier to convert that to distance up the slope. An 18 inch overhang on an 8/12 roof works out to about 36 inches of coverage up the slope.
Can I install roof heat cable myself?
The cable and clips are within reach for a confident homeowner on a single story roof. The circuit is not. Roof de-icing needs a dedicated circuit with ground fault protection of equipment, sized for a continuous load, and in most places that is permitted electrical work. Plan on doing the roof half yourself, if at all, and hiring the panel half.
How much power does a roof snow melt system use?
Multiply the total feet of cable by its rated watts per foot. A 650 foot run of 5 watt cable is 3,250 watts, or 3.25 kilowatts, which is 26 kilowatt hours over an eight hour storm. That is why the controller matters: an automatic sensor runs the system only during a melt and freeze event instead of all winter.
Do heated gutters work without cable on the roof?
Only for a narrow problem. Cable in the gutter alone keeps the gutter and downspout draining, which helps if your ice forms in the gutter itself. If ice is building on the roof surface above the gutter, the water never reaches the heated gutter, and you have solved nothing. Most installs need both.
Should the system stay on all winter?
No. It should run when snow or ice is present and outdoor temperature is in the melt and freeze range, usually somewhere between the low twenties and the high thirties Fahrenheit. Below that, nothing melts anyway and the cable is just drawing power. Above it, the roof drains on its own. That window is exactly what an automatic controller watches for.
Does heat cable damage shingles?
Properly clipped cable does not. Damage comes from the install: fasteners driven through field shingles, cable pulled tight over an edge, or someone chipping ice off a roof with a hammer because the cable was not turned on in time. Use manufacturer clips at the shingle edge, keep the cable flat, and do not walk a frozen roof.
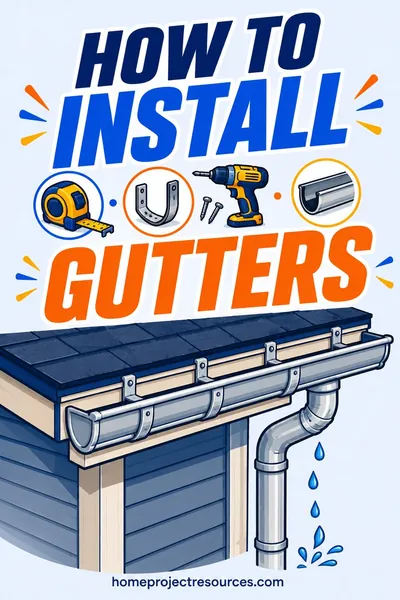
Related: Size your roof edges with the roofing calculator, then check the underlying cause with how to insulate an attic and the R-value insulation chart. For the drainage half of the problem, see how to install gutters and how to clean gutters, and run the yearly walkaround with our roof inspection checklist.