Vinyl Plank Layout Patterns That Make a Room Look Bigger

The layout that makes a room look biggest is the simplest one: run the planks parallel to the longest wall, use a random stagger with end joints at least 8 inches apart, and carry the same direction through every doorway without a transition strip. Long unbroken lines pull your eye down the room, and the fewer times that line is interrupted, the larger the space reads.
Everything else is a trade. Diagonal and herringbone look expensive and both make a room feel busier and smaller, and they need a lot more material to cover the same floor.
Updated September 2026
Pick your pattern first, then buy. Feed your room dimensions and the pattern into our free Flooring Calculator and it applies the matching waste allowance and converts square feet into whole boxes, which is what the store actually sells you.
A note on numbers. There are no dollar figures on this page. Flooring, underlayment and labor pricing move by region, by product line and by season, so a printed range would be wrong for most readers. What you get instead is the geometry, the waste math you can run yourself, and the layout decisions that change how much you carry home.
Vinyl Plank Layout Patterns and What Each One Does to a Room
Vinyl plank is a floating floor made of long, narrow rectangles, so the pattern choice is really two choices stacked together: which way the boards point, and how the end joints line up from row to row.
| Pattern | How it goes down | Waste allowance | Difficulty | What it does to the room |
|---|---|---|---|---|
| Straight lay, parallel to the long wall | Rows run the length of the room, random stagger | 5 to 10% | Easy | Stretches the room lengthwise, the standard choice |
| Straight lay, parallel to the short wall | Rows run across the room | 10% | Easy | Widens a long narrow hallway, shortens a long room |
| Straight lay toward the main window | Rows point away from the biggest light source | 5 to 10% | Easy | Hides seam shadows, boards look flatter |
| Diagonal, 45 degrees | Rows set at 45 degrees to every wall | 15% | Moderate | Adds movement, hides an out of square room, reads busier |
| Herringbone | Boards set in an L at 90 degrees, forming a zigzag | 20% | Hard | Strong texture, makes a big room feel furnished and a small one feel crowded |
| Chevron | Boards with mitered ends meeting in a clean V | 20% or more | Hard | The most formal look, needs left and right boards |
| Long narrow hallway run | Rows run down the hall, few full boards reused | 15% | Easy | Lengthens the hall, but offcuts have nowhere to go |
Those waste percentages come straight off our flooring calculator, and they are the same numbers a good installer will quote you. They are not padding. Every one of them is covering material you will cut off and throw away.
Two rows in that table surprise people. A long hallway is the easiest pattern to install and one of the most wasteful, because a hallway has no second area to absorb the leftover pieces. And chevron is not something you improvise from ordinary planks. True chevron boards are manufactured with angled ends in left-hand and right-hand versions. Trying to fake it by mitering standard LVP means two cuts on every single board and a waste number that climbs past anything in the table.
Which Direction Should Vinyl Plank Run?
Three rules, in priority order. When they disagree, the one higher on the list wins.
1. Parallel to the longest wall. This is the default for a reason. Boards running the length of a room create continuous lines that your eye follows all the way to the far wall, and a room with long lines reads bigger than the same room with the boards running across it. If you only remember one thing, remember this one.
2. Toward the main light source. Every click-together plank has a tiny bevel or micro-groove at the seam. Light raking across those seams sideways throws a shadow line at every joint and makes the floor look striped. Running the boards away from the biggest window puts the seams in line with the light instead of across it, and the floor looks flatter and more continuous.
3. Perpendicular to the floor joists, if you are on a wood subfloor with any bounce. Vinyl plank floats, so it is far less fussy about joist direction than solid hardwood. But a springy floor telegraphs through, and running boards across the joists spreads the load over more of them. If the subfloor is a slab or a solid, well-fastened plywood deck, ignore this rule entirely.
The exception that matters: in an open-plan space, direction is set by the largest continuous run, not by the room you happen to be standing in. Pick the longest sightline in the whole area, usually front door to back wall, and run everything that way. Changing direction between a kitchen and a living room chops the floor into boxes and instantly makes both spaces look smaller.
Hallways are the other exception. A hall is a long, skinny box, and running boards down its length exaggerates that. Running them across the hall makes it read wider. The catch is that a hallway usually connects to rooms, and switching direction at a doorway needs a transition strip. Most people run the hall the same direction as the rooms and accept the tunnel effect, which is usually the right call.
The Stagger Pattern Is What Separates a Good Floor From a Cheap One
Direction gets all the attention. Stagger is what people actually notice when they walk in, even if they cannot name what is bothering them.
Stagger is how far the end joint in one row sits from the end joint in the row next to it. Get it wrong and the floor develops visible repeating shapes that look like a manufacturing defect.
The rules:
- Minimum 8 inches between end joints in adjacent rows. Some manufacturers say 6 inches, a few rigid core products ask for 12. Read the carton, because installing tighter than the spec can void the warranty.
- Never let joints line up every third row. A joint that repeats in a regular rhythm creates a visible column running across the floor.
- No H-joints. That is when a joint in row 1 and a joint in row 3 sit at the same point, with a single board in row 2 bridging them. The eye picks out the H shape immediately.
- No stair-steps. Offsetting each row by the same amount in the same direction makes a diagonal lightning bolt across the floor. This is the single most common DIY mistake.
- Randomize genuinely. Open three or four cartons at once and pull boards from all of them, and vary your starting cut between something like 12 inches, 30 inches and a full board rather than always cutting in half.
Here is the trick that makes randomizing easy. Cut your first row starter at full length, the second row starter at roughly one third, and the third row starter at roughly two thirds. Then repeat that three-row cycle, and vary each cut a few inches so the cycle never lands in the exact same spot twice. You get a stagger that always exceeds the minimum and never forms a pattern.
The offcut rule saves material at the same time. The piece you cut off the end of a row is the piece that starts the next row, as long as it is longer than the manufacturer's minimum, usually 6 to 8 inches. That is the whole reason a straight lay in a simple square room can get away with 5 percent waste while a diagonal needs 15. In a diagonal, both ends of every offcut are angled, so almost nothing gets reused.
How Layout Actually Makes a Room Look Bigger
Pattern is one lever. Here are the rest, and they compound.
Run the floor continuously through doorways. Every transition strip is a horizontal bar that says "this room ends here." Removing three T-molds from an open plan does more for perceived size than any pattern choice. Floating floors need an expansion gap around the perimeter, not at every doorway, so as long as the total run stays inside the manufacturer's maximum, usually somewhere around 30 to 40 linear feet before a break is required, you can carry it straight through.
Use longer boards. Plank length varies a lot, from about 36 inches on budget lines to 60 inches or more on premium ones. Longer boards mean fewer end joints per square foot, which means fewer visual interruptions in that long line you worked to create.
Go wider, but not too wide. A 7 inch plank reads more open than a 5 inch plank in most rooms. Past about 9 inches, wide boards start to make a small room feel like it was floored with leftovers from a bigger house.
Keep the color light and the finish matte. Light floors bounce light around the room. Gloss shows every seam shadow and every speck of dust, which chops the surface up visually.
Choose low contrast between boards. Heavy graining and dramatic board-to-board color variation draws the eye to individual planks instead of the whole floor. Subtle variation reads as one continuous surface.
Match the baseboard, not the floor. A baseboard close in tone to the wall makes the wall look taller. A baseboard that matches the floor makes the floor look like it is climbing the wall.
Worked Example: A 12 by 16 Living Room
Here is the whole calculation, start to finish.
The room measures 12 feet by 16 feet. That is 192 square feet. There is also a closet 2 feet deep by 5 feet wide, which adds 10 square feet, for 202 square feet total.
The boards will run parallel to the 16 foot wall, straight lay, random stagger. The room has a closet, two doorways and one jog, so this is a typical room rather than a perfect square. That means a 10 percent waste allowance, not 5.
- 202 sq ft x 1.10 = 222.2 sq ft to buy
- Carton coverage on the chosen product: 24.0 sq ft per box
- 222.2 / 24.0 = 9.26 boxes, so round up to 10 boxes
- 10 boxes = 240 sq ft delivered, leaving about 38 sq ft of true surplus
That surplus is not wasted. Keep the unopened partial and the usable offcuts flat, indoors, as attic stock. Vinyl plank product lines get discontinued fast, and a matching board five years from now is worth far more than the shelf space it takes up now.
Now price the same room as a herringbone. At a 20 percent allowance: 202 x 1.20 = 242.4 sq ft, which is 10.1 boxes, so 11 boxes. One extra box, plus roughly double the labor hours, plus a subfloor that has to be genuinely flat because herringbone shows every dip.
And the diagonal, at 15 percent: 202 x 1.15 = 232.3 sq ft, which is 9.68 boxes, so 10 boxes. Same box count as the straight lay in this particular room, but with almost no surplus left over and far more angled cuts. That is the risk with diagonal. One bad measurement and you are back at the store hoping the dye lot matches.
Laying Out the Room So You Do Not End on a Sliver
A sliver is a final row an inch and a half wide. It looks like a mistake, it is fragile, and it is the layout error people regret most.
- Measure the room width across the direction the boards will run. Measure at both ends and in the middle, because walls are rarely parallel.
- Divide the width by the plank width. A 12 foot wide room with 7 inch boards gives you 144 / 7 = 20.57 rows.
- Look at the leftover. That 0.57 of a row is 4 inches, which is fine. If the leftover had come out under about 2 inches, or under half a plank width, you have a sliver problem.
- Fix a sliver by splitting it across both walls. Rip the first row narrower so the first and last rows come out the same width. In the example above, if the leftover were 1.5 inches, you would rip the first row to about 4.25 inches and end with a matching 4.25 inch last row.
- Dry-lay the first three rows before you glue, click or peel anything. Fifteen minutes here saves a weekend later.
- Leave the expansion gap. Most rigid core and click LVP needs 1/4 inch clear of every wall, cabinet toe kick, pipe and door jamb. The floor moves with temperature, and a floating floor pinned against a wall buckles in the middle of the room.
- Undercut the door casings, do not scribe around them. Lay a scrap board flat, rest a pull saw on it, and cut the casing at exactly the right height. The board slides underneath and the joint disappears.
- Acclimate the boxes flat in the room for as long as the manufacturer asks, usually 24 to 48 hours, stacked flat rather than on end.
If you want the same layout logic for a hard-surface floor with grout, our tile layout patterns guide runs the center-line method in more detail, and the math transfers directly.
Which Pattern Belongs in Which Room
| Room | Best layout | Why |
|---|---|---|
| Small living room | Straight, parallel to the long wall | Maximum apparent length, minimum waste |
| Long narrow hallway | Straight down the length, or across if it stands alone | Down the length keeps the floor continuous, across makes it read wider |
| Open plan main floor | One direction across everything, longest sightline | No transitions, no visual chopping |
| Entryway or mudroom | Herringbone, if the budget allows | A small feature area is where a busy pattern earns its keep |
| Bedroom | Straight, running toward the window | Seam shadows disappear in raking morning light |
| Kitchen | Same direction as the adjoining living space | Continuity matters more than the kitchen's own geometry |
| Basement | Straight, parallel to the long wall, rigid core product | Slab movement and moisture drive the product choice more than the pattern |
| Stairs | Not a floating layout at all | Stair treads are glued and nosed, never floated |
Two of those deserve a sentence more. A basement slab is rarely flat, and a floating floor bridges hollows rather than filling them, so check flatness with a straightedge before you pick anything fancy. And stairs are a completely separate job with their own parts and their own risk of a squeak.
Mistakes That Show Up After the Floor Is Down
Starting against a wall you assumed was straight. Chalk a line, measure to it from the wall in three places, and set the first row to the line instead of the wall.
Cutting every board in half. It feels random. It is not. It produces joints that line up every other row.
Using boards straight out of one carton at a time. Cartons are often sorted, so you get all the light boards in one corner and all the dark ones in another. Pull from three or four boxes at once.
Forgetting the expansion gap behind a heavy cabinet or an island. Anything screwed to the subfloor through a floating floor pins it and causes buckling. Islands and tall cabinets go down first, and the floor goes around them.
Skipping the flatness check. Most manufacturers specify something like 3/16 inch over 10 feet. A floating floor over a dip flexes, the joints work, and eventually they separate or click apart.
Running a new direction in every room. It saves a bit of material and costs the entire look.
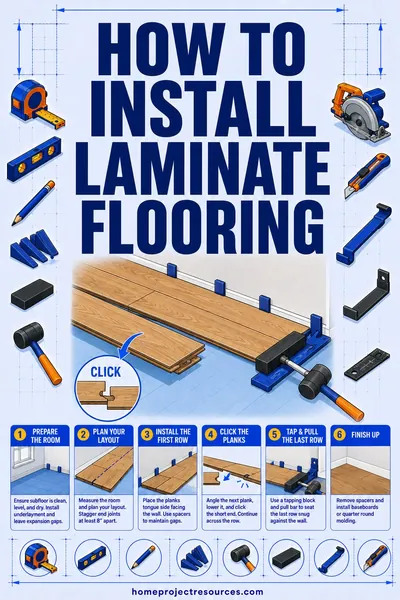
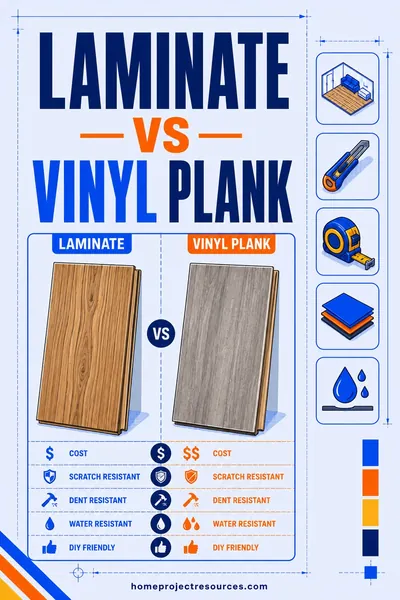
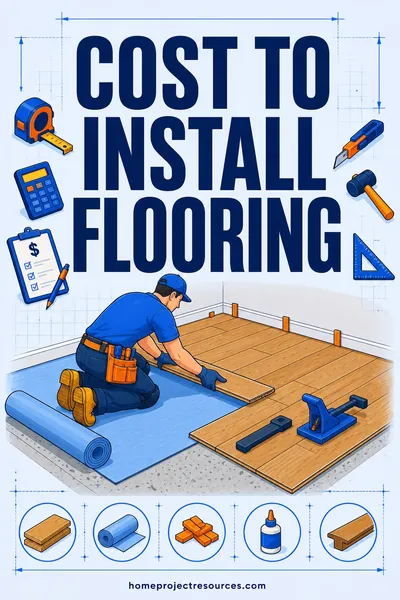
If you are still deciding between materials before you commit to a layout, our laminate vs vinyl plank comparison covers wear layers and water resistance, and cost to install flooring walks through what drives an installation quote. The step-by-step process is nearly identical for both products, so how to install laminate flooring is a useful read even if you are laying LVP.
FAQ
Which direction should vinyl plank run in a small room?
Parallel to the longest wall, almost always. That gives you the longest continuous lines, which is what makes a small room read bigger. If the room has one dominant window and the long wall points a different way, run toward the window instead, since seam shadows in raking light will do more visual damage than the direction change.
How much stagger do I need between vinyl plank rows?
At least 8 inches between end joints in adjacent rows is the safe default, and some rigid core products ask for 12. Vary the starting cut across a three-row cycle so the joints never form a repeating stair-step or an H shape. Check the carton, because installing tighter than the manufacturer's minimum can void the warranty.
Do vinyl plank layout patterns change how much flooring I buy?
Yes, and by more than most people expect. A straight lay in a simple square room needs about 5 percent extra, a typical room with doorways and a closet needs 10, a diagonal needs 15, and herringbone or chevron needs 20 or more. On a 200 square foot room that gap is roughly 30 square feet, or more than a full box.
Should the flooring run the same direction in every room?
In connected open spaces, yes. One direction across the whole area removes transition strips and makes the floor read as a single surface. A closed room behind a door, like a bedroom or a bathroom, can run its own direction without hurting anything, because you never see both floors at once.
Is herringbone worth it in a small space?
Usually not as a whole-floor treatment. Herringbone adds visual texture that fills a room, which works against you when the room is already tight. It shines in a defined small area like an entry or a powder room floor, where the pattern reads as a deliberate feature rather than as clutter.
Can I change plank direction at a doorway?
You can, but you need a transition strip at the change, and that strip is a visible bar across the opening. It is the standard fix when a hallway runs one way and the rooms run another. If you are trying to make the space feel larger, avoid it.
How do I avoid a sliver in the last row?
Measure the room across the direction the planks run, divide by the plank width, and look at the remainder. If the last row would come out under about half a plank wide, rip the first row narrower so the first and last rows match. Do this before the first board goes down, because it cannot be fixed afterward.