How to Winterize Outdoor Faucets Before the First Freeze

Here's how to winterize outdoor faucets in four moves: disconnect every hose, close the shutoff valve inside the house that feeds the spigot, open the outdoor faucet so the trapped water drains out, and slip an insulated cover over it. If you have frost-free faucets, the hose removal alone does most of the work, but only if the faucet was installed with a downward pitch and nothing is left screwed onto it. The whole job takes ten minutes per faucet and prevents the single most common winter plumbing repair: a spigot that split inside the wall and flooded the basement in March.
This page covers everything from the wall outward. For the pipes inside the house, the crawl space, and heat cable, see the hub on how to keep pipes from freezing.
Updated September 2026
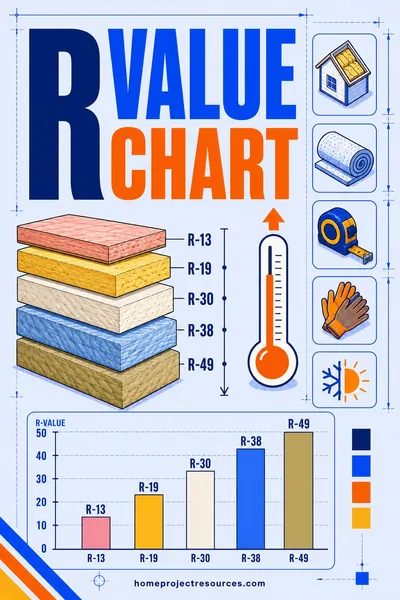
Wondering whether the wall behind that faucet is insulated at all? Run our free insulation calculator to see what the cavity should carry in your climate zone, because a bare stud bay behind a hose bib is why some spigots freeze even when they're covered.
Why outdoor faucets burst, and where the break actually is
An outdoor faucet is a valve on the end of a pipe that pokes through your wall. On a mild fall night, the water in that last foot of pipe cools to outdoor temperature and freezes. Ice expands, and the pressure between the ice plug and the closed valve has to go somewhere. It goes into the pipe wall, and the pipe splits.
The nasty part is that you won't see it. The split is usually a couple of inches behind the wall, inside the rim joist or the stud cavity. Nothing leaks while the ice is holding it shut. Then a warm day arrives, the ice melts, and the next time someone turns on the hose, water pours into the wall instead of out of the spout. Many people discover this in April when a ceiling stain shows up in the basement below the faucet.
Two facts drive everything else on this page:
- A hose left attached traps water in the faucet. Even a frost-free faucet can't drain if the hose is holding water against the spout. A screwed-on hose is the number one cause of split frost-free sillcocks.
- A standard (non frost-free) faucet keeps water in the exposed pipe all winter unless you shut it off from inside and drain it. A cover alone slows freezing but doesn't stop it.
Which kind of outdoor faucet do you have?
Look at the faucet and how it sits in the wall. It's almost always one of three.
| Type | How to recognize it | What winterizing needs |
|---|---|---|
| Standard hose bib (compression faucet) | Short body, the handle sits right on the spout, valve is at the outside face of the wall | Interior shutoff, drain, cover. Full four-step process |
| Frost-free sillcock | Long body, handle on a stem, the faucet extends 4 to 24 inches into the house, often with a small vacuum breaker cap on top of the spout | Remove the hose. Cover is optional insurance. Interior shutoff only if it exists and you want belt and suspenders |
| Yard hydrant (freestanding post in the yard) | Steel pipe standing up out of the ground with a lever handle | Nothing beyond removing the hose, if it was installed below frost depth with working drain-back |
If you're not sure, feel for the length of the body. A frost-free faucet has a stem that runs the length of the body, and when you close it, you can feel the valve seat far inside the wall. A standard faucet closes right at the handle.
Frost-free sillcocks come in fixed lengths, commonly 4, 6, 8, 10, 12, and 14 inches, and the right length puts the valve seat inside the heated envelope of the house. Get this wrong (an 8-inch faucet through a 10-inch wall) and the valve sits in cold space and the faucet isn't frost-free at all.
Step by step: how to winterize outdoor faucets
Do this the week nighttime lows first dip below freezing. In most of the northern United States that's October. Further south, do it before the first forecast frost, and keep the hoses off all winter.
Step 1: Disconnect every hose, splitter, timer, and nozzle
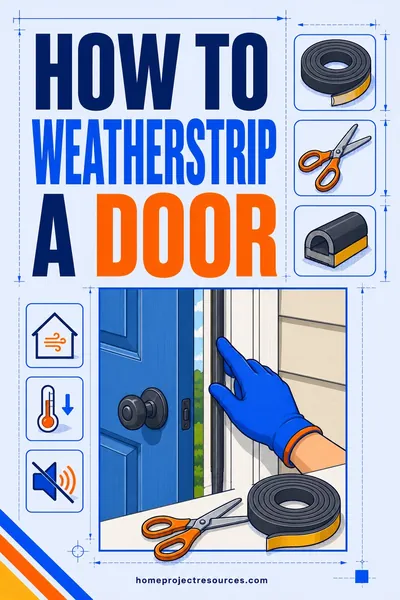
Unscrew the hose. Then unscrew anything else that's on the faucet: a Y-splitter, a timer, a quick-connect fitting, a backflow device you added. All of them can hold water against the spout and defeat the drain. Drain the hoses by walking them out straight, then coil and store them somewhere they won't freeze solid with water inside.
If the hose is stuck, don't force it with pliers against the faucet body, which can crack the fitting. Grip the faucet body with one wrench and the hose coupling with another so the torque goes into the coupling, not the pipe in the wall.
Step 2: Close the interior shutoff valve
Go inside and find the valve on the pipe that feeds the outdoor faucet. It's usually within a few feet of the faucet on the inside of the same wall: in the basement ceiling, the crawl space, the garage, or under a sink near an exterior wall. It'll be a small ball valve (lever handle, quarter turn) or a gate valve (round handle, several turns).
Close it. Ball valve: turn the lever perpendicular to the pipe. Gate valve: turn clockwise until it stops, then don't force it further.
Many of these shutoffs have a bleeder cap, a small brass cap on the side of the valve body. That's for the next step.
If there's no interior shutoff, you can still drain a standard faucet by covering it and hoping, but the real fix is to have one installed. It's a short job for a plumber and the only way to properly winterize a standard hose bib.
Step 3: Drain the faucet
Go back outside and open the outdoor faucet all the way. Water runs out, then trickles, then stops. Leave it open.
Now go inside and, holding a cup under the shutoff valve, unscrew the bleeder cap a few turns. Air enters from the open faucet outside, and the last of the water in the pipe between the shutoff and the spout drains into your cup. Tighten the cap back on when it stops. If the valve has no bleeder, the open faucet drains most of the line on its own, since the pipe usually slopes toward the outside.
Leave the outdoor faucet open all winter. If any water gets back into that pipe and freezes, an open valve gives it somewhere to expand.
Step 4: Cover the faucet
Slip an insulated cover over the spout. Two kinds work:
- Foam dome covers are a rigid foam shell with a rubber gasket around the rim and a hook or drawstring that catches behind the spout. Tighten the strap so the gasket seals against the siding.
- Soft insulated pouches are a quilted fabric bag with a drawstring. Same idea, easier over odd shapes like a faucet with a vacuum breaker or one that sits on brick.
The cover traps a pocket of still air around the metal and lets a little heat from the wall reach the faucet. It's not a heater, so on a standard faucet it's the last step, not a substitute for the first three. On a frost-free faucet it's extra insurance against a hard freeze finding the vacuum breaker.
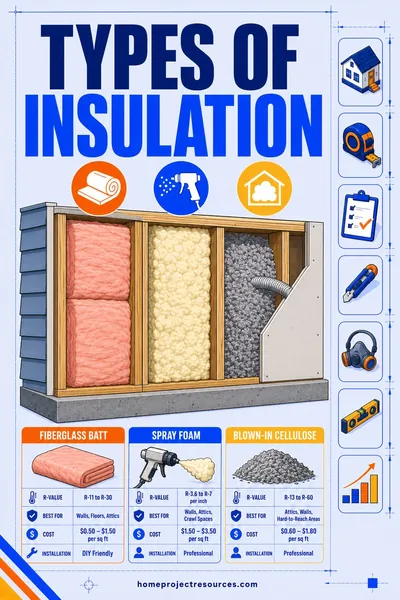
If a faucet sits on a wall with no insulation behind it, the cover does less. See the types of insulation guide for what to put in that bay if you ever open it.
Frost-free sillcocks: how they work and how they fail
A frost-free sillcock moves the valve seat deep into the house. When you close the handle, the water stops well inside the heated wall, and the length of pipe sticking outside drains itself through the open spout because the whole body is pitched slightly downhill toward the outside.
That design fails in four common ways:
- A hose left attached. The spout can't drain, water sits in the body, freezes, and splits the pipe just behind the valve. This is the overwhelming cause of frost-free faucet failures.
- Installed level or pitched inward. Water can't drain to the spout. The installer bored the hole flat, or the faucet was shimmed wrong. You'll see standing water drip for a long time after closing, or none at all.
- Too short for the wall. The valve seat ends up in the cold zone. Common in walls that were furred out, insulated, or resided after the faucet went in.
- A failed vacuum breaker. The little cap on top of the spout (more on it below) can hold water if its internal seal sticks. Some hold enough to freeze and crack the cap.
You test a frost-free faucet in the fall by closing it, removing the hose, and watching. It should drip for a few seconds and then stop completely. If it keeps dripping for a minute or more, it's not draining and needs a look. If it drips forever, the valve seat washer is worn and it'll leak all winter.
The vacuum breaker, and why it sometimes drips
Most outdoor faucets sold in the last couple of decades have a small cap or bulge on top of the spout. That's an anti-siphon vacuum breaker. Its job is to stop garden hose water (which could be sitting in a bucket of fertilizer or a kiddie pool) from being sucked backward into your drinking water if the supply pressure drops. Plumbing codes require it on hose connections, and if your faucet doesn't have one built in, a screw-on version belongs on the spout.
For winter, two things matter:
- It can spit a little water when you first open the faucet or when the hose is removed. That's it venting, and it's normal.
- It can hold water. After the faucet drains, tap the cap lightly or press the little relief hole on the underside (on styles that have one) to let trapped water out. Then cover the whole spout, cap included.
Screw-on vacuum breakers have a small set screw that locks them onto the faucet threads so they can't be removed easily. If yours is the screw-on style and you want to take it off for winter, loosen that set screw first. Many have a drain hole and can stay on.
Worked example: a 1990s colonial with three outdoor faucets
Take a two-story house with three spigots: one on the front by the garage, one on the back deck, and one on the side wall by the air conditioner.
Front faucet. Standard compression hose bib, screwed to a 2x4 wall over an unfinished basement. Interior shutoff with a bleeder cap is on the basement ceiling 30 inches inside the wall. Process: hose off, shutoff closed, faucet opened outside, bleeder cracked into a cup (about 4 ounces of water came out, which is the water that would have frozen), bleeder retightened, foam dome cover strapped on. Total time, seven minutes.
Back deck faucet. A 10-inch frost-free sillcock through a 2x6 wall with rigid foam and siding, roughly 8.5 inches total wall thickness, so the valve seat sits about 1.5 inches inside the drywall. Good. It has a built-in vacuum breaker. Process: pull the hose and the timer, close the handle, watch it drip for about ten seconds and stop, tap the breaker cap, put on a soft pouch cover because the breaker makes the dome a poor fit. There's no interior shutoff on this line, and one isn't needed. Three minutes.
Side faucet by the AC. Also a frost-free sillcock, but this one keeps dripping after it's closed and the hose is off, for well over a minute, then stops with a puddle still visible in the spout. That's a faucet that isn't pitched right. It was added after the house was resided, and the installer set it level. For this winter: close the interior shutoff on that line (there is one in the crawl space), open the faucet outside, and cover it. Next spring, have the faucet reset with a slight downward pitch, or replace it with a 12-inch model so the seat lands further inside.
Three faucets, under twenty minutes, and the only one that needs money spent is the one that was installed wrong.
What about faucets you can't shut off from inside?
Older houses, slab foundations, and some additions have hose bibs teed straight off a line with no interior valve. Your options, in order of how well they work:
- Add a shutoff. A plumber can cut in a ball valve with a bleeder in an accessible spot. This is the permanent answer.
- Replace the faucet with a frost-free sillcock. If there's access to the wall from inside or the faucet is on a rim joist, swapping a standard bib for a frost-free one moves the valve seat inside for good. Match the length to the wall thickness plus about an inch.
- Cover and hope. A foam cover over a standard faucet with water still in it slows freezing and may get you through a mild winter in a mild climate. It will not get you through a week in the teens.
A slab house in the South with a standard hose bib is the classic "cover and hope" situation, and it's usually fine because the freezes are short. The same setup in the Upper Midwest needs one of the first two fixes.
Reconnecting in spring
Don't just screw the hose back on. Do it in this order:
- Take the cover off and close the outdoor faucet.
- Go inside, make sure the bleeder cap is tight, and open the shutoff valve slowly.
- Go back outside and listen. If you hear water running inside the wall, close the shutoff immediately. That's a split pipe.
- Open the outdoor faucet and let it run for a few seconds to clear the line.
- Check inside again at the faucet's wall penetration for any dampness after a few minutes of running.
If the faucet was split by ice, that first slow reopening is the moment you'll find out, and the slow open plus a listen keeps the damage to a cup of water instead of a flooded room.
Fall timing by region
Timing follows your first freeze, and the safe rule is to winterize a week before the first frost date rather than the day after. Frost dates are published by the National Weather Service and by state extension offices. Roughly:
| Region | Typical first freeze | Winterize by |
|---|---|---|
| Northern Plains, Upper Midwest, New England, mountain West | Late September to early October | Mid to late September |
| Mid-Atlantic, lower Midwest, Pacific Northwest inland | Mid to late October | Early October |
| Southeast interior, Texas, Southwest high desert | November | Late October |
| Gulf Coast, Florida, coastal California | December or only occasional freezes | Before any forecast freeze, then keep hoses off |
This belongs on the fall page of your home maintenance checklist with the gutter cleaning and the furnace filter.
Frequently asked questions
Should I leave the outdoor faucet open or closed in winter?
Open, after you've shut off the interior valve and drained it. An open faucet lets any remaining water expand into air instead of into the pipe wall. If you have a frost-free sillcock with no interior shutoff, close the handle normally, because the valve is inside the house and the exposed body drains itself.
Do frost-free faucets need to be covered?
Not strictly, if they're installed right and the hose is off. A cover is cheap insurance against the vacuum breaker holding water in a hard freeze, and against a faucet that's slightly under-length for the wall. Most plumbers cover them anyway.
Can I just cover my outdoor faucet and skip the shutoff?
On a standard hose bib in a cold climate, no. The cover slows heat loss but the water in the pipe is still there and still freezes when the cold lasts. The cover works as the final step after the faucet is drained, or as a standalone measure only where freezes are brief.
How do I know if my outdoor faucet froze and cracked?
You often won't until spring. Signs: the faucet dribbles or has no pressure when first opened, you hear water running behind the wall, or you find a damp spot or stain inside near the faucet. Open the interior shutoff slowly in spring and listen before you screw a hose on.
What if my hose is frozen onto the faucet?
Wait for a warmer afternoon or pour warm (not boiling) water over the coupling. Then hold the faucet body with one wrench and turn the coupling with another. Never lean on the faucet itself, because the pipe behind it is the part that breaks.
Is a yard hydrant winterized the same way?
No. A properly installed yard hydrant has its valve at the bottom of the standpipe, below the frost line, and drains the standpipe into a gravel bed every time you close it. Remove the hose and it takes care of itself. If water stands in the pipe after closing, the drain port is blocked, and that's a repair rather than a winterizing step.
Does pipe insulation on the outdoor faucet do anything?
A little. Wrapping the exposed pipe with foam sleeve or fiberglass wrap slows heat loss the same way a cover does. It's most useful on the few inches of pipe between the wall and the faucet body where a dome cover doesn't reach, and on the inside of the wall where the line passes through a cold rim joist, which is covered in the pipes hub.