How to Keep Pipes From Freezing in Winter, Room by Room

The short answer for how to keep pipes from freezing is this: keep warm air touching the pipe, slow the heat that leaks out of it, and keep water moving through it on the coldest nights. Every trick you'll read about (open cabinet doors, dripping faucets, foam sleeves, heat cable) is just one of those three ideas applied to a specific spot in the house. The pipes that burst are almost always the ones running through unheated space: crawl spaces, garages, exterior walls, attics, and the cabinet under a kitchen sink on an outside wall.
This page is the hub. It walks the house room by room, covers pipe insulation and heat cable properly, and finishes with how to thaw a pipe without turning a nuisance into a flood. Outdoor spigots are their own animal, and they get their own page: how to winterize outdoor faucets.
Updated September 2026
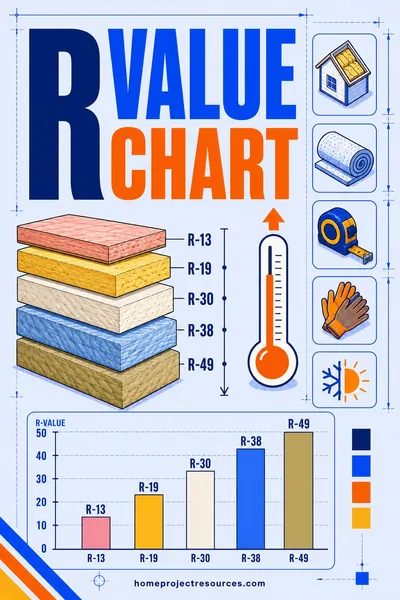
Not sure whether the wall or floor around a pipe run has any insulation worth the name? Run our free insulation calculator to see what R-value the cavity should carry for your climate zone before you decide whether a foam sleeve alone will do.
Why pipes burst (and why it's not where you think)
Water expands by roughly nine percent when it turns to ice. That alone doesn't usually split a pipe. What splits a pipe is the pressure that builds up between the ice plug and a closed faucet downstream. The ice grows, the trapped water between the plug and the tap has nowhere to go, and the pressure climbs until the weakest fitting lets go.
That's why the break is often a few feet away from the ice, and why you frequently don't find out until the thaw. The ice was holding back the water. Once it melts, everything behind it comes through the crack.
It also explains the single most useful habit on this page: an open faucet relieves that pressure. Even if a pipe freezes solid, water that can escape through a dripping tap can't build enough pressure to burst the line.
Which pipes freeze first
Pipes freeze in a predictable order. Work through this list and you'll have covered the risk before the first hard freeze.
| Location | Why it freezes | Risk level | First fix |
|---|---|---|---|
| Crawl space or under-house runs | No heat, often vented to outside air | Highest | Seal vents in winter, insulate every pipe, heat cable on the worst runs |
| Pipes in exterior walls (kitchen and bathroom sinks) | Sit between the siding and a thin layer of insulation | High | Open cabinet doors, insulate the cavity if ever opened |
| Unheated garage | Water heater or laundry lines share space with a big door | High | Keep the door shut, insulate lines, add a low-wattage heater on cold nights |
| Attic runs | Heat rises but the attic is outside the insulated envelope | High | Bury pipes under the attic insulation, never above it |
| Unfinished basement near rim joist | Cold air leaks in at the sill plate | Medium | Air seal the rim joist, foam sleeves on lines near the wall |
| Mobile home underbelly | Thin floor, wind under the unit | Highest | Skirting, belly insulation, heat cable on the riser |
| Interior walls, heated rooms | Surrounded by warm air | Low | Nothing needed unless the room is closed off |
Copper freezes and bursts. So does PVC and CPVC, and CPVC gets brittle in cold. PEX tolerates freezing better because it stretches, but the brass and plastic fittings at each end do not, so treat PEX runs with the same care.
What temperature do pipes freeze at?
Water freezes at 32°F, but a pipe doesn't hit 32°F the moment the air outside does. It depends on how long the cold lasts, how much wind hits the wall, how much insulation sits between the pipe and outside, and whether water is moving.
A widely used rule of thumb, originally from research at the University of Illinois Building Research Council, is that uninsulated pipes in unconditioned spaces in the southern United States become a real risk around 20°F. In northern houses built for cold, pipes are usually routed through heated space and it takes a longer, deeper freeze or a failed furnace to cause trouble. Your own house has its own threshold. The night you first hear a faucet sputter is your number.
Wind matters more than most people expect. A crawl space vent facing the prevailing wind turns a mild cold snap into a pipe-freezing night, because moving air strips heat off a pipe far faster than still air.
Room by room: how to keep pipes from freezing where it matters
Here's the walk-through, starting with the rooms that cause the most calls to plumbers.
Kitchen and bathroom sinks on exterior walls
Open the cabinet doors under the sink when the forecast drops below freezing. That's it, and it works. The cabinet is a little cold box on an outside wall, and warm room air can't reach the supply lines until you open it up.
Two extra moves help on the coldest nights. Pull any cleaning supplies out so air circulates, and set a small fan on the floor pointed into the cabinet. Moving warm air beats still warm air.
If you ever open that wall for a remodel, move the supply lines to the interior side of the cavity and put the insulation between the pipe and the siding, never between the pipe and the room.
Laundry rooms and utility closets
Washer supply lines and the drain standpipe often run through an exterior wall or a garage wall. Leave the door to the laundry room open in cold weather so it shares heat with the rest of the house. If the washer sits in an unheated garage, shut off its supply valves and disconnect the hoses for the winter, or insulate the lines and run a thermostat-controlled space heater set to the low 40s°F.
Basements
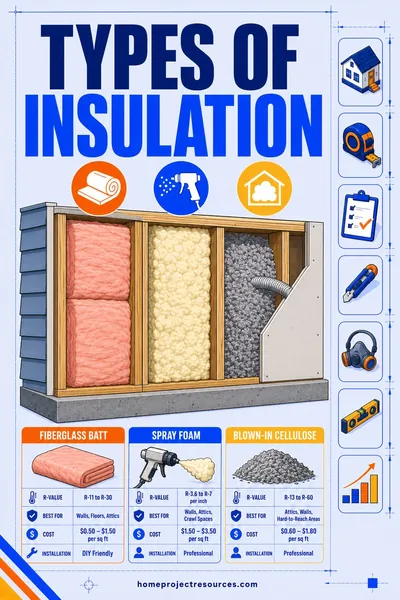
Basements are usually fine except along the rim joist, where the floor framing rests on the foundation wall. Cold air pours in at that joint and any pipe running within a foot or two of it is at risk. Air seal the gaps with caulk or canned foam, cut rigid foam board to fit each joist bay, and slip foam sleeves on the nearby lines. Our types of insulation guide covers which rigid board to use there.
Attics
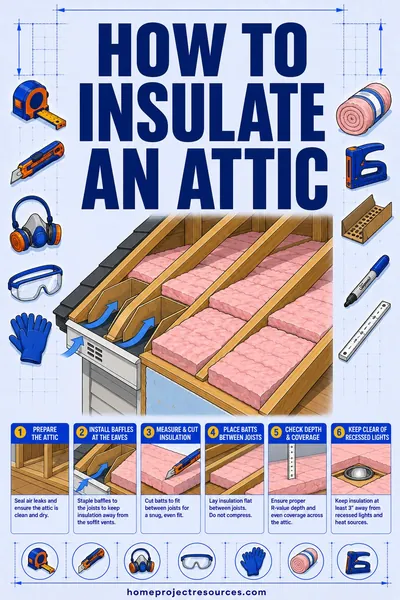
Never let a pipe sit on top of attic insulation. The insulation is doing its job, which means the air above it is nearly as cold as outside. Lift the insulation, lay the pipe on the drywall side, and cover it back over so the pipe stays on the warm side of the blanket. If a run has to cross above the insulation, wrap it in fiberglass pipe wrap and add heat cable. The how to insulate an attic guide shows what a properly buried run looks like.
Garages
Keep the big door closed. A garage with the door down on a still day can hold a temperature 15 to 20 degrees above outside, which is often the difference. Insulate every water line and consider a thermostat-controlled electric heater near the water heater or any exposed plumbing. If the garage has a hose bib on an interior wall, that's still an outdoor faucet and belongs in the outdoor faucet guide.
Crawl spaces and under-house runs
This is where most burst pipes live. Foundation vents that are open in winter turn the crawl space into a wind tunnel. Close them with foam vent plugs or slide-in covers once nighttime lows hit freezing, and open them again in spring. Every water line under the house gets a foam sleeve, and the long runs near the vents or the perimeter get heat cable underneath the sleeve.
If you keep fighting frozen pipes down there, the permanent fix is to bring the crawl space inside the heated envelope: seal the vents for good, insulate the foundation walls, and cover the dirt with a vapor barrier. Our crawl space encapsulation page explains what that involves.
Mobile and manufactured homes
Mobile homes freeze from below. The water enters through a single riser under the floor, and that riser plus the first few feet of line are the classic failure point. Three things fix it: keep the skirting intact with no gaps, keep the belly wrap (the fabric under the floor insulation) sealed, and run a listed heat cable on the riser and any exposed line under the home, wired to a GFCI outlet. Most manufactured-home heat cables are sold in short fixed lengths for exactly this job.
The drip rule, done right
Dripping a faucet is the cheapest insurance you have, and most people do it wrong by running the wrong tap.
- Which faucet: the one farthest from where the water enters the house, so water moves through the longest run of pipe. If a specific line freezes every year, drip that one too.
- Which handle: both. Open a single-handle faucet to the middle so hot and cold both move. Hot lines freeze too, and they freeze faster in a poorly insulated wall because the water sat still and warm, then cooled.
- How much: a steady drip to a thin, unbroken trickle, about the width of a pencil lead. You don't need a stream.
- When: any night the forecast drops into the low 20s°F or below, or any time the furnace is out. Start it before bed, not after you notice a problem.
A dripping faucet also does the pressure-relief job described above. If the line does freeze somewhere upstream, the open tap keeps the pressure from building to the burst point.
Pipe insulation for winter: what to buy and how to size it
Pipe insulation doesn't heat a pipe. It slows the rate the pipe loses heat. That distinction matters: an insulated pipe in a 0°F crawl space will still freeze eventually, just hours later than a bare one. Insulation buys time and works with the drip rule and with whatever residual heat the space holds. On the coldest runs it's the wrapper over the heat cable, not the whole answer.
| Type | Fits | Wall thickness | Best for |
|---|---|---|---|
| Polyethylene foam sleeve, slit | 1/2 in, 3/4 in, 1 in pipe | 3/8 in or 1/2 in | The default for copper and PEX in basements, crawl spaces, garages |
| Rubber (elastomeric) foam sleeve | 1/2 in to 2 in | 1/2 in to 1 in | Better cold tolerance, stays flexible, good under heat cable |
| Fiberglass pipe wrap with foil or vinyl jacket | Any size, spiral-wrapped | Roughly 1 in when wrapped | Odd sizes, fittings, valves, attic runs |
| Foam fitting covers | Elbows and tees | Matches sleeve | The corners a straight sleeve leaves bare |
How to size it: measure the outside diameter of the pipe, not the nominal size. Half-inch copper measures about 5/8 inch outside. Half-inch PEX measures about 5/8 inch too. Three-quarter-inch copper is about 7/8 inch outside. Sleeves are labeled by the nominal pipe size they fit, so "1/2 inch copper" sleeve is the right label for either of those half-inch lines. Check the label for both the pipe size and material.
Thicker wall is better. A 1/2 inch wall sleeve slows heat loss noticeably more than a 3/8 inch wall. In a crawl space that sees real cold, buy the thicker one.
Installation rules that matter:
- Open the slit, push it onto the pipe, and press the seam shut. If the sleeve has a self-sealing adhesive strip, peel it and press. If not, tape the seam every 12 inches or so with the tape the manufacturer sells.
- Butt sections tightly and tape the joints. A one-inch gap of bare pipe is where it freezes.
- Cover the fittings. Cut a V-notch in the sleeve to bend around elbows, or use the molded elbow covers. Every valve, tee, and hose connection is a bare metal heat sink.
- Don't compress it. Cable-tying it tight squeezes the air out of the foam and cuts the R-value.
- Never wrap a pipe that already has constant-wattage heat cable unless the cable manufacturer says you can. See below.
Heat tape for pipes: which kind, and how not to start a fire
Heat cable (often called heat tape, though the flat tape style is mostly gone) is the one product on this list that adds heat rather than slowing loss. It's also the one that can start a fire if it's the wrong type, old, or installed carelessly. The Consumer Product Safety Commission has recalled and warned about heat tapes for decades, mostly older constant-wattage products, so buy new, buy listed, and read the sheet in the box.
There are two families, and the difference matters:
| Constant-wattage cable | Self-regulating cable | |
|---|---|---|
| How it works | Draws the same power along its whole length whenever plugged in | Conductive core draws more current where it's cold, less where it's warm |
| Overlap | Never. Crossing it over itself creates a hot spot | Generally allowed by most manufacturers |
| Insulation over it | Only if the label permits, and only the type it names | Usually fine with foam or fiberglass over it |
| Cut to length | No, fixed lengths only | Yes, sold by the foot with a termination kit |
| Thermostat | Built-in plug thermostat, usually turns on in the upper 30s°F | Self-limiting, though a plug thermostat still saves electricity |
| Typical use | Short fixed runs, mobile home risers | Long crawl space or attic runs, anything you'll insulate over |
Installation rules from the manufacturer sheets, which all say the same thing:
- Plug it into a GFCI-protected outlet. If there isn't one nearby, that's a job for an electrician, and our electrical safety basics page explains why the GFCI isn't optional.
- Run it straight along the pipe, on the underside, held every foot or so with the tape the manufacturer specifies (usually a fiberglass or aluminum tape, not duct tape or electrical tape, which lets go when cold).
- Keep the plug and thermostat sensor where the label says. The sensor needs to sit against the pipe on the cold end.
- Don't run it through a wall, a floor, or inside a sleeve it wasn't rated for. Don't cover the thermostat.
- Inspect it every fall. Cracked jacket, discolored spots, or a stiff cable means replace it.
- Unplug it in spring unless it's self-regulating with a thermostat. Constant-wattage cable running all summer is a wasted load and a fire risk on a hot pipe.
Wattage runs about 5 to 7 watts per foot for most residential cable, and a single circuit can carry a lot of cable, but add up the total watts before you daisy-chain anything and stay under the circuit's rating.
Worked example: a crawl space run in a 1,600 square foot ranch
Say you have a single-story ranch in climate zone 5 with a vented crawl space. The water service enters at the northwest corner and runs 38 feet of 3/4 inch copper along the north foundation wall, then branches to 1/2 inch lines: 14 feet to the kitchen (exterior wall, north side), 22 feet to the hall bath, and 9 feet to the laundry. Two crawl space vents sit on the north wall. The kitchen sink line froze last January.
Here's the plan and the count:
- Vents. Two foam vent plugs, sized to the 8 x 16 inch vent openings.
- Main run. 38 feet of 3/4 inch copper needs 38 feet of sleeve. Sleeves come in 6-foot sticks, so 7 sticks of 3/4 inch, 1/2 inch wall (42 feet, leaving spares for the fittings).
- Branches. 14 + 22 + 9 = 45 feet of 1/2 inch line. That's 8 sticks of 1/2 inch sleeve, 1/2 inch wall.
- Fittings. Count the elbows and tees on the north wall run: 6 elbows and 3 tees. Buy 6 elbow covers and 3 tee covers, or notch and tape the sleeve.
- Heat cable. The north main run and the 14-foot kitchen branch are the cold side. 38 + 14 = 52 feet. Buy 60 feet of self-regulating cable with a termination kit and a plug thermostat, and land it on the GFCI outlet the previous owner installed for the sump pump. At roughly 6 watts per foot that's about 360 watts on the circuit, fine on its own.
- Sequence. Cable first, taped to the underside of the pipe, then sleeves over the cable, then fitting covers, then tape every joint. Thermostat sensor on the kitchen branch, which is the line that froze.
Two afternoons of work, most of it on your back with a headlamp. Then the drip rule on the kitchen faucet for any night forecast below 15°F, since that line has a history.
When the power goes out
An outage in a cold snap is the worst case, because the furnace, the heat cable, and the thermostat-controlled garage heater all stop at once. Your job shifts to slowing heat loss and keeping water moving: drip every faucet on an exterior wall, open every sink cabinet, and shut the door on any room without plumbing so the rooms with pipes keep the heat. If the outage looks long and the house is dropping toward the 40s°F, shut off the main and drain the system. The full playbook, including what to do when the power comes back, is in how to prepare for a power outage in winter.
Leaving the house in winter
If you'll be away more than a day or two, don't turn the heat off. Set the thermostat no lower than 55°F, open the sink cabinets, and ask a neighbor to check that the furnace is still running. For a long absence in a cold climate, the safer move is to shut off the main water valve, open the faucets to drain the lines, flush the toilets, and pour a little nontoxic antifreeze (the RV kind, not automotive) into traps and toilet bowls so the standing water in them doesn't freeze and crack the porcelain.
How to thaw frozen pipes safely
You turn on a faucet and get a trickle or nothing. Here's the order.
- Leave that faucet open. As the ice melts, water and steam need an exit, and running water helps melt the rest of the plug.
- Find the frozen section. Follow the line from the dead faucet back toward the meter. Look for frost on the outside of the pipe, a section that's noticeably colder to the touch, or a slight bulge. It's almost always in one of the spots in the table above.
- Warm it, starting at the faucet end and working toward the ice. Warming the middle of a plug first traps water between two ice sections and can burst the pipe. A hair dryer on high, a heat gun on its low setting held moving, a heating pad wrapped around the pipe, or towels soaked in hot water all work. A portable space heater aimed at a cabinet works for lines you can't reach.
- Never use an open flame. No propane torch, no heat gun on high against a wall, no kerosene heater in a crawl space. Torches on copper have burned down houses, and the water inside can flash to steam and split the pipe.
- Keep going until full pressure returns, then check the whole run for drips. A pipe that froze may have cracked. Keep the water off that line and call a plumber if you find wet insulation or a hiss.
- If you can't find or reach the frozen section, shut off the main so a hidden crack doesn't flood the house when it thaws, and call a plumber. They have pipe-thawing equipment for exactly this.
Know where your main shutoff is before you need it. In most houses it's where the water line enters, near the meter or the pressure tank, on the street side of the house. Turn it clockwise to close.
The fall checklist
Print this and do it the weekend after the first frost:
- [ ] Close and plug crawl space vents
- [ ] Sleeve every water line in the crawl space, garage, and basement rim joist area
- [ ] Bury attic runs under the insulation, or wrap and cable them
- [ ] Inspect and test last year's heat cable, replace anything cracked
- [ ] Find and tag the main shutoff valve
- [ ] Winterize outdoor faucets (separate guide)
- [ ] Seal gaps where pipes pass through exterior walls, using caulk or canned foam
- [ ] Set a reminder to open sink cabinets and start the drip when lows hit the low 20s°F
It's a good addition to the fall section of our home maintenance checklist.
Frequently asked questions
At what temperature should I start dripping faucets?
Most guidance says start when the forecast low hits about 20°F, and sooner if you've had a pipe freeze before or your pipes run through a vented crawl space. There's no harm in starting early. The water you use is trivial compared to a burst line.
Should I drip hot or cold water?
Both. Open a single-handle faucet to the middle position, or open both handles on a two-handle faucet to a thin trickle. Hot supply lines freeze too, and in a poorly insulated wall they can freeze first.
Does pipe insulation keep pipes from freezing?
On its own, only for a while. Insulation slows the heat loss, so an insulated pipe stays above freezing hours longer than a bare one, and in a space that holds some heat, that's often enough. In a truly cold, windy crawl space or a long outage, insulation needs a heat source (moving water, a heat cable, or warm air) to finish the job.
Can I leave heat tape plugged in all winter?
Self-regulating cable with a plug thermostat, yes, that's how it's meant to run. Constant-wattage cable should only run when it's cold enough to need it, and it must never be overlapped or covered with insulation the label doesn't allow. Inspect any cable every fall and replace it if the jacket is cracked or discolored.
How long does it take pipes to freeze?
It depends on the pipe's exposure, insulation, and the wind, so there's no single number. Uninsulated pipe in a space that drops into the teens can freeze within a few hours. A well-sleeved pipe in a basement that's holding 40°F might never freeze in the same weather. The variable that matters most is how long the cold lasts, which is why a three-day cold snap causes more bursts than a single cold night.
Do pipes freeze in interior walls?
Rarely, as long as the house is heated. The exceptions are walls that back onto an unheated garage or an addition that was never insulated properly, and rooms you've closed off and let go cold. If a line in an interior wall freezes, look for a cold air leak into that cavity, often from an attic above or a crawl space below.
Will PEX pipes burst if they freeze?
PEX is more forgiving because the tubing stretches as ice forms, and it often survives a freeze that would split copper. The fittings don't stretch, though, and repeated freezing weakens the tubing. Protect PEX the same way you'd protect copper.