Ice Dams on the Roof: Causes, Damage and Prevention

Ice dams on the roof form when heat leaking out of your house melts the snow on the upper roof, the meltwater runs down to the cold overhang past the exterior wall, and it refreezes into a ridge of ice. That ridge then traps everything melting behind it, and once the trapped pool gets deeper than the overlap between shingle courses, water travels sideways under the shingles and into the ceiling. The permanent fix is not chipping ice off the edge every February. It is air sealing and insulating the attic floor so the roof deck stays close to outdoor temperature.
That is the whole mechanism in three sentences. Everything below is how to confirm it on your house, what the damage looks like before it soaks through the drywall, and the order to fix things in.
Updated September 2026
Start with the attic, because that is where the cause lives. Our free insulation calculator turns your attic square footage and current insulation depth into the R-value you have now and the inches you still need to hit your climate zone target. That gap number is the single best predictor of whether you will get dams again next winter.
What causes ice dams on the roof
An ice dam needs three things at the same time. Take away any one and the dam cannot form.
| Ingredient | What it means at your house | How to remove it |
|---|---|---|
| Snow on the roof | Usually 3 inches or more, enough to insulate the roof deck and hold meltwater | You cannot control snowfall, but you can rake the lower 3 to 4 feet |
| A warm roof deck over the heated space | Attic air above about 32F warms the sheathing from underneath | Air seal the attic floor, add insulation, ventilate the attic |
| A cold roof edge | The overhang past the exterior wall has no heated space below it, so it stays at outdoor temperature | You cannot fix this, and you should not try to |
Notice that only the middle row is under your control. People spend whole winters attacking the snow and the ice, which are the two ingredients they cannot change, and skip the one they can.
The cold edge is not a defect either. The overhang hangs out in the weather by design. The problem is never that the eave is too cold, it is that the field of the roof is too warm.
How warm is too warm?
Snow starts melting against the deck once the sheathing gets above roughly 32F. In practice, a house with a well sealed attic runs within a few degrees of outdoor temperature up there. A leaky one can run 15 to 25 degrees warmer, which is more than enough to melt snow on a 20F day.
The telltale sign is snow that melts off your roof much faster than off your neighbor's, or bare patches over parts of the roof while the rest stays white. Those bare stripes almost always sit directly over a heat leak.
The heat leaks that build the dam, ranked
Attic heat loss is mostly air movement, not conduction through the insulation. Warm indoor air is buoyant, finds a hole, and rides up into the attic carrying its heat with it. Insulation alone does not stop that, because fiberglass filters air rather than blocking it.
| Leak | Why it matters | Typical fix |
|---|---|---|
| Attic hatch or pull-down stairs | Often the single biggest hole in the ceiling plane, and rarely weatherstripped | Foam board box, gasket, and a latch that pulls it tight |
| Recessed can lights | Older non-IC cans are vented on purpose, so each one is a chimney | Swap to airtight IC-rated LED retrofits |
| Top plates of interior walls | A continuous gap along every wall where drywall meets framing | Canned foam along the plate seam |
| Plumbing and wiring penetrations | Small holes, but there are dozens and they run warm | Fire-rated caulk or canned foam at each hole |
| Bath fan and range hood ducts | Warm wet air dumped into the attic instead of outdoors | Duct to a roof or gable cap, insulate the duct, damper it |
| Chimney and flue chases | Big open shafts, and they need noncombustible sealing | Sheet metal collar plus high-temperature sealant |
| Ductwork in the attic | Supply leaks blow conditioned air straight into the attic | Mastic the joints, then bury or insulate the runs |
| Compressed or missing insulation | The straightforward conduction path, worst above bathrooms and closets | Top up to zone target after sealing |
Do these in order. Sealing before insulating matters, because once you blow 12 inches of cellulose over the ceiling you can no longer find the holes, and nobody wants to dig them back out.
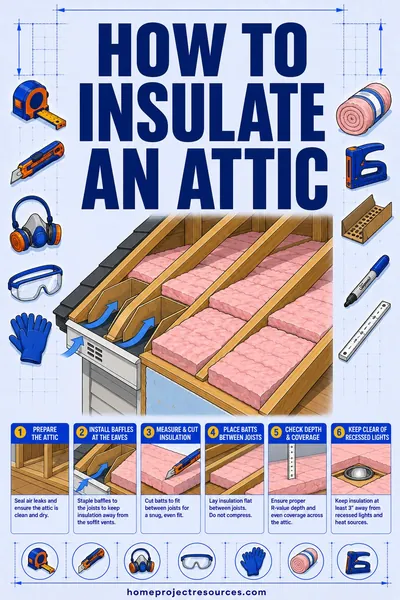
Our guide to how to insulate an attic walks the sealing pass in detail, including the parts that are easy to skip.
What ice dam damage actually looks like
Damage rarely announces itself as a dramatic leak. It shows up as small, slow, easy to misread symptoms first.
Weeks 1 and 2 of a dam. Icicles hanging off the gutter line, and a visible ridge of gray ice sitting on the shingles above the gutter. No interior sign yet.
Once water backs up. A damp corner where the ceiling meets an exterior wall, usually the first place to show. Paint that looks slightly glossy or blistered. A faint tide line that dries and comes back after each thaw.
Later. A brown ring on the ceiling, wet insulation over that spot, and a musty smell in a closet on an exterior wall. If you see a stain forming, our article on a water stain on the ceiling covers how to read the shape and the color to tell an ice dam from a plumbing leak.
The expensive versions. Rotted roof sheathing at the eave. Gutters torn loose by the weight of the ice. Wet cavity insulation inside the exterior wall, which loses most of its R-value while it is wet and stays wet for weeks. Mold on the back of the drywall. Peeling exterior paint below the eave, which happens when moisture drives out through the siding.
Snow and ice are heavy, and that matters for gutters. Packed ice weighs about 57 pounds per cubic foot. A block of ice 6 inches deep and 6 inches wide running 20 feet along a gutter is 5 cubic feet, which is roughly 285 pounds hanging on hangers designed for a fraction of that.
Emergency moves when a dam is already there
You want the trapped water to drain, and you want it done without wrecking the roof. Here is the order.
- Rake the lower roof. A roof rake with a long handle, used from the ground, pulls the snow off the bottom 3 to 4 feet. No snow means no new meltwater arriving at the dam. This is the single most useful thing you can do from a lawn.
- Cut a channel, do not remove the dam. A vertical channel through the ice every few feet lets the pool behind it drain. You are relieving pressure, not clearing the eave.
- Use calcium chloride, not rock salt. Fill a leg of old pantyhose or a fabric tube sock with calcium chloride, lay it across the dam so it crosses the ice perpendicular to the eave, and let it melt its own channel. Sodium chloride (rock salt) corrodes metal flashing and gutters and is harder on plants below.
- Catch the drip inside. If the ceiling is bulging, put a bucket under it and poke a small hole at the low point of the bulge with a screwdriver. Controlled draining beats a collapsed ceiling.
- Turn down the attic heat source if you can find it. Closing off an attic hatch, shutting a leaky attic door, or fixing a bath fan dumping into the attic all help within hours.
- Call a steamer for a bad one. Professional crews use low pressure steam that melts ice without cutting into shingles. It is the only removal method that is genuinely safe for the roof.
What never to do
- Never chip with an ax, hatchet, or metal shovel. You will hit the shingles. Roof repairs in January are miserable and temporary.
- Never use a pressure washer. Cold water at high pressure drives under the shingles and strips granules.
- Never run a torch or open flame at the eave. Roofs catch fire this way every winter.
- Never dump rock salt straight onto a shingle roof. It stains, it corrodes flashing, and it kills whatever is planted below the drip line.
- Never climb an icy roof. Snow over ice on a slope is exactly as bad as it sounds.
The permanent fix, in the right order
Ice dams are a building performance problem with a well established sequence. Do them in this order and each step makes the next one cheaper.
Step 1: air seal the attic floor. Every hole listed in the table above. Plan on a full day with canned foam, fire-rated caulk, a sheet of rigid foam for the hatch, and a headlamp. This is the step that fixes dams, and it is the step most often skipped.
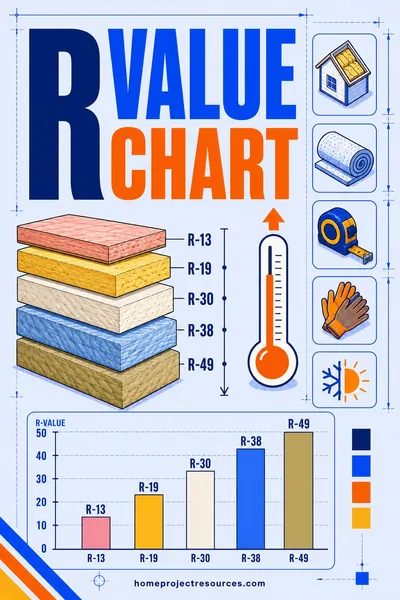
Step 2: bring insulation to zone target. After sealing, add depth. The Department of Energy attic targets are R-30 to R-49 in the far south, R-49 to R-60 across most of the country, and R-60 for zones 4 through 7 where ice dams actually happen. Our R-value insulation chart lists per-inch values for every common material.
Step 3: make sure the attic breathes. Cold air moving under the deck carries away whatever heat still gets up there. Balanced intake at the soffit and exhaust at the ridge is the goal.
Step 4: protect the eave for the leaks you cannot prevent. Ice and water shield membrane under the shingles at the eave is the backup layer. Code in cold regions generally wants it running from the edge to at least 24 inches inside the warm wall line, measured up the slope.
Step 5: only then consider heat cable. Cable is a drainage aid, not a cure. If you want one, our guide to a roof snow melt system covers cable types, coverage rules, and how the length is calculated.
Worked example: a 1,400 square foot attic in zone 6
Here is the full arithmetic for a house in Wisconsin with dams over the front eave.
The measurements. Attic floor is 35 feet by 40 feet, so 35 x 40 = 1,400 square feet. Existing insulation is old fiberglass batt measuring 6 inches deep, matted down between 2x8 joists. Twelve recessed cans in the ceiling below, one pull-down stair, one bath fan venting into the attic space.
Step 1, what you have. Fiberglass batt runs about R-3.2 per inch, and settled batt performs closer to R-3.0. So 6 x 3.0 = R-18, and that number is optimistic, because it ignores the air leaking straight past it.
Step 2, the target. Zone 6 attic recommendation is R-60. The gap is 60 - 18 = R-42 to add.
Step 3, the air sealing list. Twelve cans to swap for airtight LED retrofits, one attic hatch to box and gasket, one bath duct to run out through a roof cap with insulated flex, plus roughly 160 linear feet of interior top plate to foam. Call it one long weekend of work.
Step 4, depth of new insulation. Blown cellulose delivers about R-3.5 per inch. 42 / 3.5 = 12 inches. Cellulose settles 10 to 20 percent, so blow to 13 to 14 inches to land at R-42 after settling. Total depth in the attic ends up around 19 to 20 inches including the old batt.
Step 5, coverage volume. 1,400 sq ft at 13 inches of new material is 1,400 x (13 / 12) = 1,517 cubic feet of installed cellulose. Bag coverage is printed on the label as square feet per bag at a given depth, so divide your 1,400 sq ft by the bag's coverage at R-42.
Step 6, ventilation to match. The standard ratio is 1 square foot of net free vent area per 300 square feet of attic floor when it is balanced half low and half high. 1,400 / 300 = 4.67 sq ft, or 672 square inches total. Split evenly, that is 336 square inches at the soffit and 336 at the ridge. A typical 16 inch soffit vent panel provides around 26 square inches of net free area, so about 13 panels along the eaves.
Step 7, keep the intake open. Install rafter baffles in every bay before blowing, or the new cellulose buries the soffit vents and you lose the intake you just calculated.
The predicted result: attic air within a few degrees of outdoor temperature, snow that sits on the roof all winter instead of melting in stripes, and no ridge of ice at the gutter.
Ventilation math, because half of ice dam jobs get this wrong
Attic ventilation is a balance problem, not a total problem. Exhaust without intake pulls its makeup air from the house through the ceiling, which makes heat loss worse, not better.
| Attic floor area | Total net free area at 1:300 | Soffit intake | Ridge exhaust |
|---|---|---|---|
| 800 sq ft | 2.67 sq ft (384 sq in) | 192 sq in | 192 sq in |
| 1,000 sq ft | 3.33 sq ft (480 sq in) | 240 sq in | 240 sq in |
| 1,200 sq ft | 4.00 sq ft (576 sq in) | 288 sq in | 288 sq in |
| 1,400 sq ft | 4.67 sq ft (672 sq in) | 336 sq in | 336 sq in |
| 1,600 sq ft | 5.33 sq ft (768 sq in) | 384 sq in | 384 sq in |
| 2,000 sq ft | 6.67 sq ft (960 sq in) | 480 sq in | 480 sq in |
Two rules that go with the table. First, use net free area, which is the printed open area of the vent after the screen and louvers, not the size of the hole in the sheathing. Second, if you cannot balance it, bias slightly toward more intake than exhaust. An attic with more exhaust than intake depressurizes and pulls conditioned air up through every ceiling gap.
Ridge vents and soffit vents work as a pair. Mixing a ridge vent with powered gable fans usually short circuits the airflow, so the fan pulls from the ridge instead of from the eaves and the far corners of the attic never see fresh air.
Roof and gutter details that help at the margins
None of these prevent a dam on their own, but they change how much damage one does.
- Ice and water shield at the eave. Self-adhering membrane that seals around nail shanks. Run it up the slope past the interior warm wall line. It does not stop the dam, it stops the dam from getting into the house.
- Metal drip edge. Gives water a clean break away from the fascia rather than wicking back behind the gutter.
- Clean gutters going into winter. A gutter packed with leaves freezes solid early and becomes the seed of the dam. Fall cleaning matters more in cold climates than anywhere else, and our guide to how to clean gutters covers doing it safely.
- Downspout extensions that actually drain. Water pooling at the base freezes, the ice climbs the downspout, and the whole drainage path backs up.
- Standing seam metal roofing over the eave. Snow slides instead of sitting. It is a roof replacement decision, not a retrofit, but worth knowing when the roof is due anyway.
- Skylights and valleys deserve extra attention. Both concentrate meltwater, and both are common leak points once a dam forms upslope.
Once a season, walk your roof inspection checklist before the first snow. The best time to find a lifted shingle at the eave is October, not the middle of a thaw.
A season by season plan
Late summer. Get in the attic on a cool morning and look for daylight, dirty insulation (a sign air is filtering through it), and rusty nail tips (a sign of condensation). Photograph anything odd.
Early fall. Air seal. This is the messy work and it is far more pleasant in September than in January. Then top up insulation and install rafter baffles.
Mid fall. Clean the gutters and downspouts, check that the bath fans and range hood terminate outdoors, and confirm the soffit vents are not painted shut or stuffed with insulation.
First real snow. Watch the roof. Even melt across the whole surface is good news. Bare patches or early icicles tell you exactly which part of the ceiling is still leaking heat.
Deep winter. Rake the lower 3 to 4 feet after big storms. Watch the inside corners of exterior walls for damp spots.
Spring. Look for granule loss in the gutter, lifted shingles at the eave, and any stain that appeared over the winter. Fix while the weather is agreeable.
Frequently asked questions
Do icicles always mean I have ice dams on the roof?
Not always, but they are the warning light. A few small icicles hanging off a gutter after a sunny day can come from snow melting in direct sun, which is normal. Thick icicles that keep growing through cold cloudy days, or icicles paired with a visible ridge of ice sitting on the shingles above the gutter, mean meltwater is being generated by house heat and is refreezing at the edge.
Will heat cable fix my ice dam problem?
It manages the symptom. Cable keeps a drainage channel open through the ice so trapped water can escape, and that genuinely prevents interior leaks. It does not stop the ice from forming, it adds an electric load every winter, and a cable that stops short of the warm wall line or drains into a frozen downspout does very little. Air sealing first, cable second, and only if the attic work cannot fully solve it.
Can I just add more insulation and skip the air sealing?
You can, and it will help less than you expect. Most attic heat loss in a leaky house is air moving through holes, not conduction through the insulation. Blowing cellulose over unsealed can lights and an ungasketed hatch buries the problem instead of solving it, and it makes future sealing much harder because you can no longer see the ceiling plane.
How do I know if the leak is an ice dam or a plumbing problem?
Timing is the giveaway. Ice dam leaks show up during a thaw or a sunny day after snow, they appear near the outside wall rather than in the middle of the room, and they stop when the weather turns cold again. Plumbing leaks do not care about the forecast and usually sit under a bathroom or a kitchen. Water traveling along a joist can move a long way from its source, so trace up, not just down.
Is a cold attic supposed to be that cold?
Yes. A properly built vented attic in winter should be within a few degrees of the outdoor temperature, and frost on the underside of the sheathing after a very cold night is not automatically a failure if it dries out. What you do not want is an attic that feels comfortable. Comfort up there means the heat that should be in your living room is going out through your roof.
Does removing the snow from my whole roof prevent dams?
Raking the lower 3 to 4 feet is worth doing, and clearing the whole roof is neither necessary nor safe. Snow on the upper roof is only a problem because the deck under it is warm. Once you have fixed the heat loss, snow can sit up there all season doing nothing but insulating your house for free.
My gutters got pulled loose by ice. Do gutter guards help?
Not with ice. Guards keep leaves out, which is useful going into winter, but ice forms above, below, and through most guard designs. What helps is a clean gutter, secure hidden hangers spaced closer together in snow country, and fixing the heat loss so there is less meltwater to freeze in the first place.
Should I get an ice and water shield membrane if I am reroofing?
Yes, in any climate that gets ice dams, and most cold climate codes require it. Ask the roofer to run it from the roof edge to at least 24 inches inside the exterior wall line measured up the slope, and further on low slopes and in valleys. It costs very little as part of a reroof and it is the difference between a dam that damages a gutter and one that damages a ceiling.