How to Insulate Windows for Winter: Film, Shades, Panels

The whole trick to how to insulate windows for winter is adding one more layer over the glass with a pocket of still air trapped behind it. That is it. Shrink film, a cellular shade in side tracks, lined curtains hung to seal at the edges, an interior storm panel, even bubble wrap on a basement sash all do the same physical job: they put a second surface between you and the cold pane, and they stop room air from circulating against that pane and carrying your heat away.
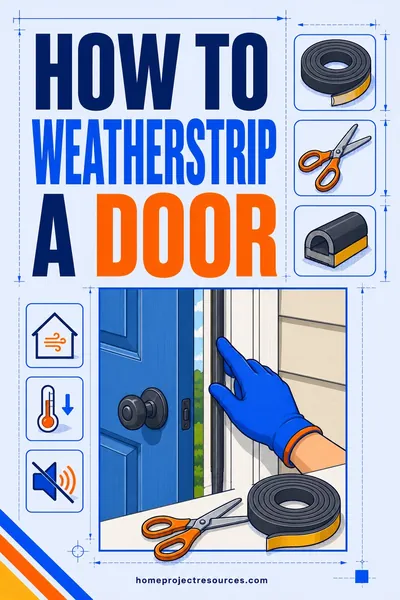
This page is about that layer. It is not about sealing. If air is actually moving through your window, a layer over the glass will hide the problem instead of fixing it, and you will still feel cold at the ankles in February. Sealing comes first, and it has its own page: how to fix drafty windows covers the smoke test, the frame perimeter, and the sash. Come back here once the smoke sits still.
Updated September 2026
Wondering where the window layer sits in the bigger picture? Run our free insulation calculator to see what your attic and walls should carry for your climate zone, because glass is usually the coldest surface in the house but rarely the biggest total loss.
Air movement or cold glass? Answer this before you buy anything
Two completely different problems both feel like a draft, and they take opposite fixes.
Moving air comes through a gap: the sash channel, the meeting rail, the shim space behind the casing. You can feel it on the back of a wet hand, and a lit incense stick held near the sash will bend and run. Adding film over a leaky window traps that moving air behind the plastic, where it still gets into the room around the tape and now condenses where you cannot wipe it. Go fix the gap first with the drafty windows guide, then film it.
Cold glass is a surface problem with no hole involved. A single pane in January sits within a few degrees of outdoor temperature. Your body radiates heat straight to it, and the room air touching it cools, gets heavy, and slides down the glass and across the floor. That is the convection loop, and it is why a sealed, locked, perfectly weatherstripped old window can still make a room miserable. Nothing you caulk will change it. A layer over the glass will.
Most older windows have both problems. The order is what saves you money and effort: seal, then layer. A layer installed over a sealed window performs the way the package claims. A layer installed over a leaky one does not.
R-value and U-factor in plain terms
Two numbers describe the same thing from opposite directions, and window products use one while insulation products use the other.
R-value measures resistance to heat flow. Higher is better. Attic insulation, wall batts, and foam board are all sold by R-value.
U-factor measures the rate of heat flow through an assembly. Lower is better. Windows are rated this way, and the number on the label covers the whole unit (glass, spacer, and frame), not just the glass in the middle.
They are roughly reciprocal. A U-factor of 0.50 is about R-2. A U-factor of 0.30 is about R-3.3. You do not need the math, only the direction: on a window label, small numbers are good.
Here is why the window layer is worth the Saturday. Plain single pane glass performs at roughly R-1. A standard clear double pane is about R-2. A modern low-e unit with argon fill gets to roughly R-3. Adding one more layer with a trapped air gap adds close to another R-1, and the gain from R-1 to R-2 is enormous in percentage terms, because you are cutting heat loss through that glass close to in half. The same R-1 added to an R-40 attic would be invisible. Layers pay the most where the assembly is worst, and single pane glass is the worst assembly in most houses.
The trapped air is the part people skip. Air itself is an excellent insulator as long as it cannot circulate. A gap of about half an inch to three quarters of an inch between the film and the glass is close to ideal. Much wider than an inch and the air inside the gap starts its own convection loop, which gives back some of what you gained. That is why a film kit taped to the casing (which sits an inch or so off the glass) works about as well as a panel mounted much closer, and why a curtain hanging loose six inches off the window works far less well than either.
How to insulate windows for winter: the five options compared
| Layer | Roughly what it adds | Season or permanent | Can you still open the window | Best for |
|---|---|---|---|---|
| Shrink film kit | About R-1 over the glass | One season, then discard | No, it seals the window shut | Bedrooms and spare rooms you never open in winter |
| Cellular shade with side tracks | About R-1 to R-2 depending on cell count | Year round, raise any time | Yes, raise the shade | Rooms you use daily and want to keep operable |
| Lined thermal curtains sealed at the edges | Less than R-1 unless the perimeter is closed | Year round | Yes | Large windows and sliders, plus light and privacy control |
| Interior storm panel | About R-1, closer to R-1.5 with low-e acrylic | Installed for the season, stored in summer | No while installed, but it lifts out in seconds | Historic windows you do not want to replace |
| Bubble wrap on the glass | About R-1 | One season | No | Garages, basements, sheds, and windows you do not look through |
The right answer for most houses is not one of these. It is a mix: film the rooms nobody opens, tracked cellular shades in the rooms you live in, and interior panels on the two or three windows that are both beautiful and terrible.
Shrink film kits, installed without a single wrinkle
A film kit is double sided tape, a folded sheet of clear plastic, and a hair dryer. Done badly it looks like a grocery bag taped to your wall. Done well it disappears, and visitors will not notice it until they touch it.
Prep decides the result
Tape sticks to a clean, dry, cured surface above roughly 50°F. Wipe the casing with denatured or rubbing alcohol, not a household spray, because most sprays leave a film that the adhesive cannot bite through. Paint needs to be fully cured, which means weeks after a repaint, not days. On bare or chalky old wood, the tape will pull the finish off on removal, so test a short piece in a corner first.
Run the tape on the flat face of the casing (the trim around the window), not on the sash and not on the jamb. Two reasons: the casing gives you a wider air gap, and it gives the tape a flat surface with no hardware in the way. Press the tape down along its whole length with your thumb and leave the paper backing on for now.
The install, in order
- Tape the full perimeter first. Butt the corners rather than overlapping them, so the film sits flat.
- Cut the film about two inches oversize on every side. You are going to trim it later, and film pulled tight during install is the single biggest cause of a permanent crease.
- Peel the backing off the top run of tape only. Set the top edge of the film, working from the center outward to the two top corners. Do not stretch it.
- Peel the two side runs. Attach the sides top to bottom, still working center out, keeping the film deliberately slack. It should sag noticeably. Slack is what shrinks out.
- Peel the bottom run and set the bottom edge last.
- Now heat. A hair dryer on medium, held about four to six inches off the film, moving constantly. Start at the four corners, which shrink slowest, then work inward in long passes.
- Trim the excess with a sharp blade held against the outer edge of the tape.
Two failure modes are worth naming. Holding the dryer still burns a hole through the film in about two seconds, and there is no repair that looks good, so keep the head moving. And overheating near the tape softens the adhesive and lets the whole edge release, usually at three in the morning with a pop that wakes the house. If an edge lifts, let everything cool, press it back, and heat that area more gently.
Taking it off in spring
Warm the tape with the hair dryer, then pull it back on itself at a low angle rather than straight out. Slow is the whole technique. Any adhesive left behind comes off with a citrus based remover and a plastic scraper. Never film the same casing two years running without cleaning off the old residue, because the new tape sticks to the residue and not to the trim.
Cellular shades: the side tracks are the product
A cellular shade (also called a honeycomb shade) is a folded fabric with hollow cells that trap air. On paper it is the most elegant answer, because it is a real insulating layer you can raise whenever you want the view back.
In practice, most cellular shades underperform their marketing badly, and the reason is always the same. Air spills around the edges. Room air slips into the gap at the sides, cools against the glass, drops, and pours out the bottom of the shade onto the floor. The fabric can be a triple cell miracle and the loop still runs.
Side tracks close that path. They are thin channels mounted to the jamb that the shade edges ride inside, so the cavity behind the shade is sealed on both sides. Manufacturer R-value claims for cellular shades are generally measured with tracks and a tight top valance. Buy them together or do not bother.
Two other choices matter. Double cell fabric holds more air than single cell and is the better winter choice. And an inside mount, fitted tight to the jamb, seals better than an outside mount hanging over the casing, as long as your window opening is square enough to take one. Measure the width at the top, middle, and bottom of the opening and order to the smallest of the three.
Thermal curtains: only as good as their edges
Heavy lined drapes can genuinely help, and they can also do nearly nothing, depending entirely on how the perimeter is handled.
A curtain hanging free in front of a window is an open chimney. Air enters at the top, falls down the cold glass, and exits at the floor, and it takes your heat with it. Sealing four edges turns that chimney into a still air pocket:
- Top: a cornice, a valance, or a rod mounted tight to the wall with the fabric brought right up to it.
- Sides: a return, meaning the fabric wraps back to the wall at each end rather than stopping in midair.
- Bottom: curtains that touch the floor or the sill, not ones that stop two inches short.
- Center: a generous overlap where the two panels meet, held closed with a magnet or a clip on the coldest nights.
Do that and lined drapes are a real layer. Skip the sides and you have a decoration.
One caution that surprises people. A well sealed curtain makes the glass behind it colder, because you have cut off the warm room air that was keeping it above freezing. On a humid night that is the recipe for water on the sill. Open the curtains during the day so the glass warms and dries, and read condensation on windows if you already fight moisture in that room.
Interior storm panels
An interior storm is a sheet of acrylic or glass in a light frame that sits in the window opening for the winter and lifts out in spring. The good ones seal against the interior casing with a magnetic strip or compressible foam, and they are the quietest, best looking answer for a historic window you want to keep.
They win on three counts. The air gap between panel and sash is large and completely still. Nothing touches the original sash, so no paint gets peeled and no putty gets disturbed. And they cut street noise noticeably, which is the same reason a decoupled second layer works in soundproofing a room.
Measuring is the whole job. Measure the opening width and height at three points each and use the smallest, then subtract the clearance the panel system specifies. Order one panel, fit it, and only then order the rest of the house, because old openings are rarely as square as they look.
One rule about moisture. An interior storm should be the tighter of the two layers so indoor humidity cannot reach the cold sash. If you also have an exterior storm window, leave its weep holes open so any moisture that does get in drains outward instead of soaking your sill.
Bubble wrap: legitimate, in the right rooms
Bubble wrap really does work, and the install takes about a minute per window. Cut a piece to the size of the glass, mist the glass with plain water from a spray bottle, and press the bubble side against the wet glass. Surface tension holds it all winter. In spring it peels off and goes in the recycling or back in a box for next year.
It costs you the view, which is why it belongs in a garage, a basement, an unheated stairwell, a workshop, a shed, or the small frosted bathroom window nobody looks through. It is a perfectly respectable fix in those places and a strange one in a living room.
Two notes. Large bubbles hold more air than small ones. And do not bubble wrap a window that is somebody's escape route from a sleeping room, for the same reason you never film one.
Condensation behind the film, and how to prevent it
This is the failure that turns a good project into rotted trim, so it deserves its own section.
When you add a layer, you raise the temperature of the surface facing the room, which is exactly what you wanted. But the original glass behind the layer gets colder, because less warm room air reaches it now. If humid indoor air can get into that gap, it condenses on the cold glass, runs down, and pools on a sash that has no way to dry.
Water behind film means one of three things:
- The tape seal is incomplete. A gap at a corner or a lifted section is enough. Room air is being pumped into the cavity every time the furnace runs.
- The window frame itself leaks. Moist air is arriving through the shim space or the sash channel rather than past the tape. That is a sealing job, and the fix is in the drafty windows guide, not here.
- Indoor humidity is too high for how cold that glass is. Very common in a tight house in a cold snap, and it shows up on the coldest window first.
Prevention is straightforward. Seal the perimeter of the window before you add any layer. Run the tape continuously with no gaps. Do not install film over a sill that is already wet or a sash with soft, punky wood, because you are sealing rot in with a plastic lid. And keep indoor relative humidity moderate through the coldest weeks by running bath and kitchen fans, since the same air that fogs a window is the air that soaks a wall cavity.
If you see a small amount of fog behind film that clears by midday, you are close to the line but stable. Water that pools and stays is a problem to open up and fix now, not in March.
Worked example: one house, four different answers
A 1,400 square foot house, eleven windows, two of them original single pane sash in the living room and the rest 1990s double pane vinyl.
Living room, two original single pane windows. These are the reason the room is unusable in January. The owners want to keep them and still open them in October. Answer: magnetic interior acrylic panels, installed in November, stored on edge in the basement each May. The perimeter had already been foamed and weatherstripped the previous fall.
Three bedrooms, double pane vinyl, never opened between Thanksgiving and April. Answer: shrink film. Cheapest in effort, invisible from three feet away, and it comes off in spring. One exception: the back bedroom's window is the only egress in that room, so it gets a tracked cellular shade instead. Nothing gets filmed shut in a room where somebody sleeps and there is no second way out.
Kitchen window over the sink. High humidity, opened for steam year round, and already prone to fogging. Answer: nothing over the glass. Improving the seal and running the range hood mattered more. A layer here would have trapped moisture against the sash.
Basement, three small sash. Answer: bubble wrap, done in ten minutes total, plus a rigid foam board cut to fit the one window in the unheated storage side that nobody needs light through.
The result was not a number off a label. It was the living room becoming a room the family used in winter, the furnace running longer and quieter cycles instead of short bursts, and the floor near the bedroom windows no longer being noticeably cold underfoot.
The safety rules that override every other choice
Never seal a bedroom egress window. Every sleeping room needs one window or door that opens directly to the outside. Film, bubble wrap, and screwed on panels all violate that on the only egress window in a room. Use a shade or a curtain there instead.
Keep fabric away from heat. A curtain that reaches the floor in front of a baseboard heater or a space heater is a fire, not an insulation strategy. Mount the rod so the drape clears the heater, or use a hard panel on that window.
Do not block a combustion air path or a dryer vent while you are covering things up, and do not cover an operable window that serves as makeup air for an appliance.
Watch the sash you are covering. Any house built before 1978 can have lead paint, and scraping tape residue off old trim disturbs it. The EPA lead safety guidance is the reference before you start scraping.
Frequently asked questions
Does window insulation film actually work, or is it a gimmick?
It works, and the mechanism is simple: the film traps a still air layer against the glass, which raises the room side surface temperature and stops the convection loop that dumps cold air on your floor. What it does not do is stop air leaking around the frame. It is a glass fix, not a sealing fix, so install it on a window you have already sealed.
Should the film go on the glass or on the trim?
On the trim. Taping to the casing gives you an air gap of roughly an inch, which is close to the ideal thickness for trapped air, and it gives the tape a flat surface with no locks or lifts in the way. Film pressed flat to the glass traps almost no air and does little.
How do I get the wrinkles out of window film?
Install it slack, then shrink it. Wrinkles happen because people pull the film tight while taping, which locks in a crease that heat cannot remove. Let it sag, then work a hair dryer on medium from the corners inward, keeping the head moving and four to six inches away.
Do thermal curtains really help in winter?
Only if the edges are closed. A curtain hanging free lets room air fall down the cold glass and spill out at the floor, which is most of the heat loss you were trying to stop. Add a valance or cornice at the top, a return to the wall at both sides, floor length hems, and a center overlap, and a lined drape becomes a real layer.
Why is there water behind my window film?
Humid room air is getting into the gap and condensing on the cold glass. Either the tape seal has a break in it, or air is arriving through the window frame itself rather than past the tape, or indoor humidity is simply too high for how cold that pane is. Seal the frame, run the tape continuously, and keep bath and kitchen fans running.
Can I insulate a window and still be able to open it?
Yes, with a cellular shade in side tracks, with lined drapes, or with an interior storm panel that lifts out. Shrink film and bubble wrap both seal the window shut for the season, so keep them out of any room where the window is the only escape route.
Is bubble wrap on windows a real fix or a joke?
A real fix, in the right place. It traps air just like film does and adds roughly the same R-value. It also destroys the view, so it belongs in garages, basements, sheds, workshops, and frosted bathroom windows, not in a living room.
I did all this and one room is still cold. What now?
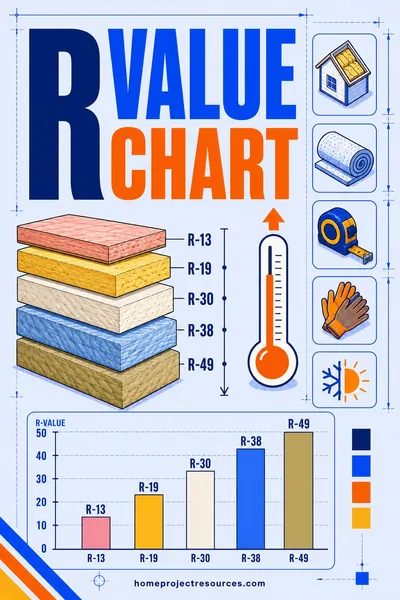
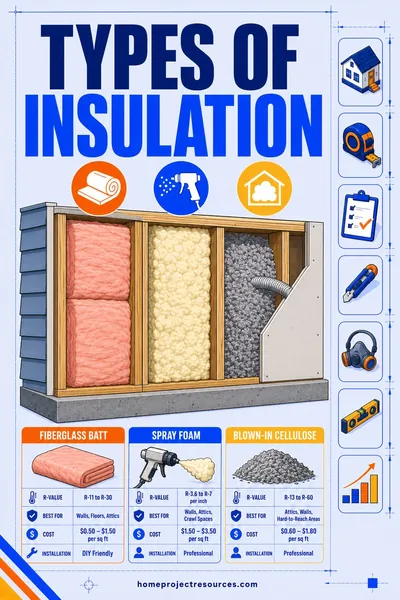
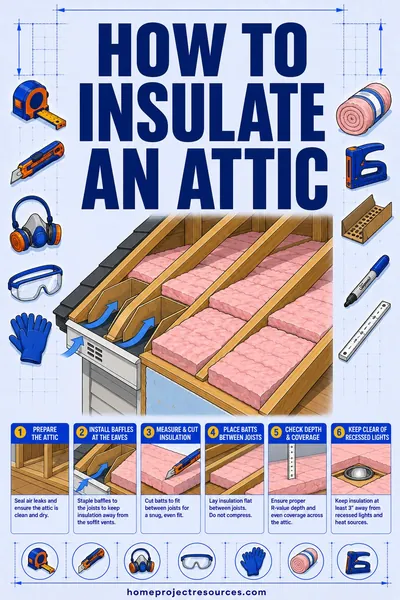
Windows are rarely the largest hole in a house. Check the ceiling plane above that room and the rim joist below it, since both usually leak more than every window combined. Our guides to insulating an attic and types of insulation cover what belongs where, and the R-value insulation chart puts glass in context next to walls and ceilings.
At what point is replacing the window the honest answer?
Rotted sash or sill, frames far out of square, or sashes painted shut in a bedroom where egress matters. Layering over a structural problem just hides it. Our guide to the cost to replace windows covers what actually drives a quote and how to compare bids on the same terms, and replacing the worst two while layering the rest is a perfectly sound plan.
The short version
Seal first, layer second. Confirm with an incense stick that the smoke sits still, and if it moves, fix the drafty window before you buy anything else. Then add one layer with about a half inch to an inch of trapped air behind it: film on the rooms you never open, a tracked cellular shade where you want the view back, sealed lined drapes on big windows, an interior panel on the old sash you love, and bubble wrap in the basement. Keep every egress window operable, keep fabric off heaters, and watch the first cold snap for water behind the layer. While the winter list is out, keeping pipes from freezing and preparing for a power outage in winter are the two jobs that pair with this one.